

- Nov 29, 2022
- 2,465
- 284
Sooner or later, anyone using this tool for promotion encounters Facebook Pixel. Many find this term complex and intimidating as it’s often associated with programming and code. However, Pixel is an essential tool that helps you effectively track and optimize ad campaigns. Today, we’ll explore what Pixel is, how it works, and how to work with it properly.
Why You Need Facebook Pixel
Facebook Pixel is a tool that gathers data on user actions on your website, landing page, pre-landing page, or app after they click on your ad. Pixel tracks actions such as:- Page views,
- Registrations,
- app installations,
- purchases,
- subscriptions, and more.
Key Objectives of Using Pixel:
- Tracking Conversions: Pixel helps you understand which ads lead to specific actions, such as purchases or registrations, by sending these events to Facebook.
- Ad Optimization: Based on the collected data, you can improve your ad campaigns and optimize them for your desired actions, showing ads to people more likely to take that action. For example, if someone visits your site through an ad, Pixel records what they do next: add a product to their cart or complete a purchase. This data is sent to Facebook, which creates a report on your ad’s effectiveness. Facebook also uses this data to improve targeting by analyzing user behavior.
Once you install Pixel on your website, it tracks user actions in real time.
Where to Find and Create Facebook Pixel
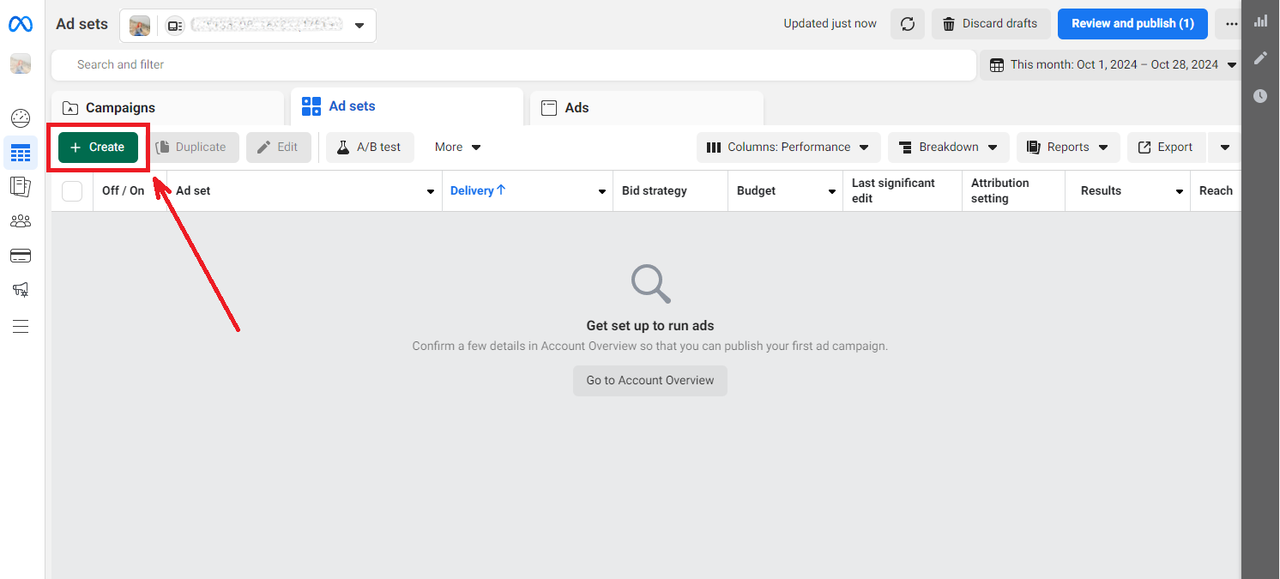
If you’re working from a personal Ads Manager account on Facebook, the easiest way to get your Pixel code or ID is to go into Ads Manager and then:- Click on Create Campaign.
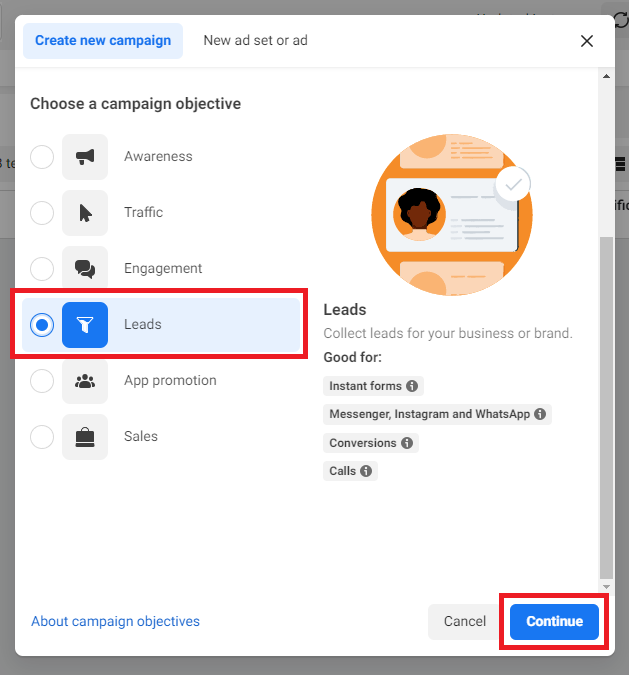
- Select the objective Leads.
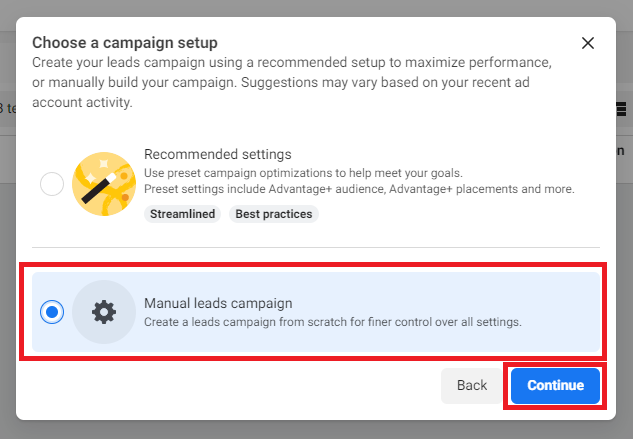
- Then select Manual leads campaign.
- Choose Website, and you’ll see the option to Create Pixel.
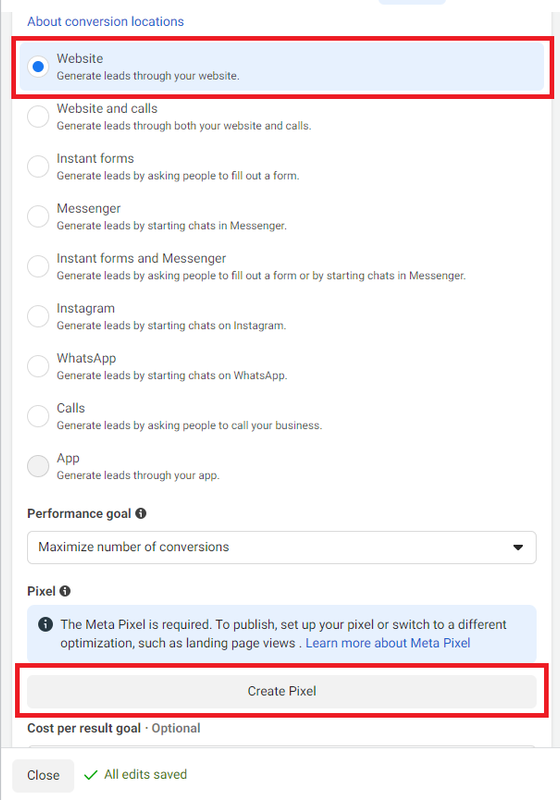
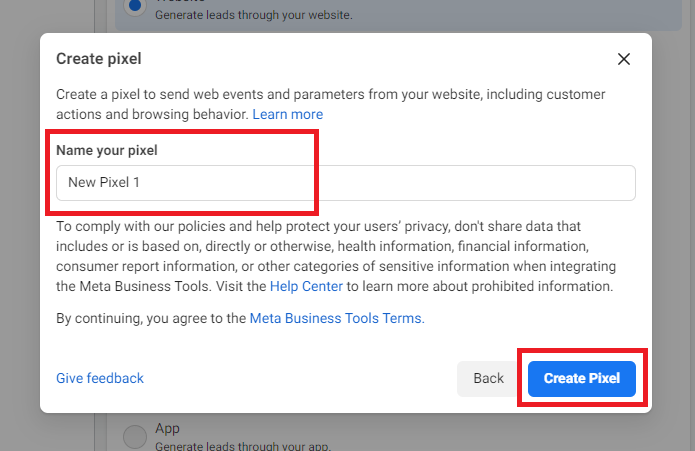
- Come up with a name for your Pixel and click Create Pixel.
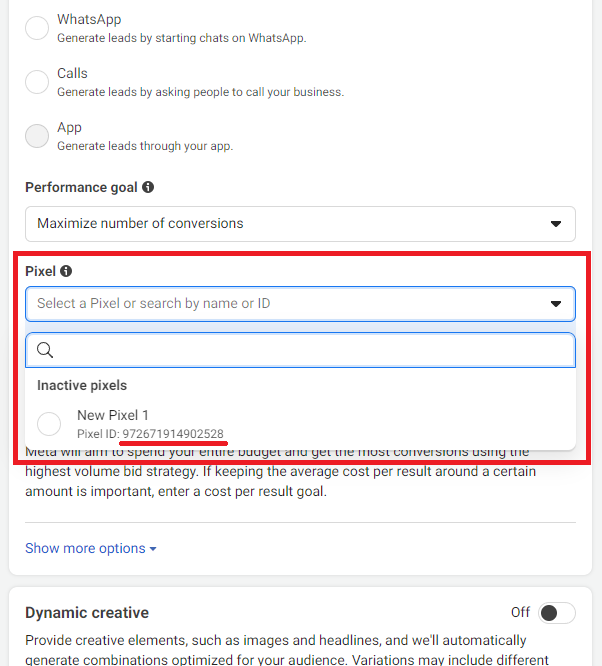
- Close the window, and now when you select Pixel, you’ll see its ID, which you can copy and use.
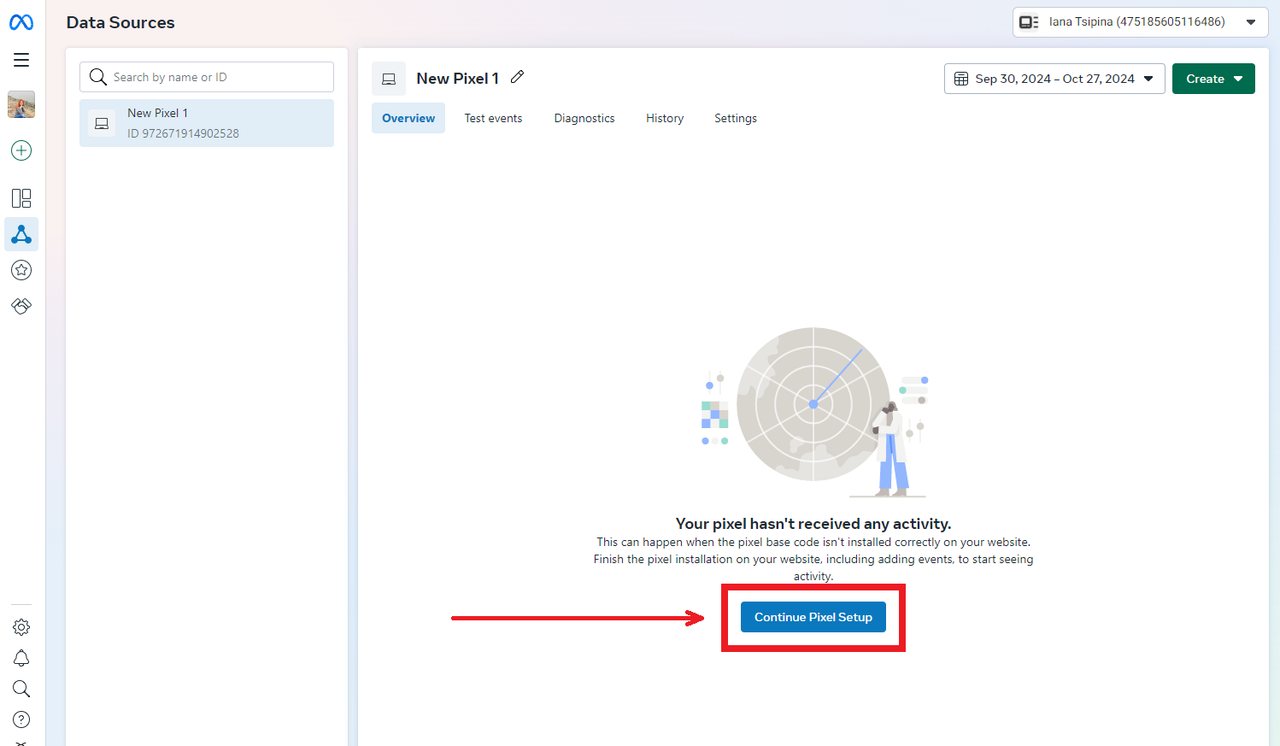
If you need the Pixel code to insert, go to Event Manager:
- Find the Pixel and go to its settings.
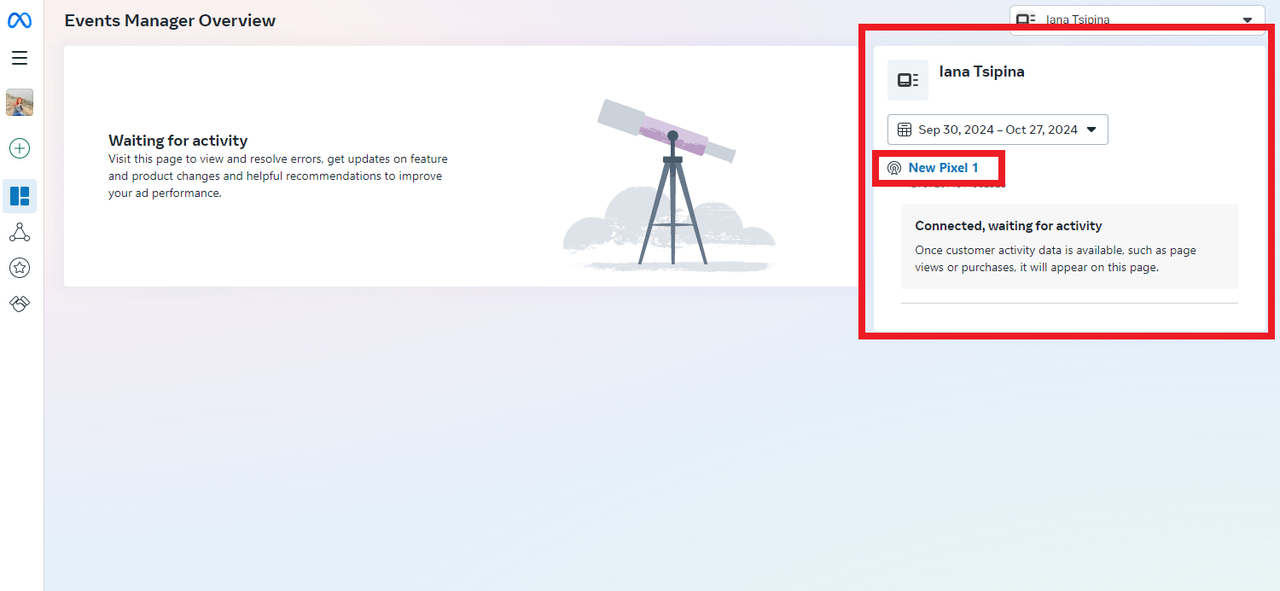
- Select Continue Pixel Setup.
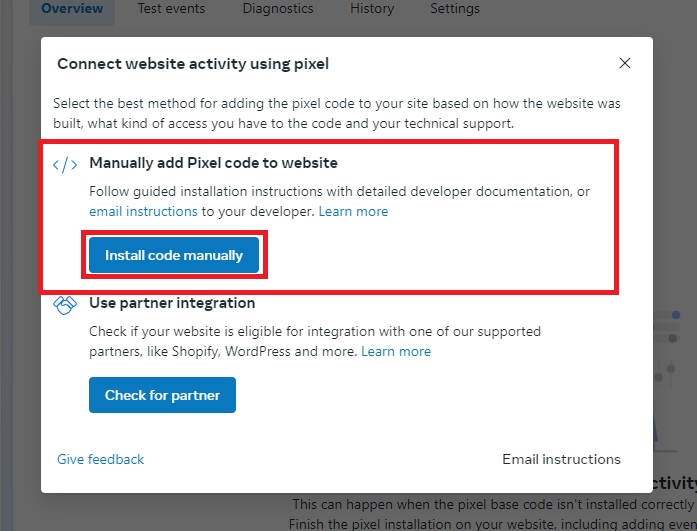
- Choose Install Code Manually.
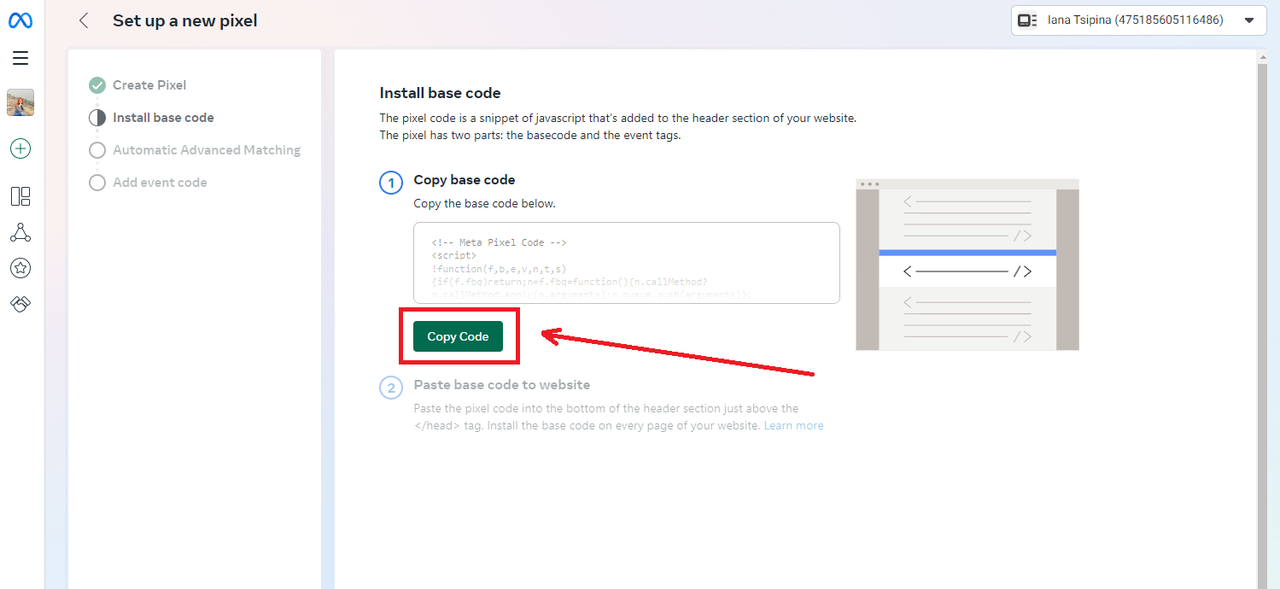
- Then copy the code for future use.
Where to Find Pixel in Business Manager
To find or create a Pixel in Business Manager, go to Data Sources, then to the Data Sets tab.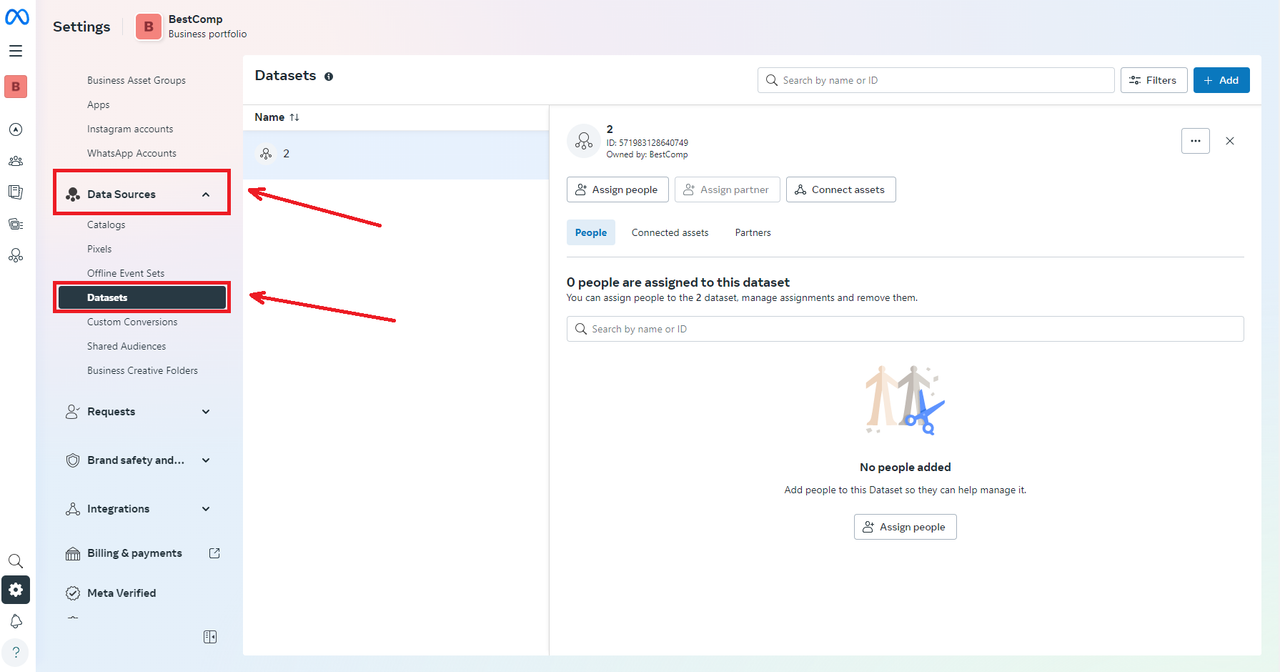
All Pixels – both those you created and shared Pixels from partners – will be found in this tab.
Here you can assign people, partners, and connect assets, as well as further customize the Pixel for your goals.
Setting Up Events for Facebook Pixel
When setting up Pixel, you have the option to select events to track. Events are actions users take on your site:- Complete Registration
- Contact
- Find location
- Lead
- Search
- Start trial
- Submit application
- Subscribe
- View content, and other actions.
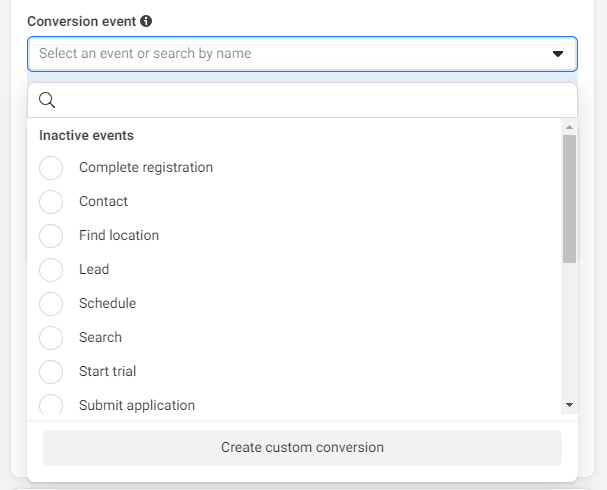
These data points help Facebook optimize your ad campaigns. In the personal Ads Manager, you can choose standard events when setting up a campaign.Facebook offers default standard events, and they can be selected after creating a Pixel. Additionally, Facebook has a Standard Events Overview section that includes a list of events with descriptions and codes. This can be helpful when working with Facebook Pixel.
Custom Conversions
If standard events don’t cover your needs, you can create custom conversions for unique objectives. For example, if you have a specific action like viewing a particular section of a website or clicking a specific button, you can create this conversion and use it as a campaign optimization goal.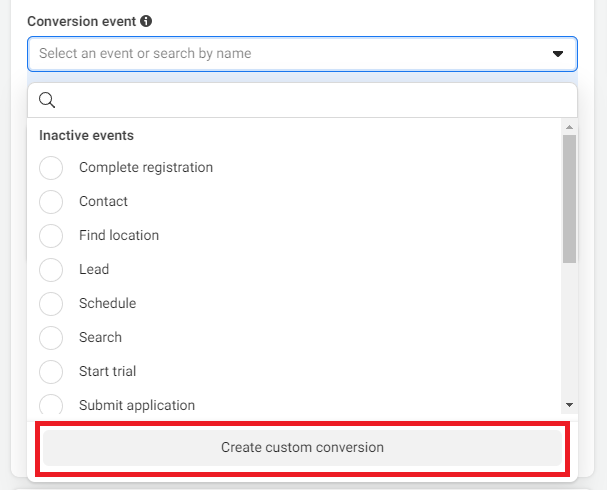
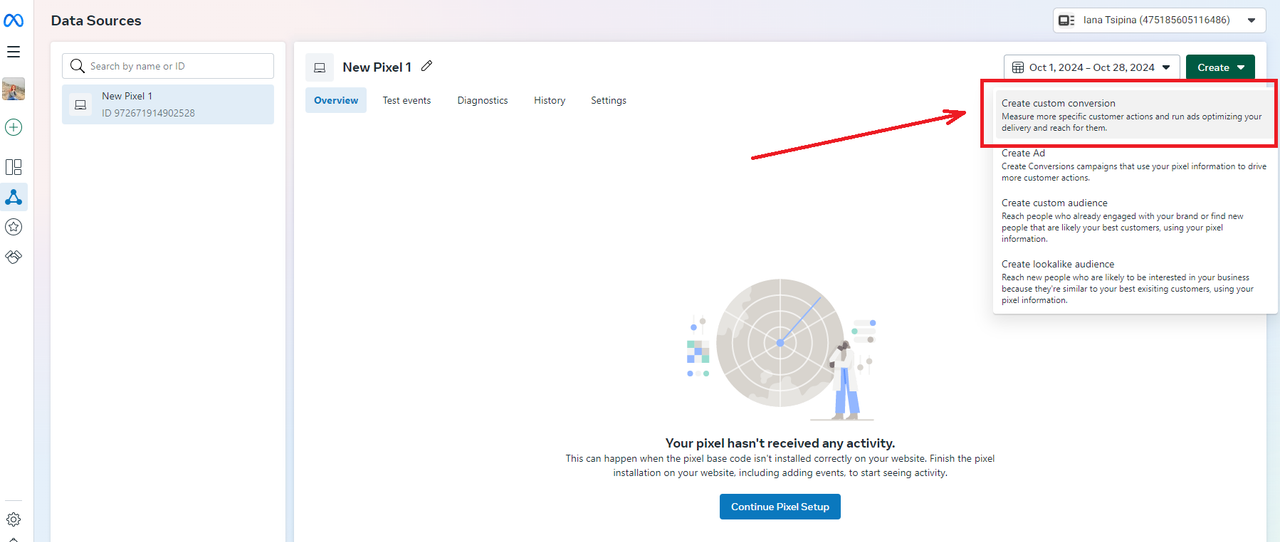
Working with Conversion API and Pixel in Business Manager
When working with Business Manager, Facebook provides the ability to create and manage Pixel with set Conversion API. One of the main benefits is the ability to transmit data directly from the server, bypassing browser limitations. This helps:- Track offline events, such as in-store purchases or calls,
- Obtain more accurate conversion data, as Conversion API works through server requests, even if users disable cookies or use browsers that block tracking.
To set up Conversion API:
- In Business Manager, go to Data Sources and open Data Sets. Click Add.
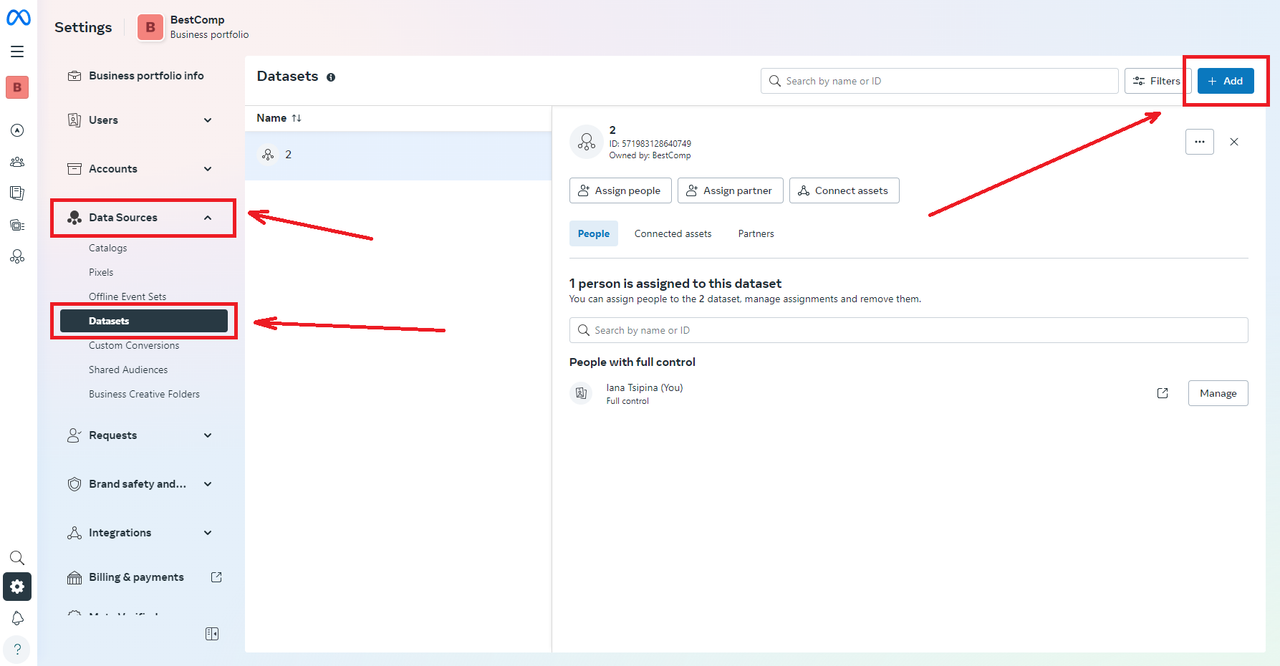
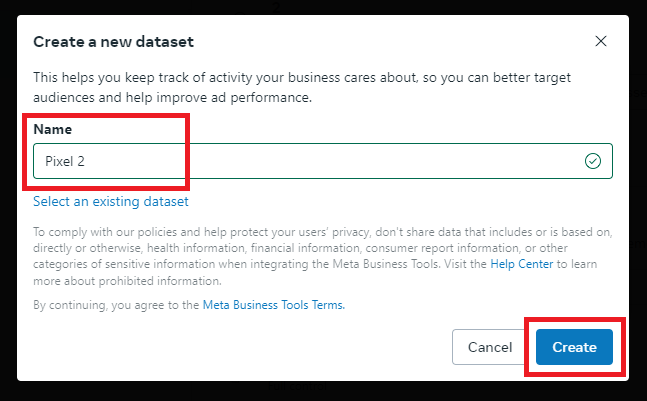
- Click Create New Data Set, name the Pixel (based on the offer or as preferred), and click Create.
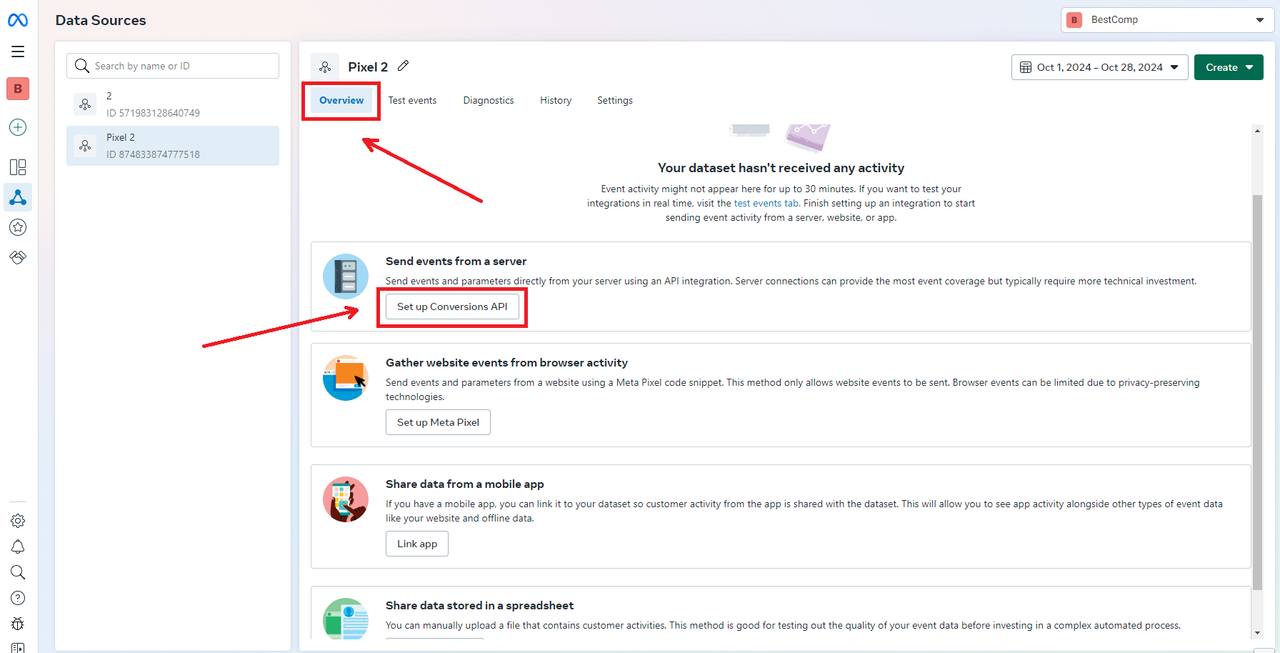
- Go to Event Manager, open the Overview section, and click Set Up Conversion API.
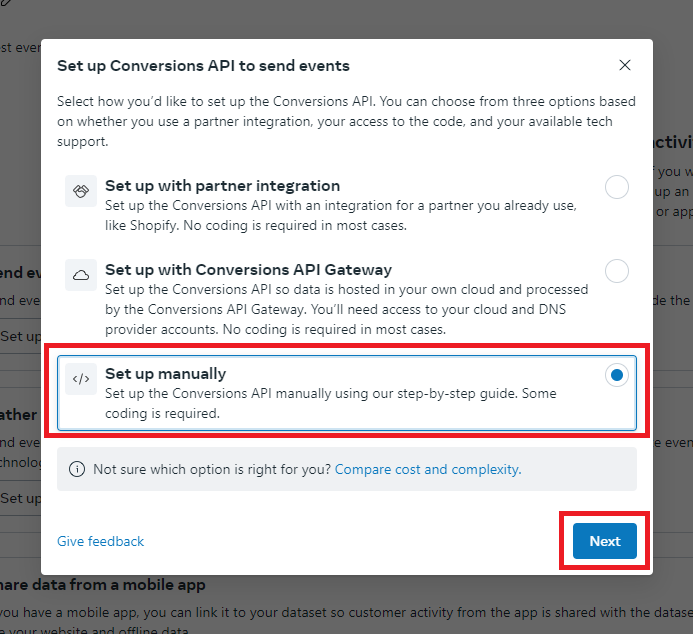
- Select Set up manually and click Next.
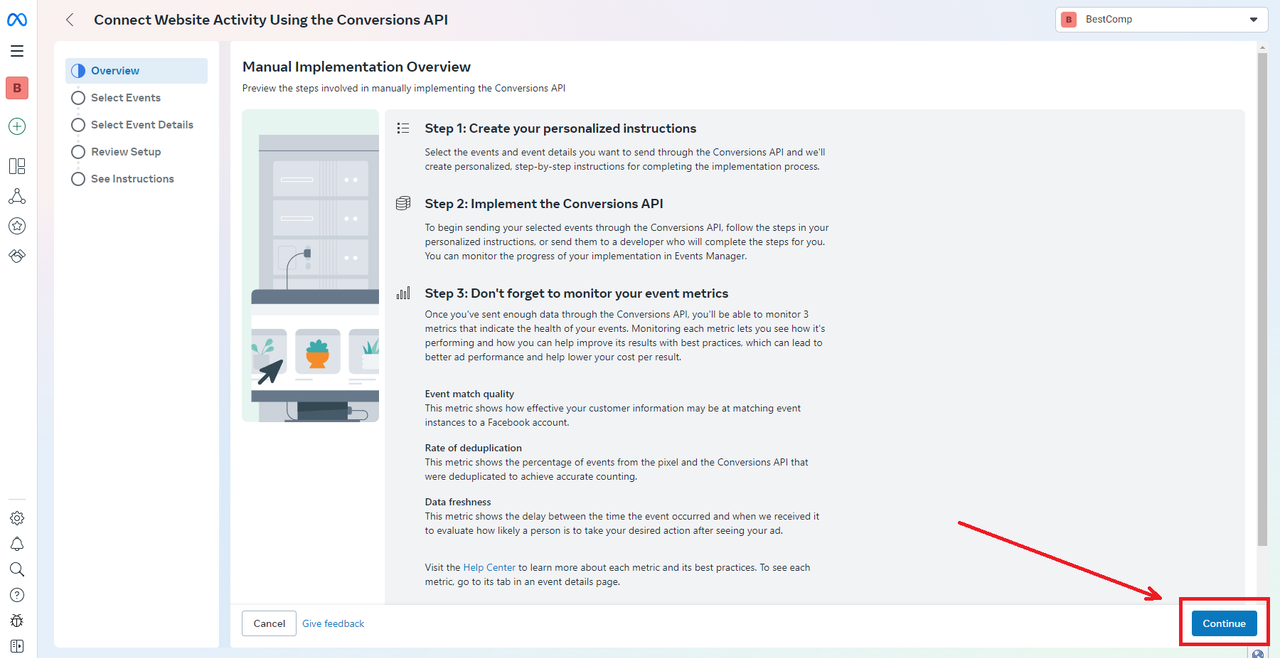
- Click Continue.
- Choose the desired events, like Purchase or Complete Registration.
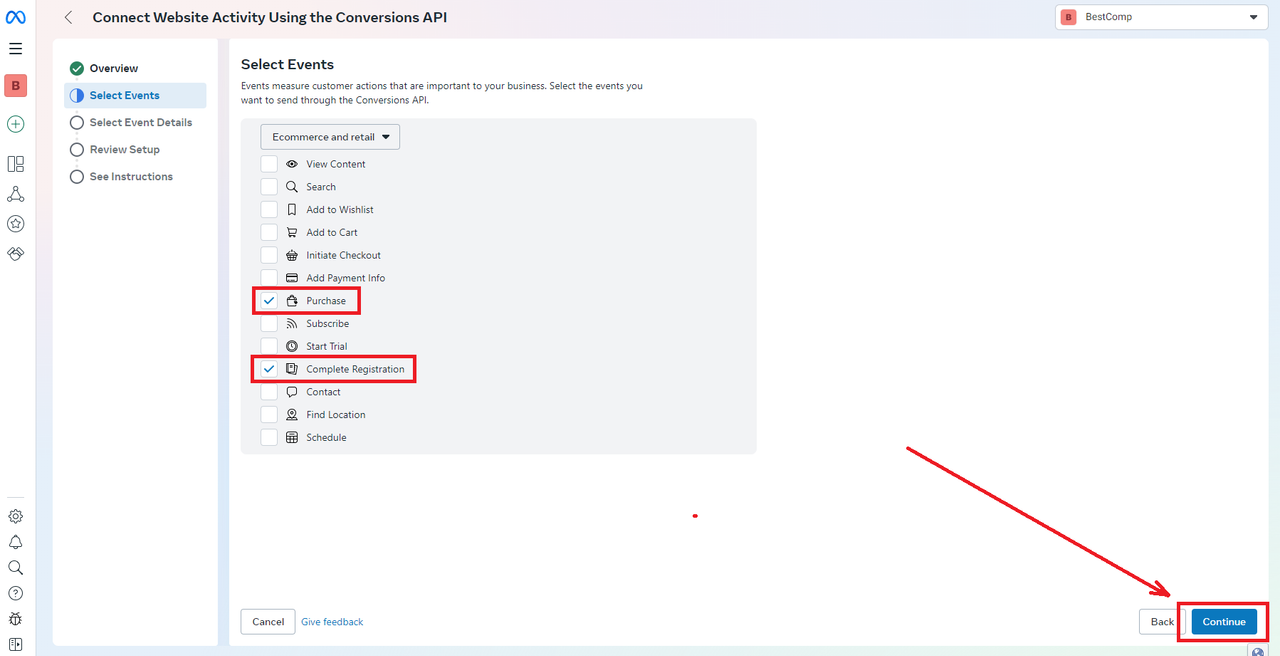
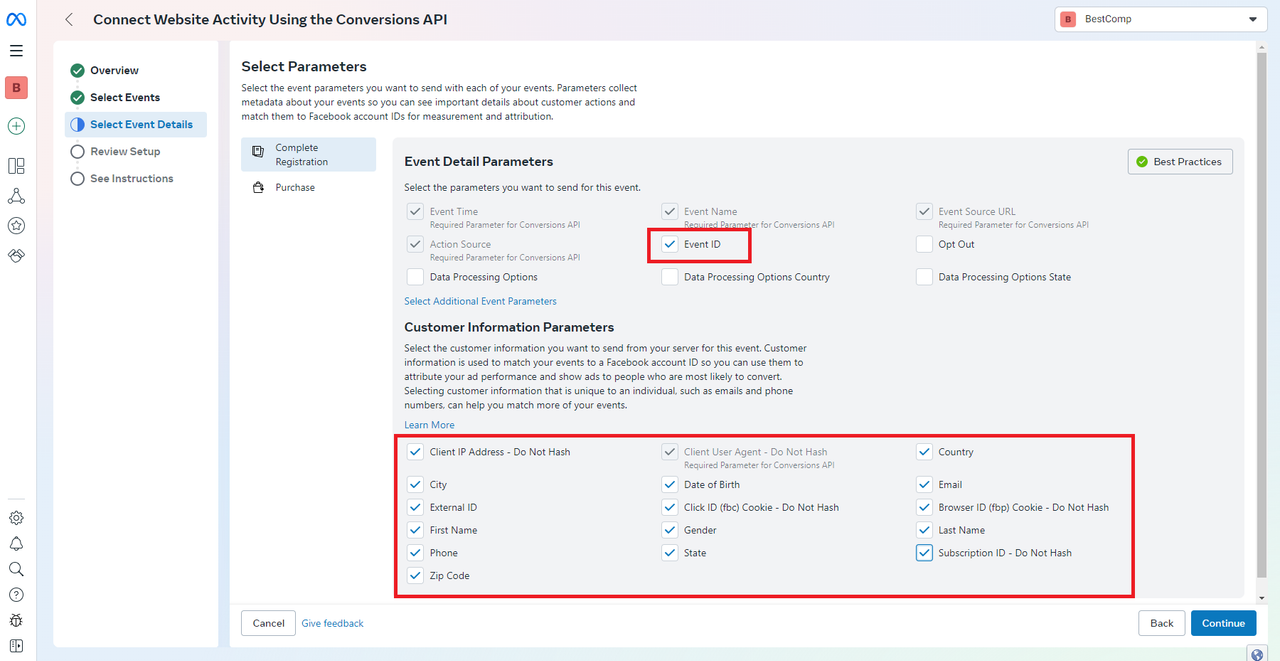
- Check the boxes next to event IDs and configure parameters.
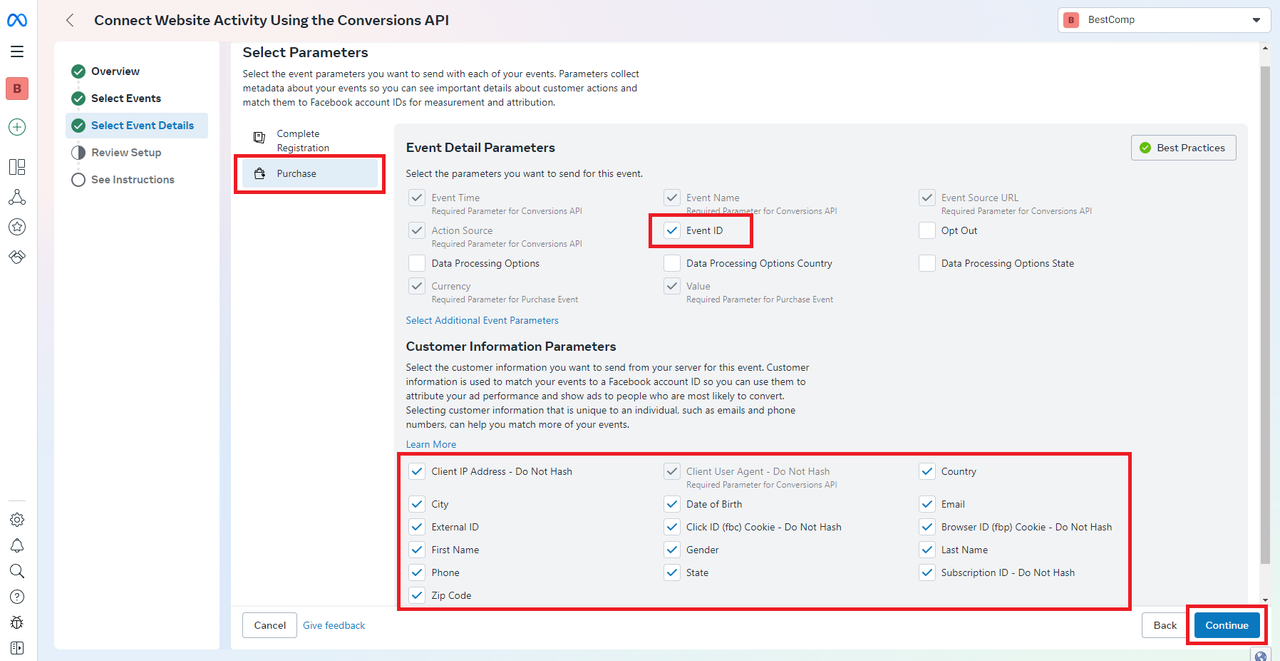
- Go to the Purchase tab and repeat. Click Continue.
- Click Continue.
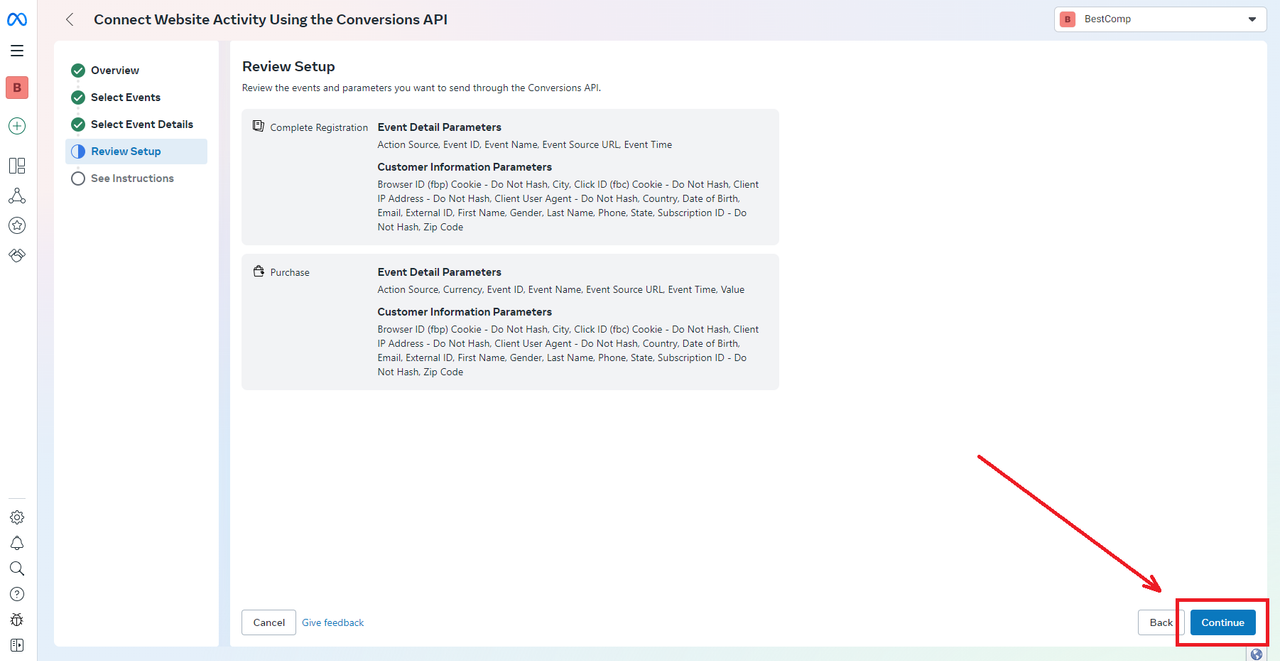
- And then Finish
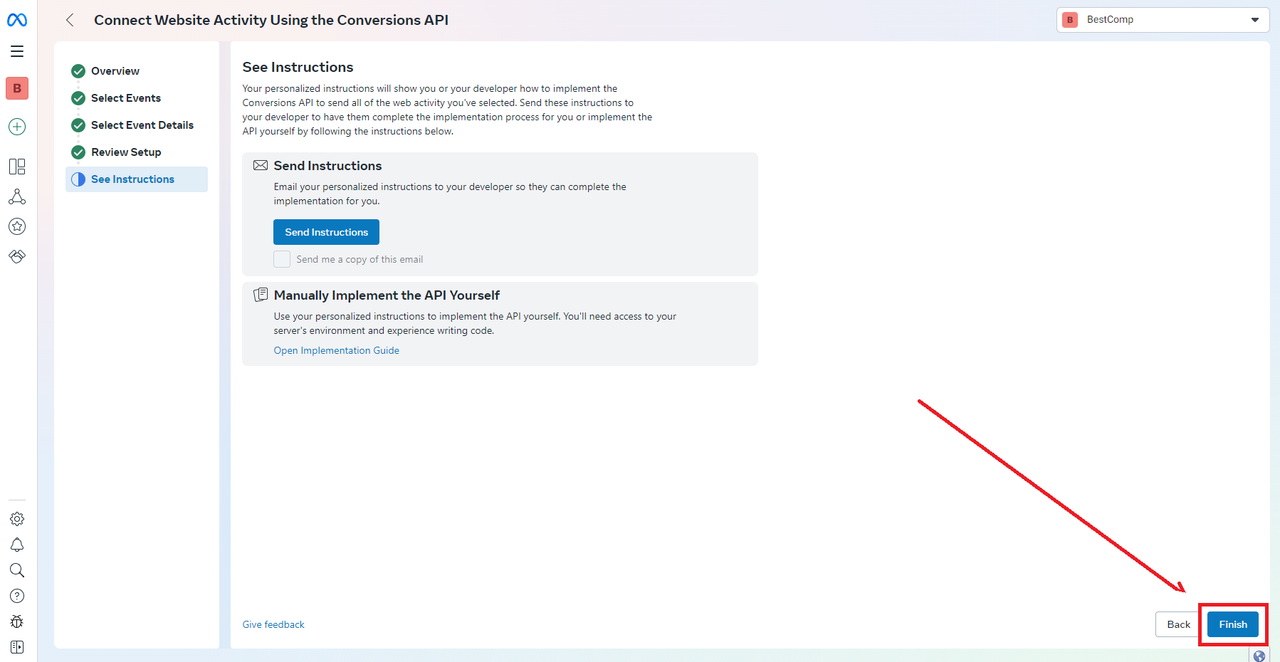
Once setup is complete, the Pixel is ready for use.
In the Settings section, you can view the Pixel ID or check it at the top of the site.
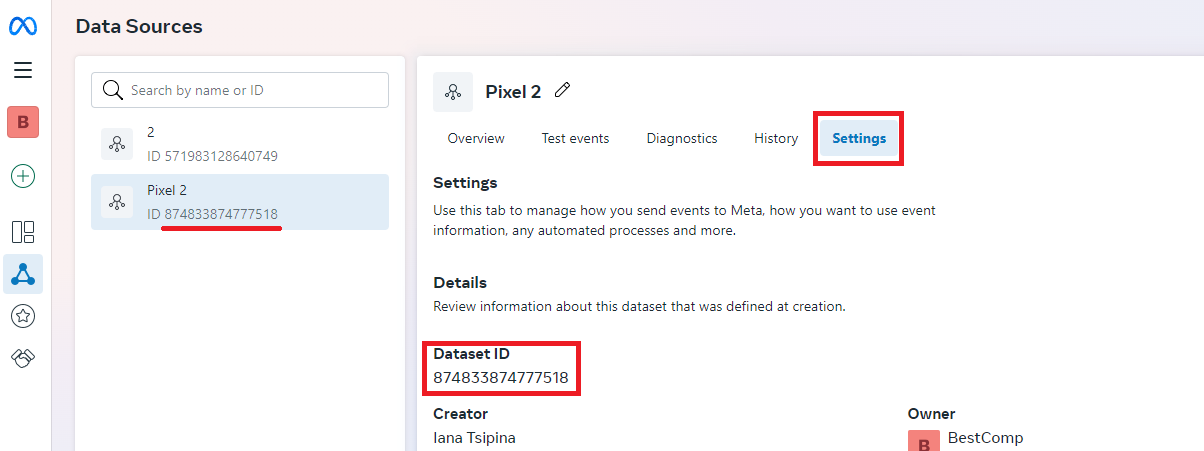
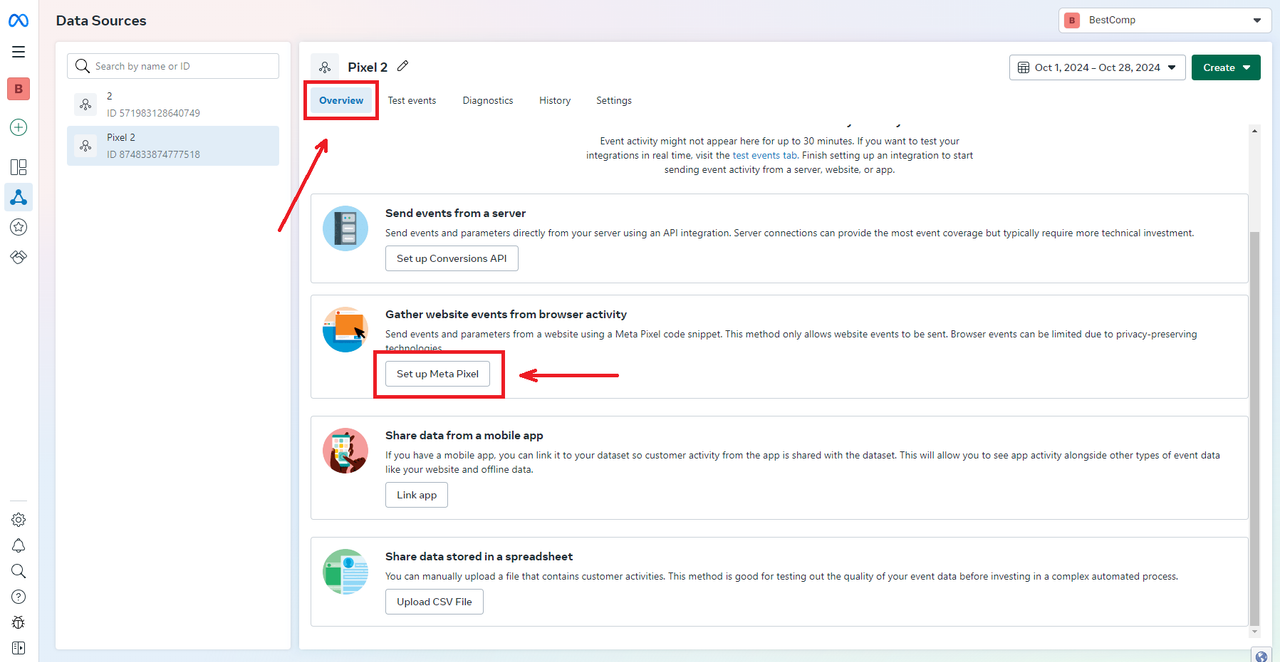
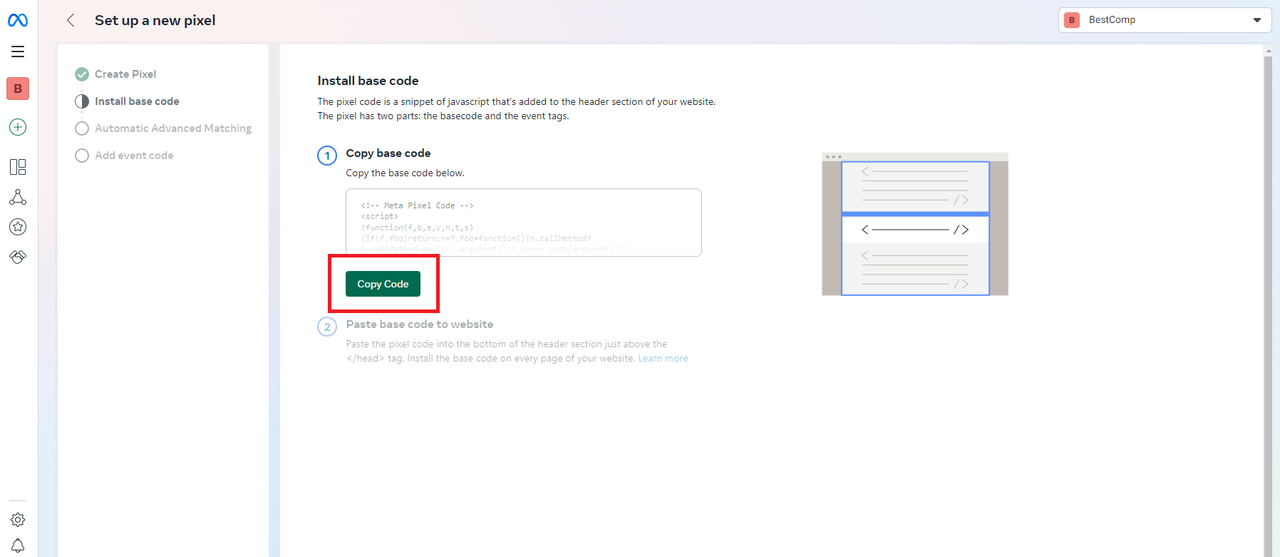
If you need the Pixel code, go to the Overview tab, find Gather website events from browser activity, and click Set Up Meta Pixel.
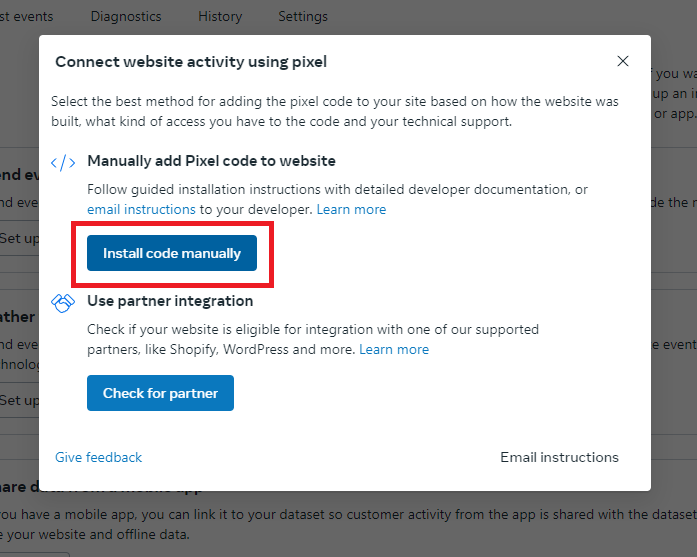
Click Install Code Manually.
And here you can copy the code:
You’ll also need the Pixel’s token ID. To find it:
Go to Settings, scroll down, and locate the Generate Access Token section.
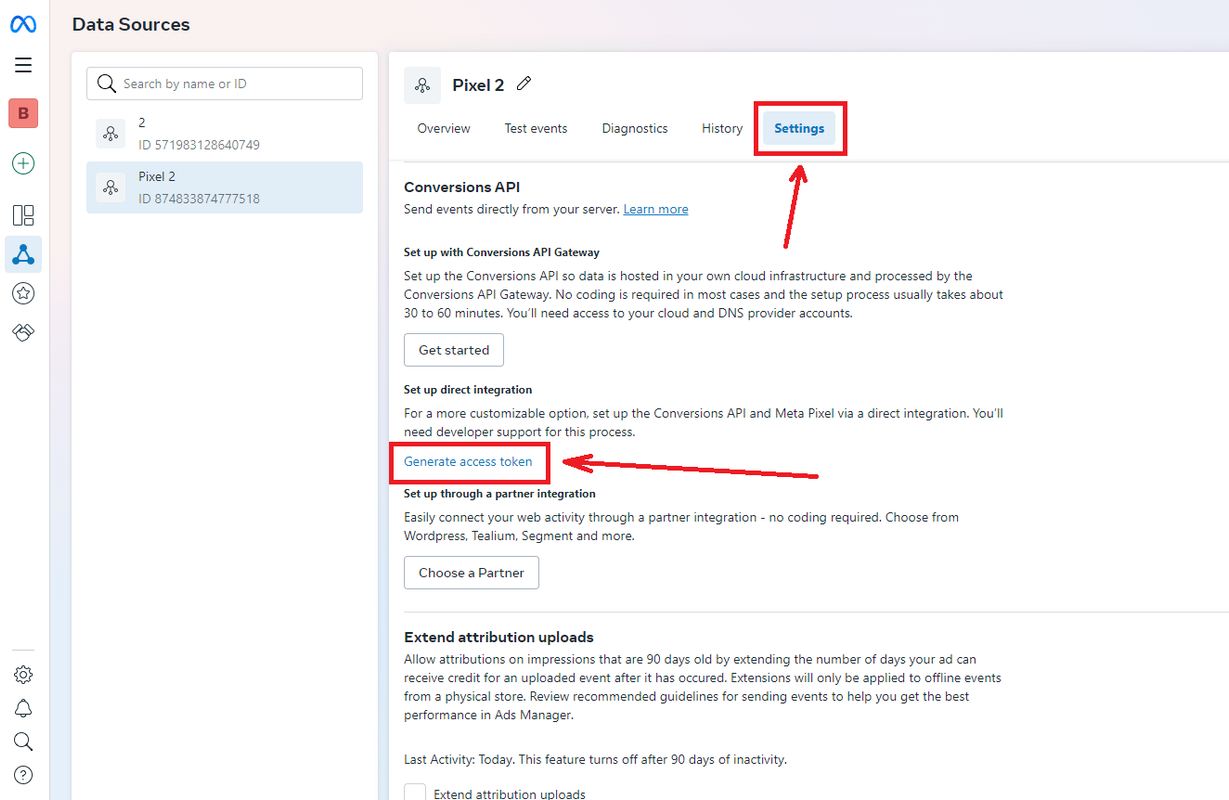
Copy and save it.
Installing Pixel in the Site Code
To install a standard Pixel on a site or landing page:- Open the landing page in editing mode.
- Paste the Pixel code before the closing tag.
- Save changes.
Testing Pixel Functionality
To check if the Pixel is installed correctly, you can use the Meta Pixel Helper plugin available in the Chrome Web Store. After installation on the landing page, copy your site link, and send a test submission to ensure the event is recorded correctly.Dynamic Pixel and Its Installation
If you’re not working with a single Facebook account or have multiple colleagues, adding Pixel to a single landing page requires a dynamic Pixel, which eliminates the need to insert Pixel repeatedly on each landing. A dynamic Pixel adds the account ID in the code upon clicking the ad link, simplifying tracking. To install a dynamic Pixel, you need a script:- Copy the first script and paste it on the page before >.
- Copy the second script and paste it on the "Thanks" page (Success or Confirm section).