

- Nov 29, 2022
- 2,597
- 287
To maximize the effectiveness of advertising campaigns in Google Ads, using Google Tag and conversion goals is essential. When working with verticals such as e-commerce, nutra, and consumer goods, a successful conversion is typically defined as a form submission, which is followed by a redirection to a "Thank You" page. This is where the Google Tag fires, recording the conversion. Below, we’ll break down how to properly set everything up.
Setting Up Conversion Goals in Google Ads
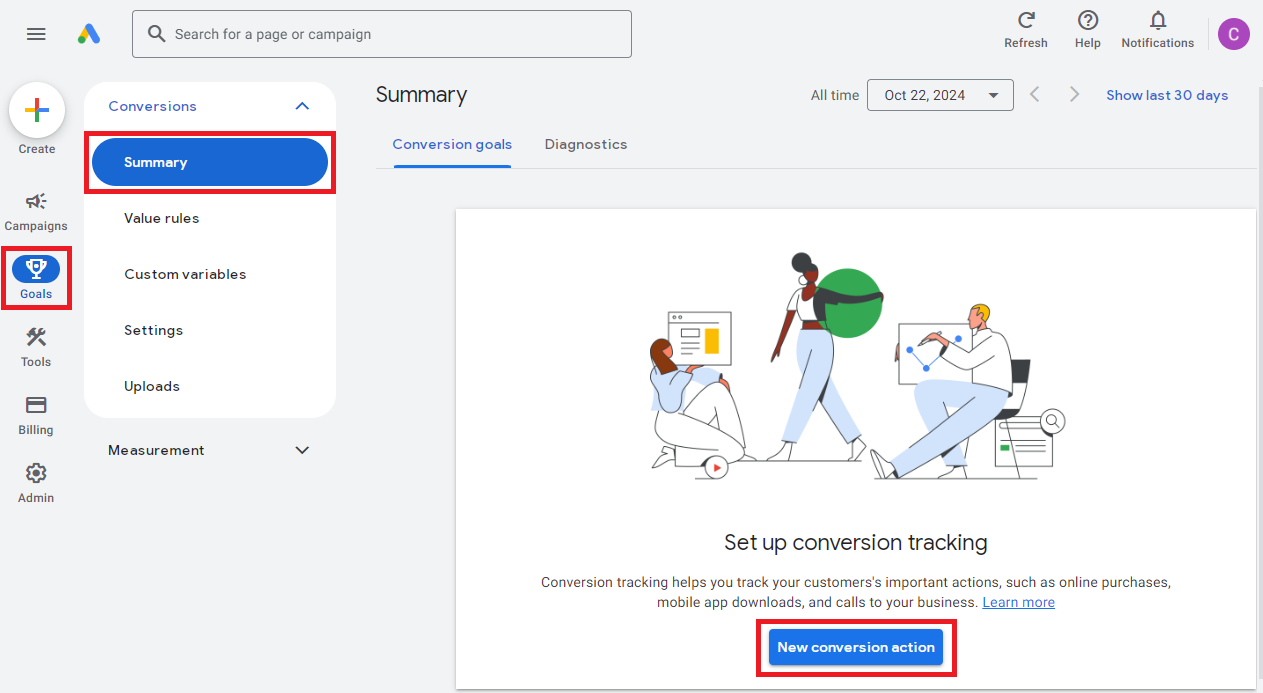
We'll start by configuring the goals in your Google Ads account.- Log in to your Google Ads account.
- From the left menu, select “Goals.”
- Click on “Summary.”
- Press the “New conversion action” button.
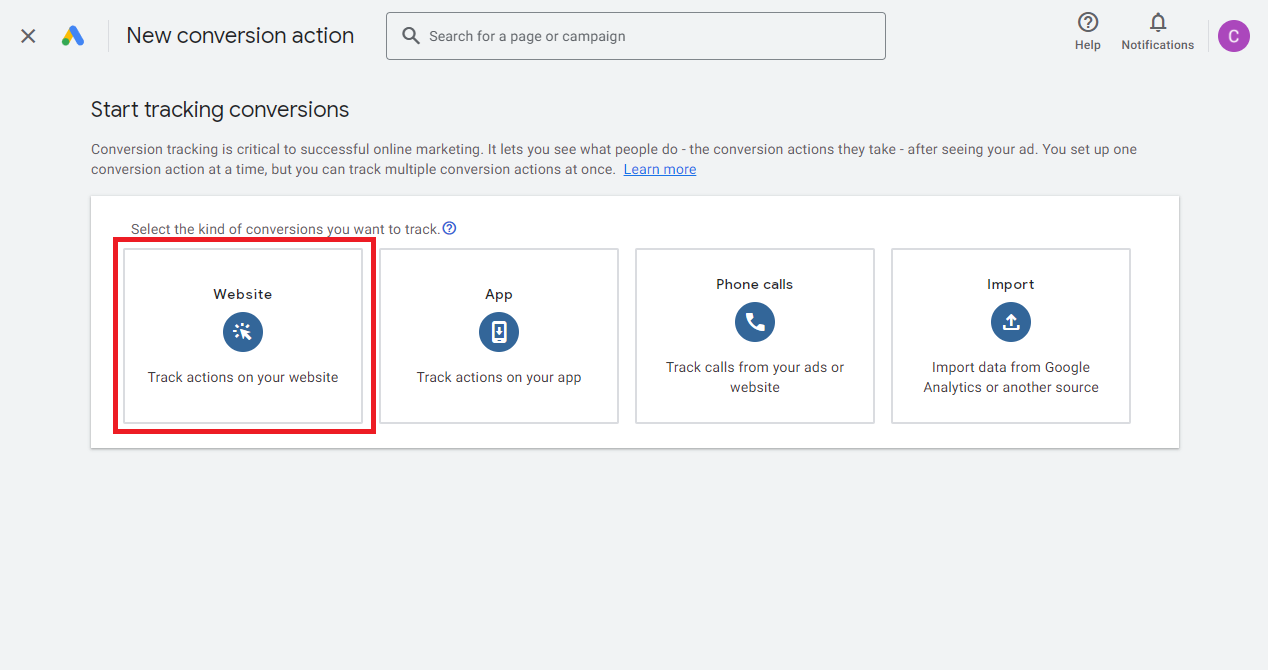
Now, you'll need to choose the type of conversions to track. In our case, select “Website,” which allows tracking of:
- Online sales
- Link clicks
- Page views
- Registrations
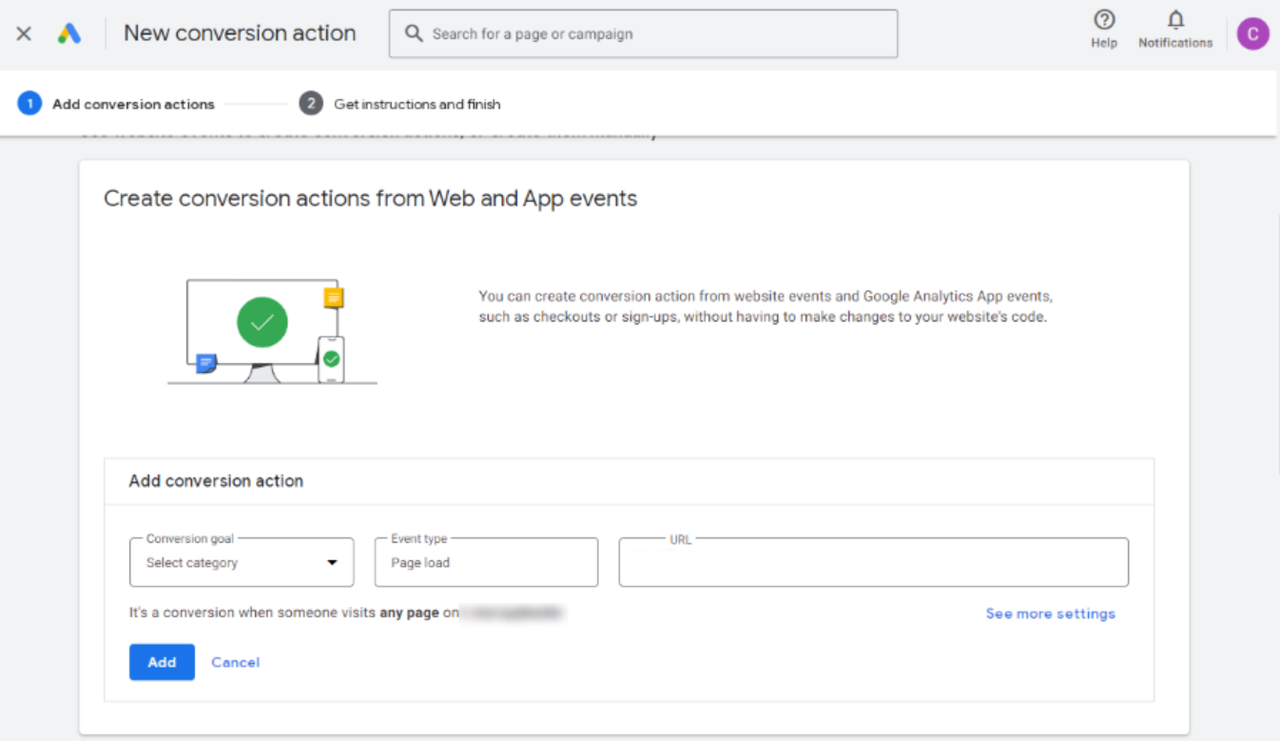
- On the next step, enter the domain of your website (the landing page) and click “Scan.”
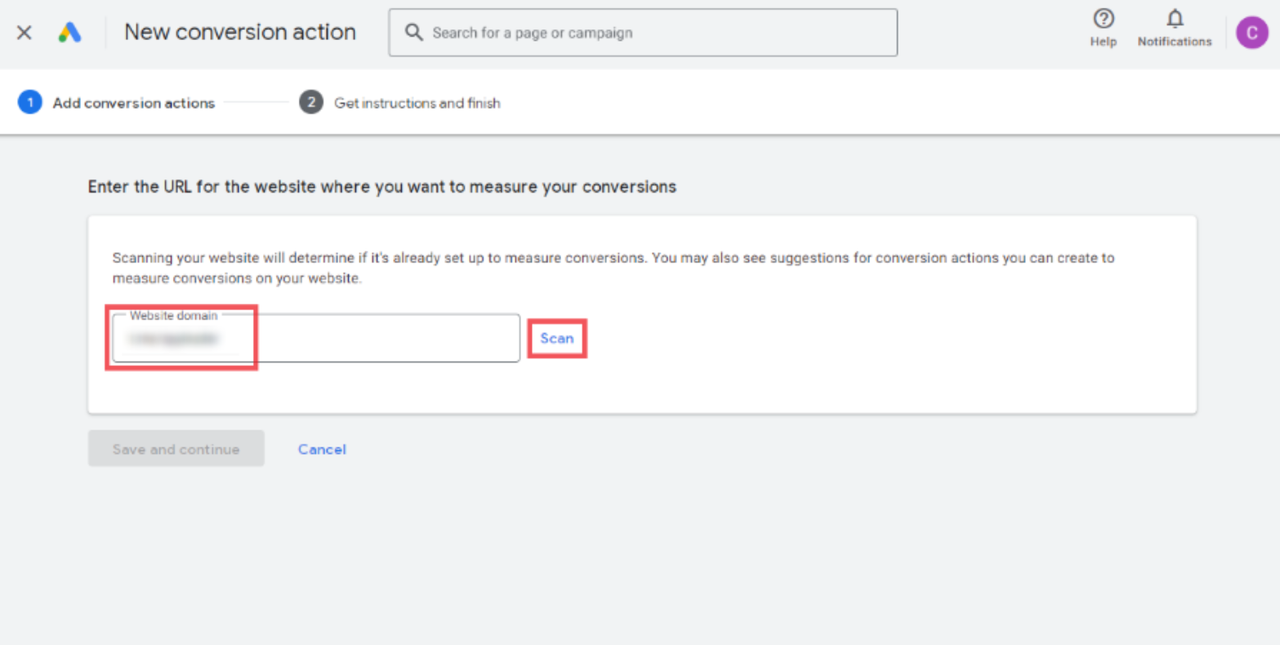
Google will scan the site for existing Google Tags or Google Analytics tags and provide available setup options.
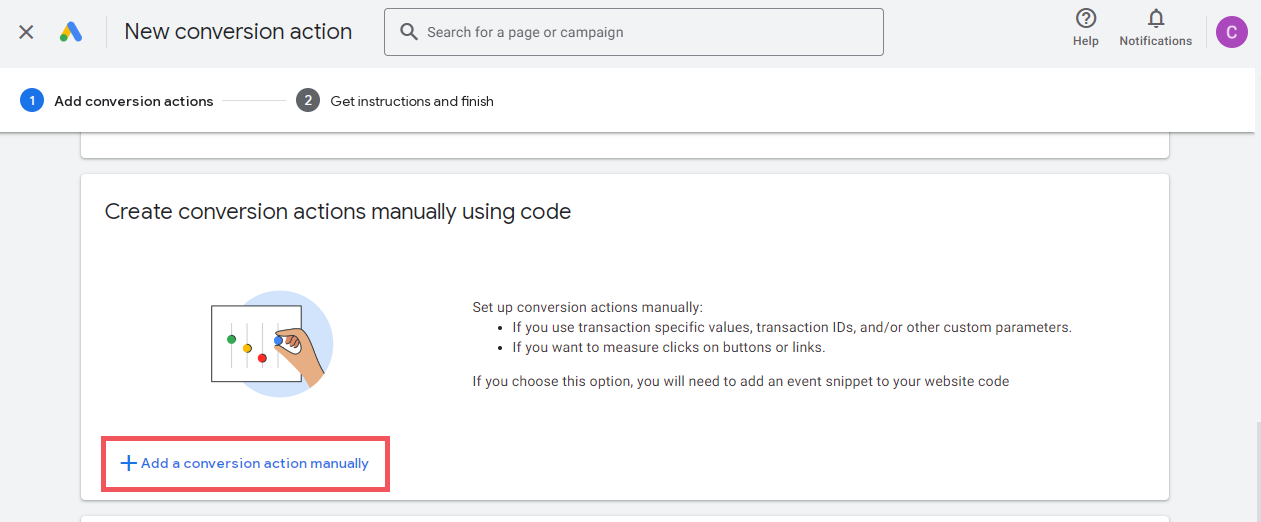
We will manually create conversion goals using code.
• Add a conversion action manually.
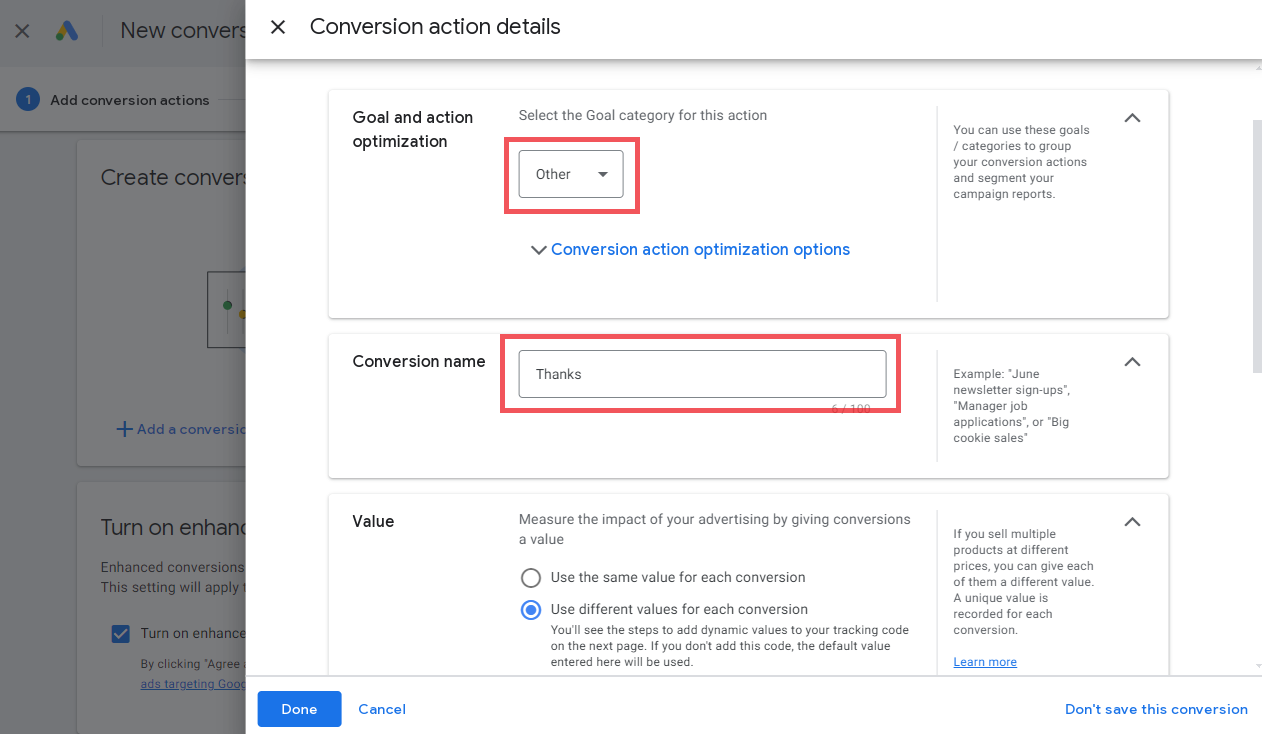
• In the “Goal and Action Optimization” field, you can select any option; it won’t affect the setup.
• Name the conversion, for example, “Thanks.”
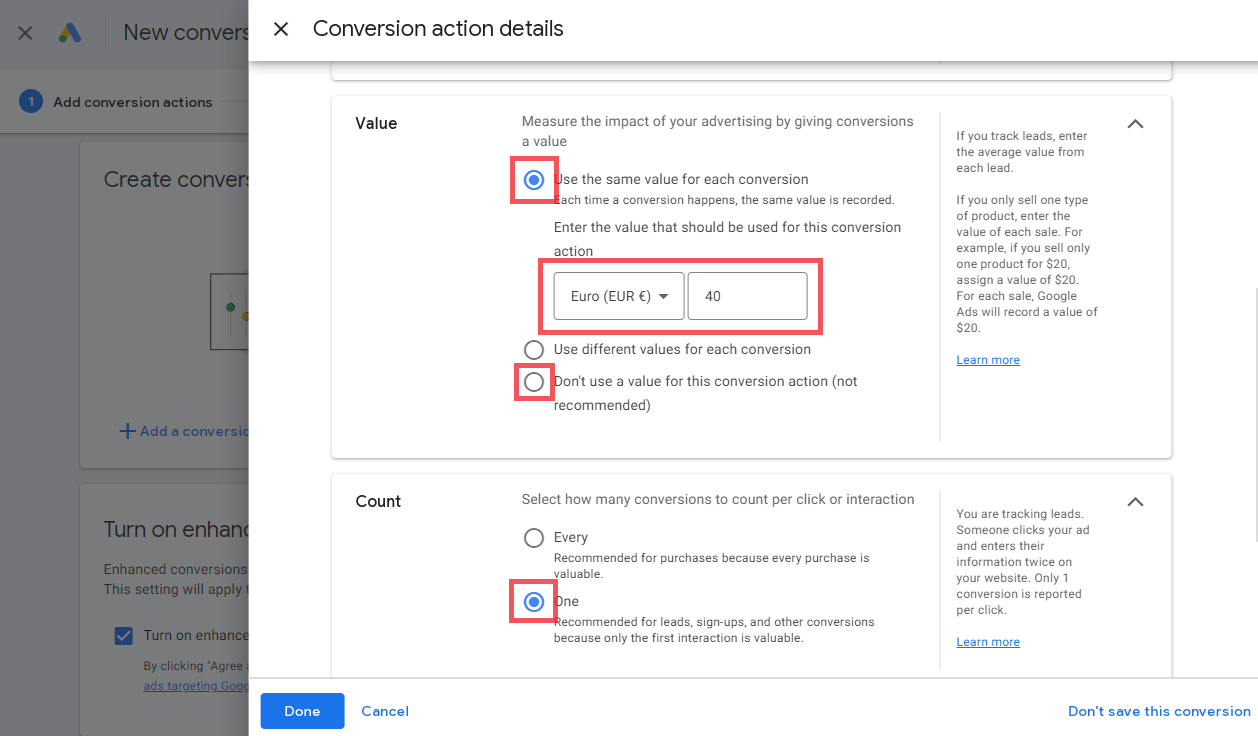
• You can also set a conversion value, but if you’re unsure of the average cost per lead for profitable traffic, select “Don’t use...”
• For the “Count” setting, choose One to avoid counting multiple conversions when a user revisits the “Thanks” page.
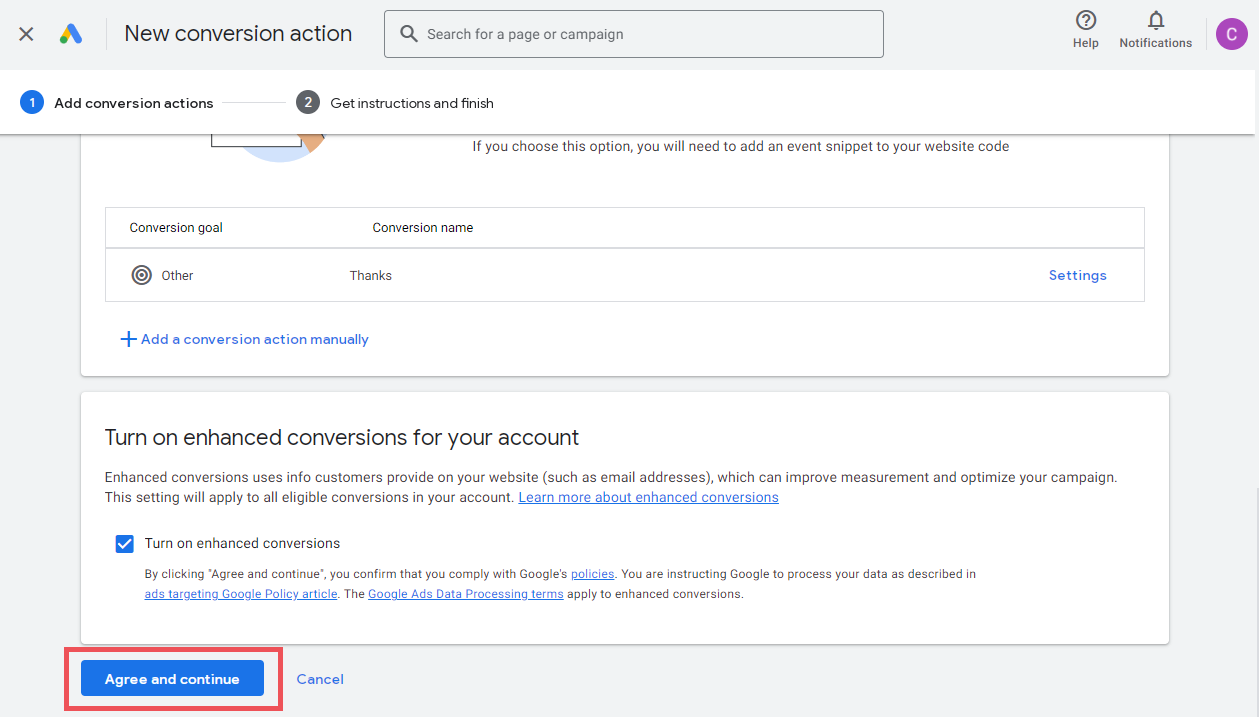
- Click “Agree and continue” to save the conversion goal.
In the “Summary” page, you’ll see a list of conversion goals and their statuses:
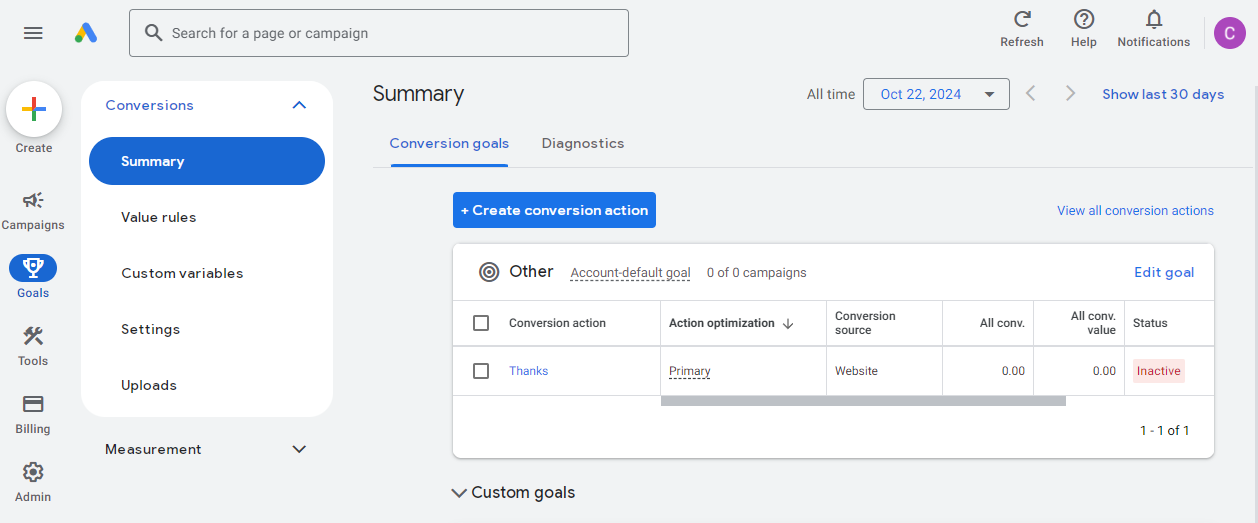
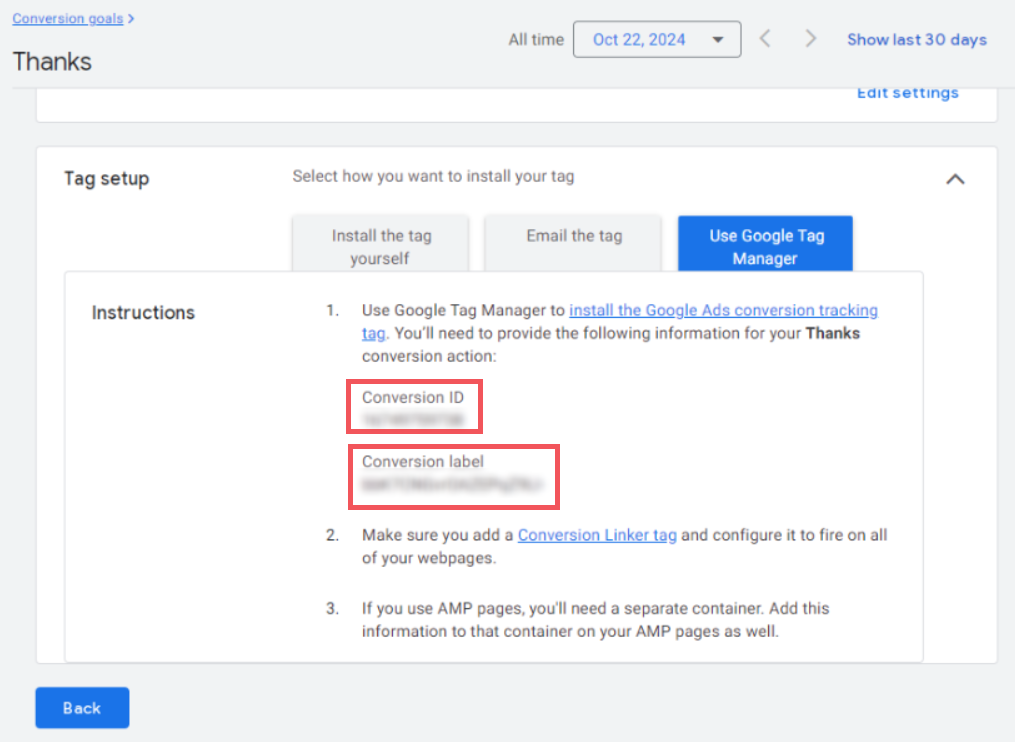
- Click on the newly created goal, and you’ll be prompted with two options for adding the code to your site:
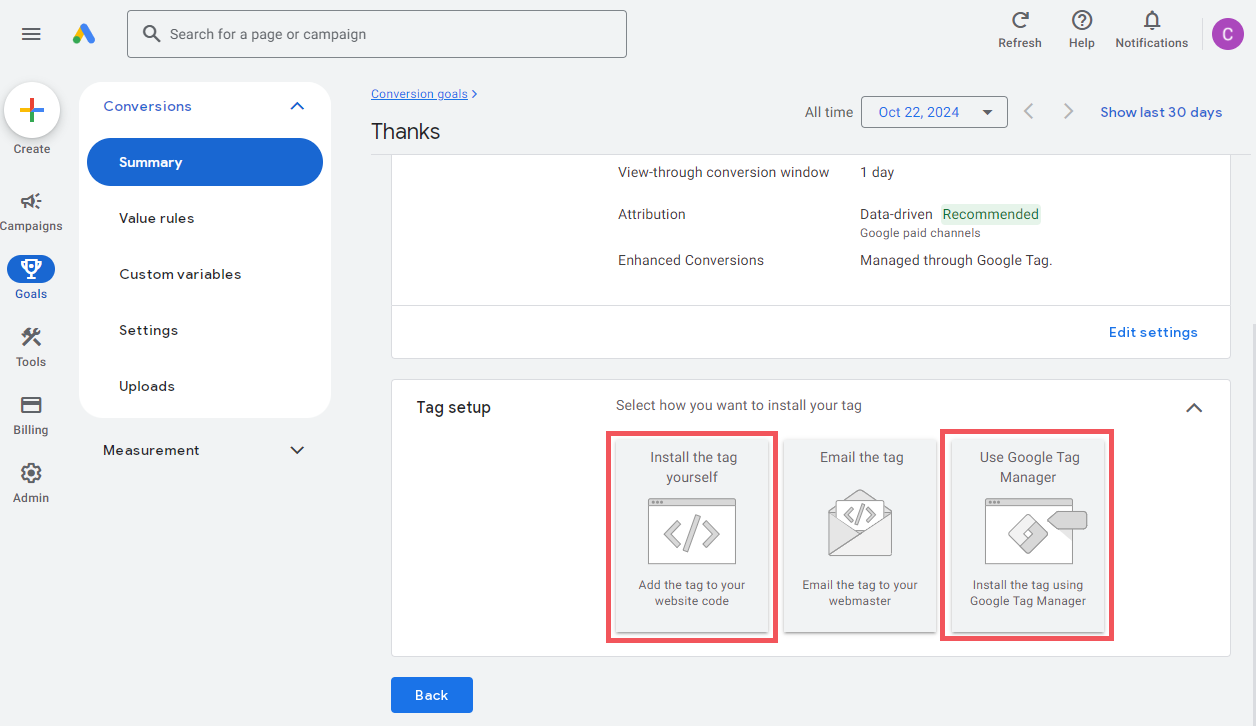
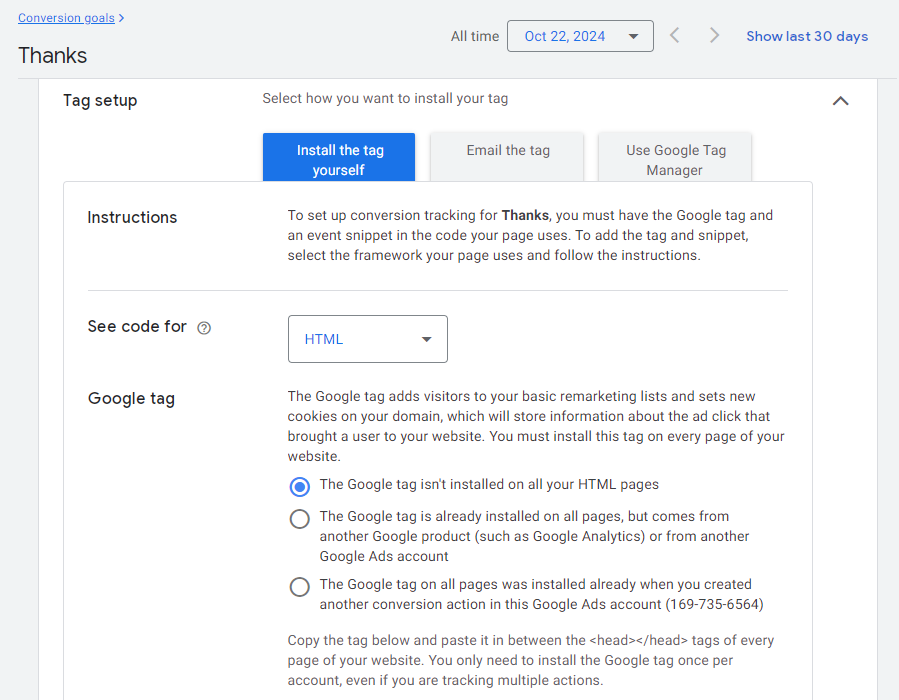
• Manual installation – You’ll need to insert the provided code into the “Thanks” page of your landing site.
• Using Google Tag Manager (GTM) – This method requires the “Conversion ID” and “Conversion label.”
Manual Tag Installation
This method works well for single-page sites. You’ll need to add two tags:• Google Tag – This tag adds visitors to the main remarketing lists and creates cookies on your domain to store data on ad clicks that led to visits. This tag must be added to all pages of your site. Copy the code and paste it between the tags on each page of your website.
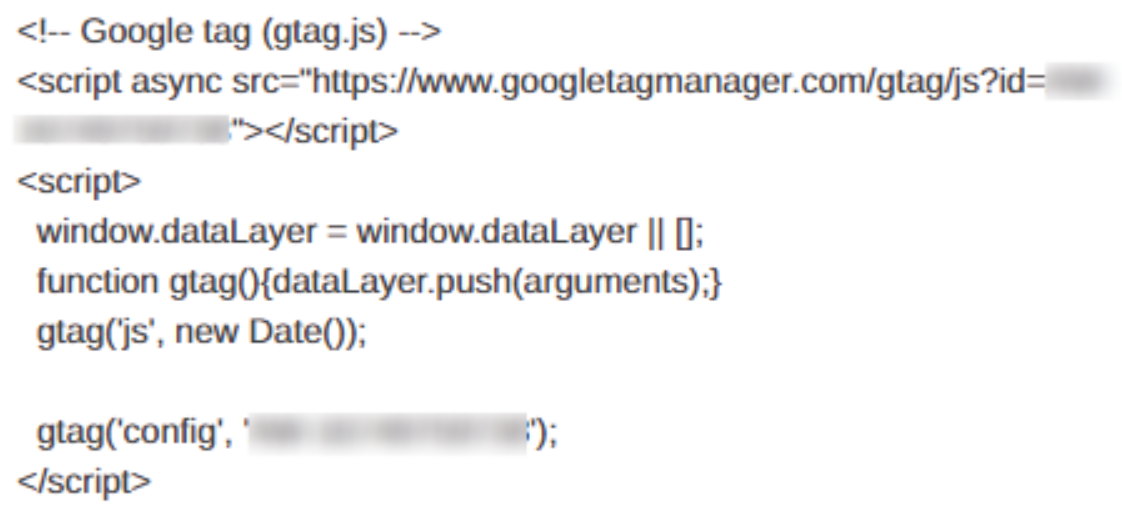
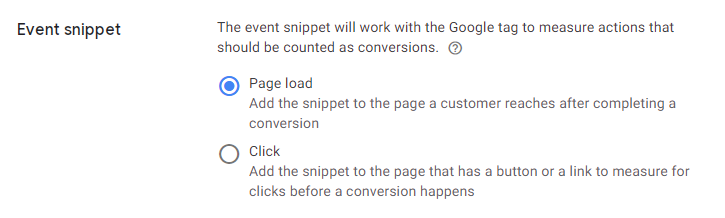
• Event Tag – This works alongside the Google Tag and tracks actions that should be counted as conversions. It allows tracking page loads, link clicks, or other elements. In this case, we’ll track “Page load” by placing the event code between the tags, immediately after the Google Tag, on the “Thank You” page.
Setting Up Google Tag Manager (GTM) for Conversion Tracking
Using Google Tag Manager (GTM) to manage your conversion tracking on the “Thank You” page is a flexible method that doesn’t require direct changes to your website’s code.Creating a GTM Container
• Go to Google Tag Manager: https://tagmanager.google.com/• Click “Create Account.”
• Name your account and container, then select the “Web” platform.
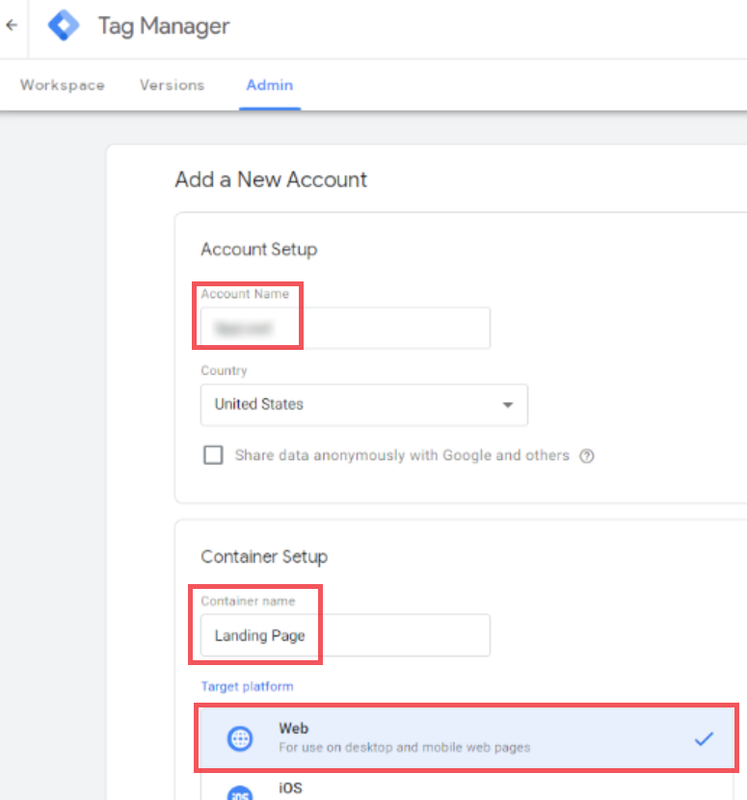
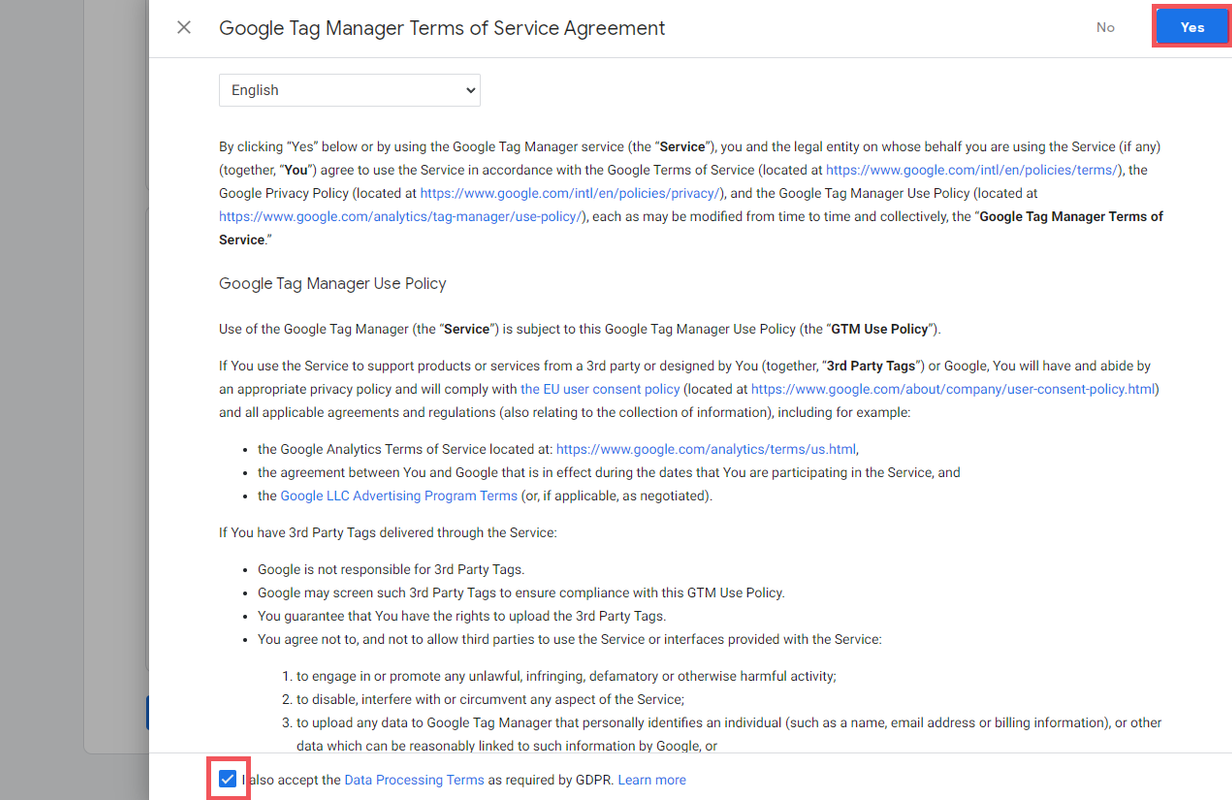
• Click “Create” and agree to the terms.
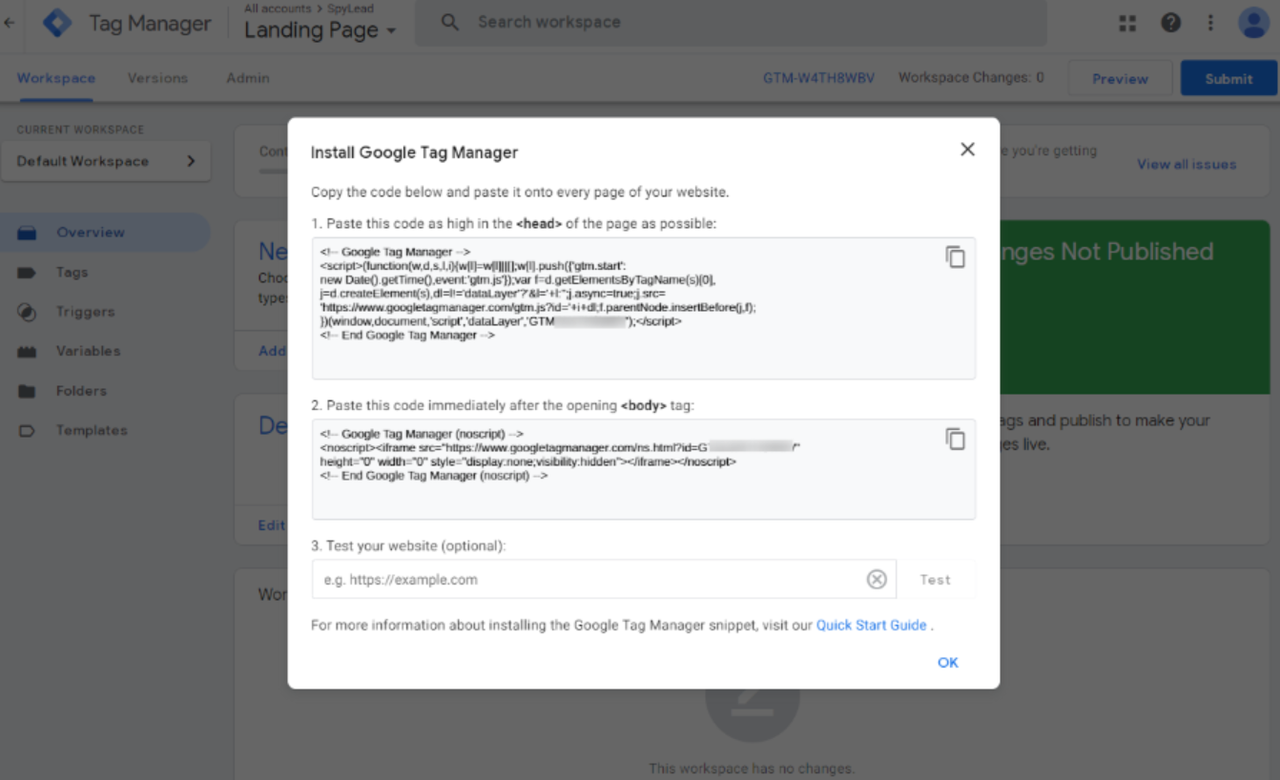
You’ll receive code to install on your site—place the first part after the tag and the second part after the tag on all pages.
Setting Up Triggers and Tags
• In GTM, go to the “Triggers”.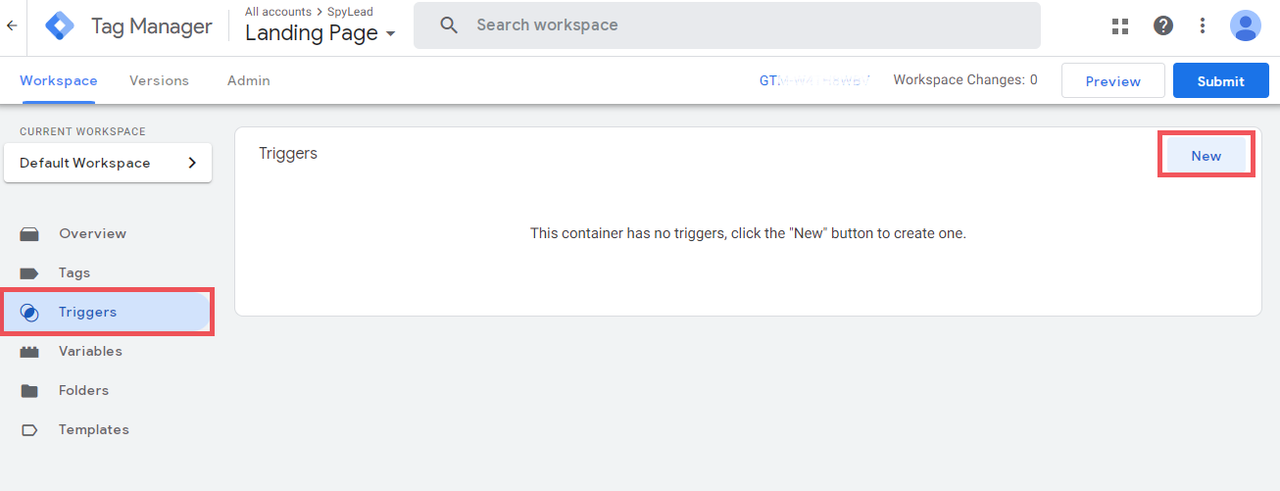
- Click “Trigger Configuration”
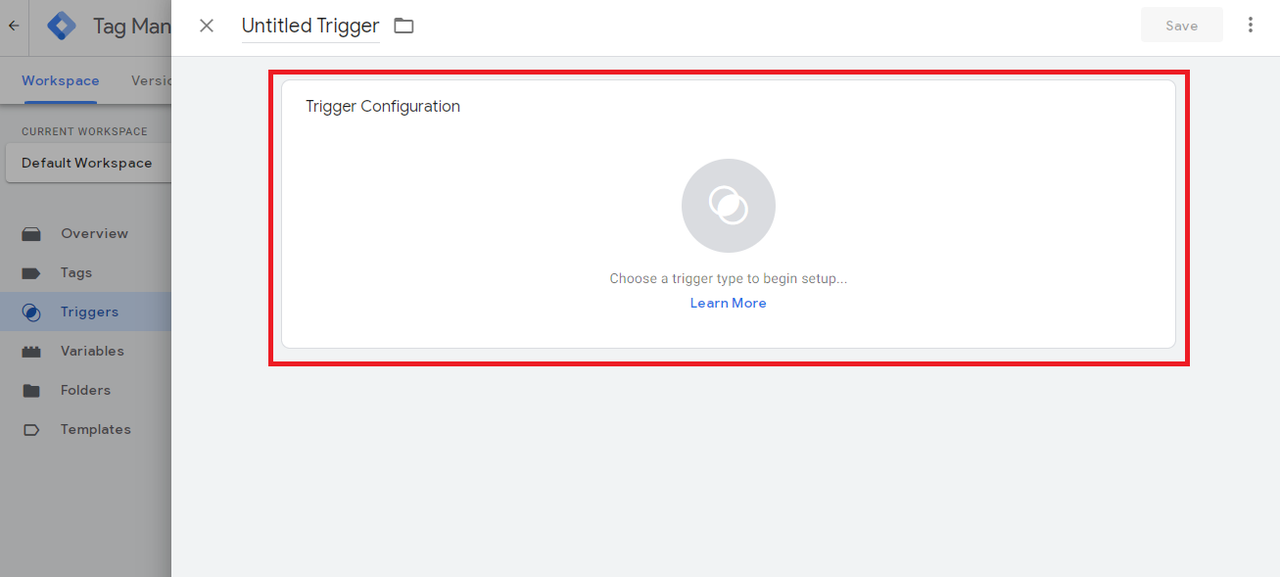
• Select “Page View” as the trigger type.
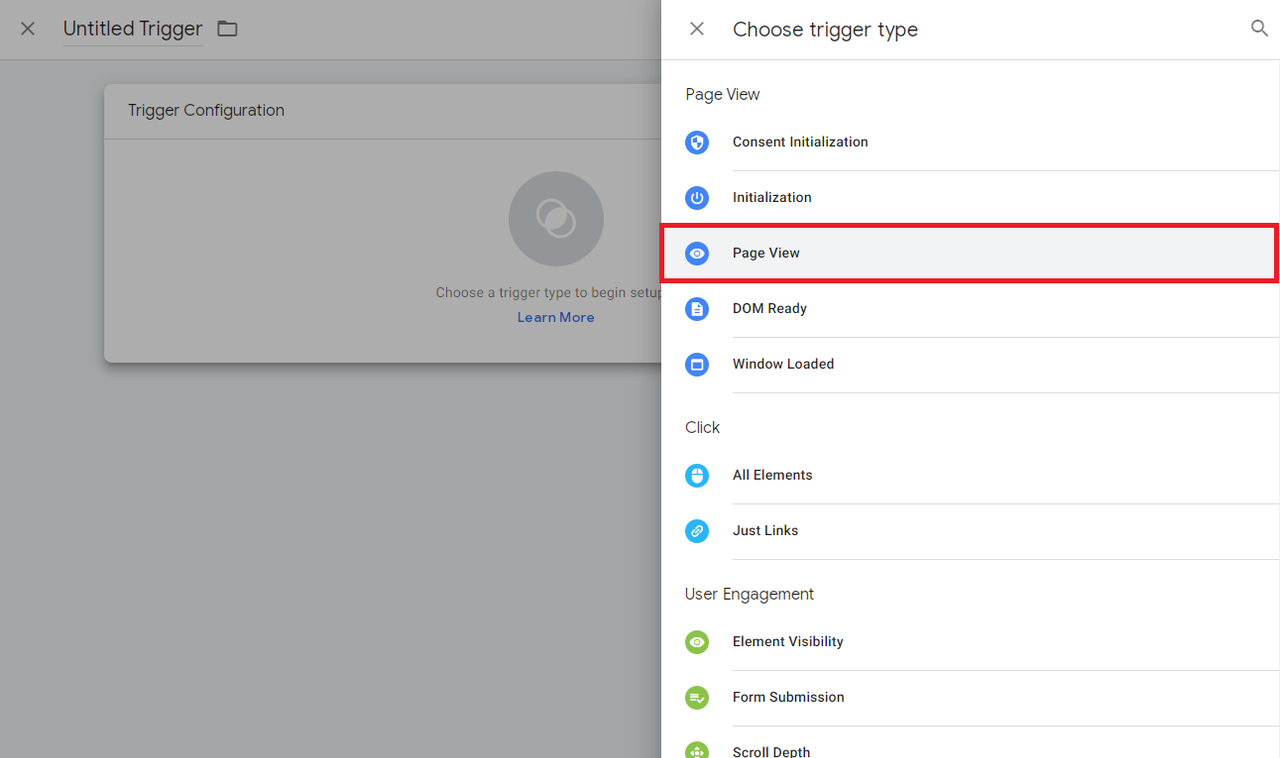
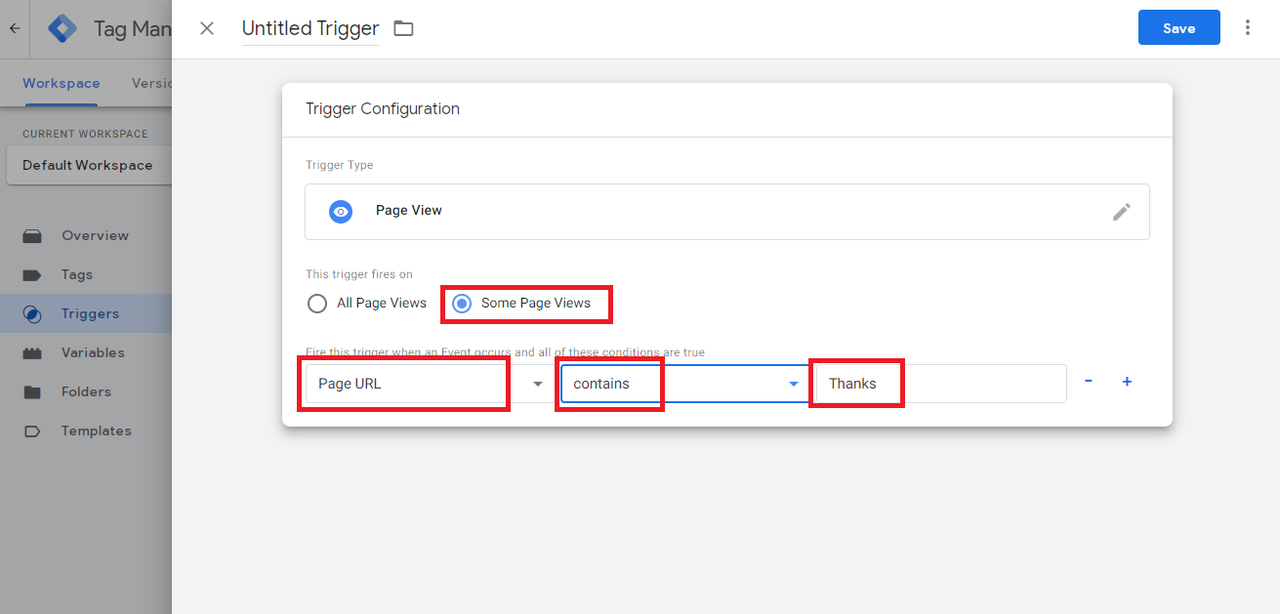
• Set it to trigger only on the “Thanks” page (e.g., thanks.html).

- Select "Some Page View" so that the trigger only fires on a specific page.
- In the field below, choose the option "Page URL".
- Next, select "contains".
- In the last field, enter the part of the URL that is only present in the "Thanks" page's address. In our case, it's "Thanks".
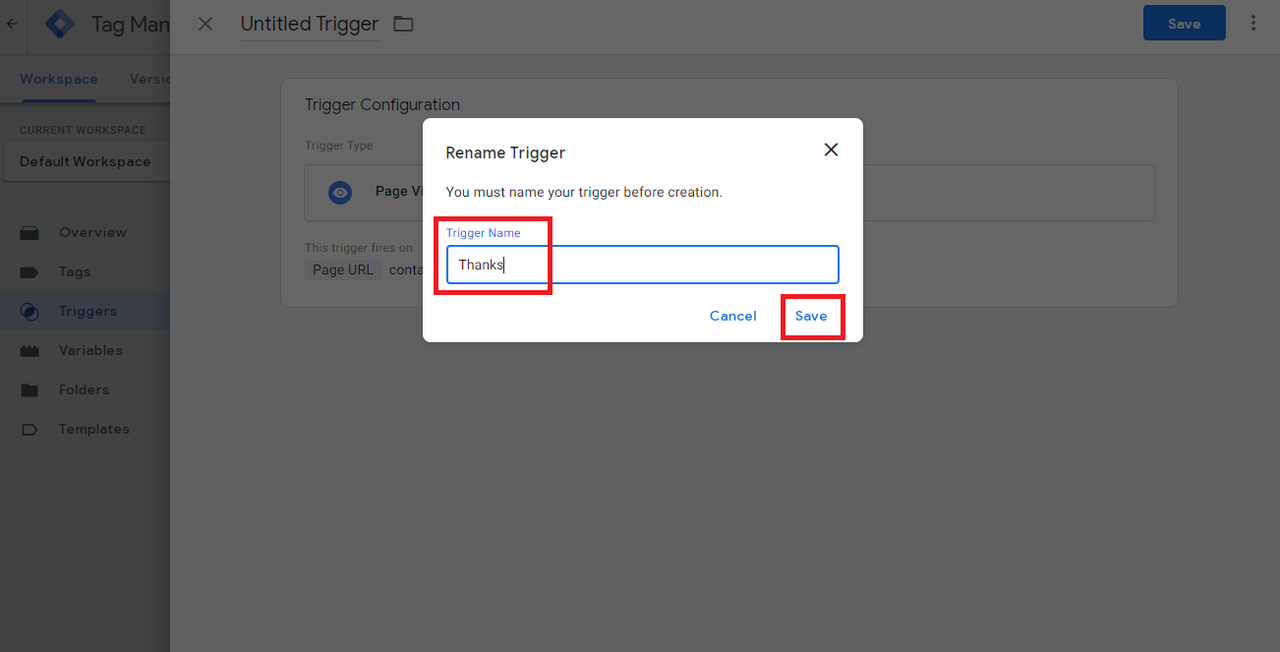
- Click "Save".
• Save the trigger with an appropriate name like “Thanks.”
• Go to the “Tags” section
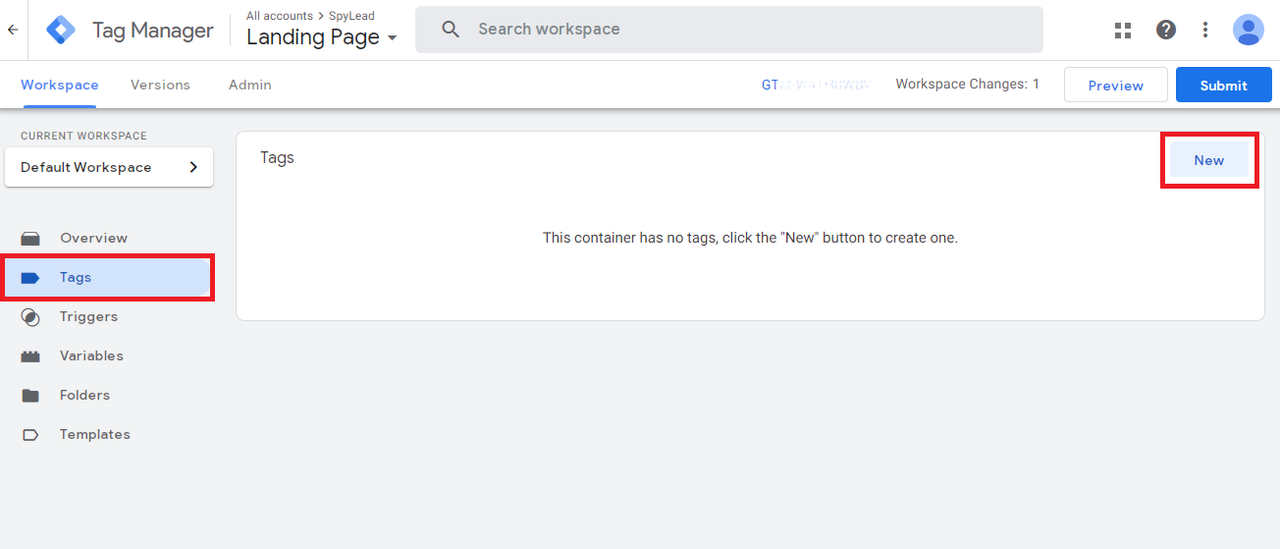
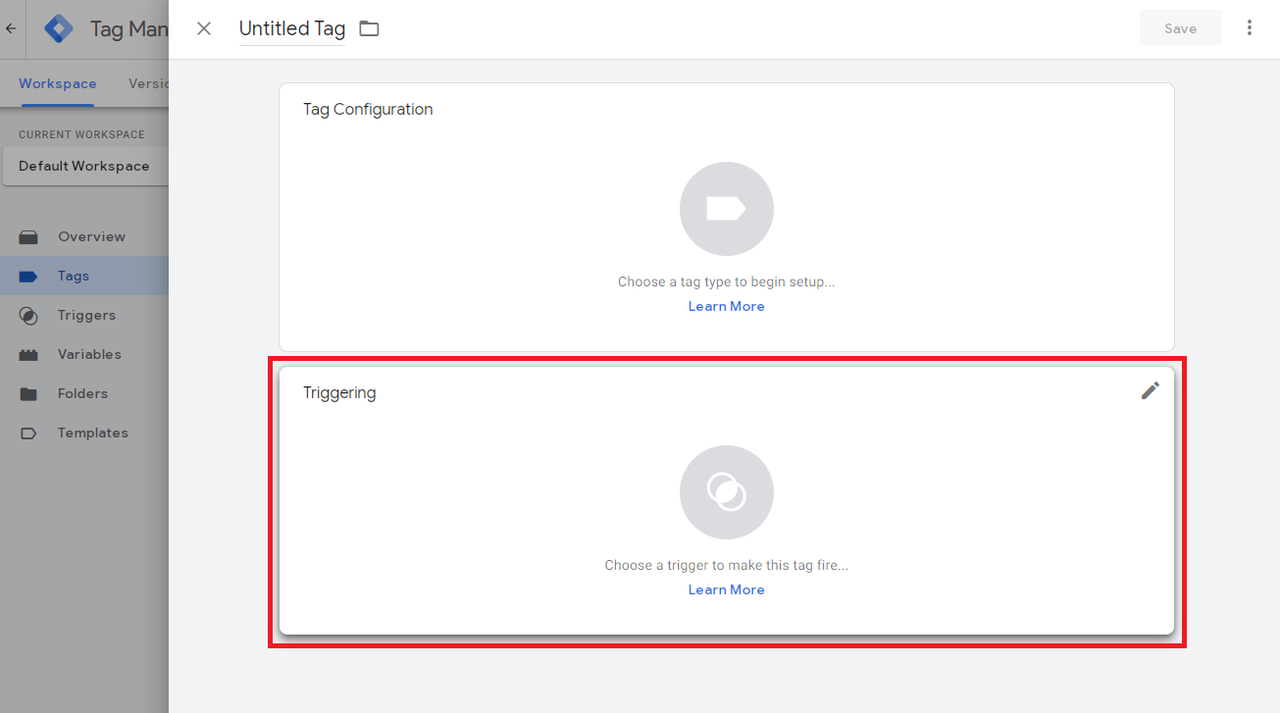
- Click the “Triggering” block
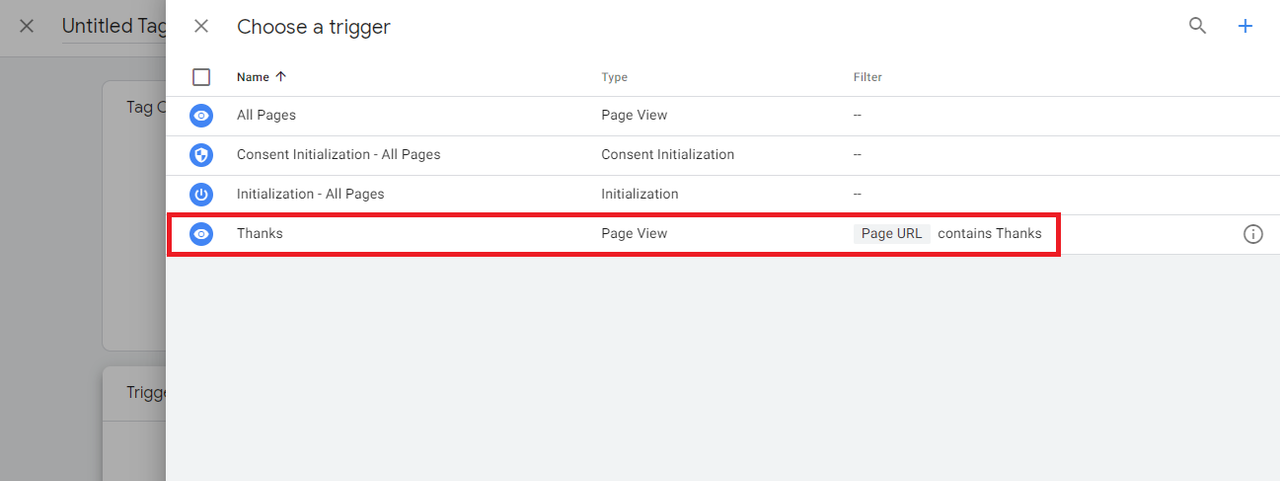
- In the list that appears, select the previously created “Thanks” trigger
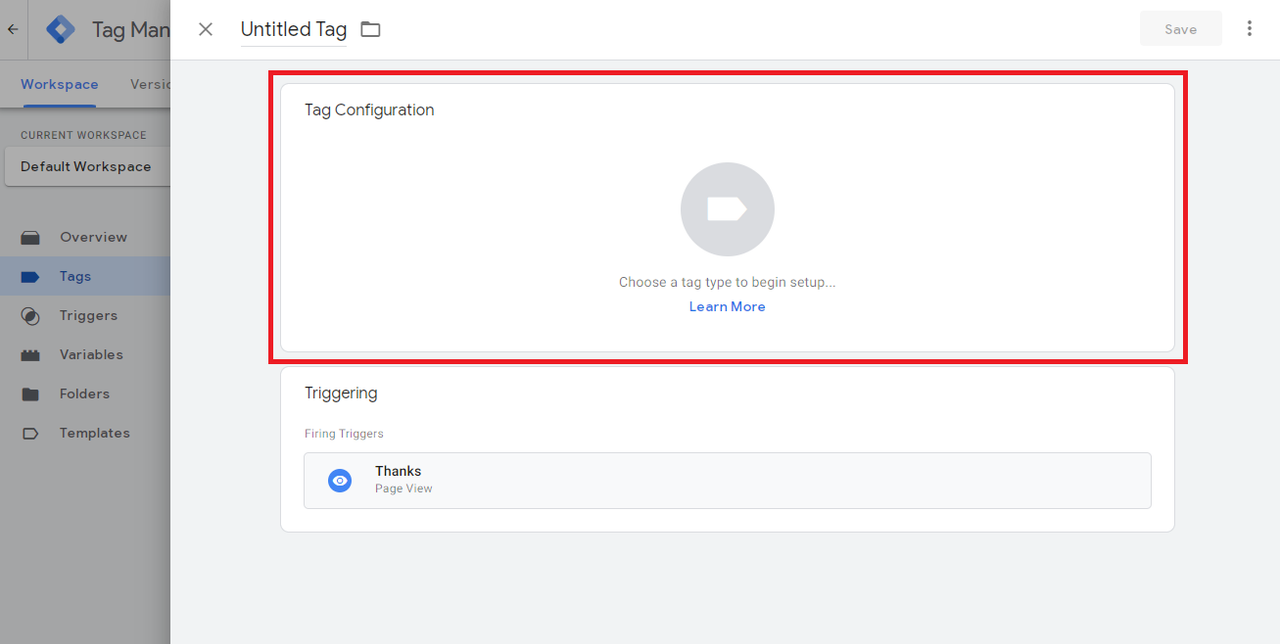
- Click the “Tag Configuration” block
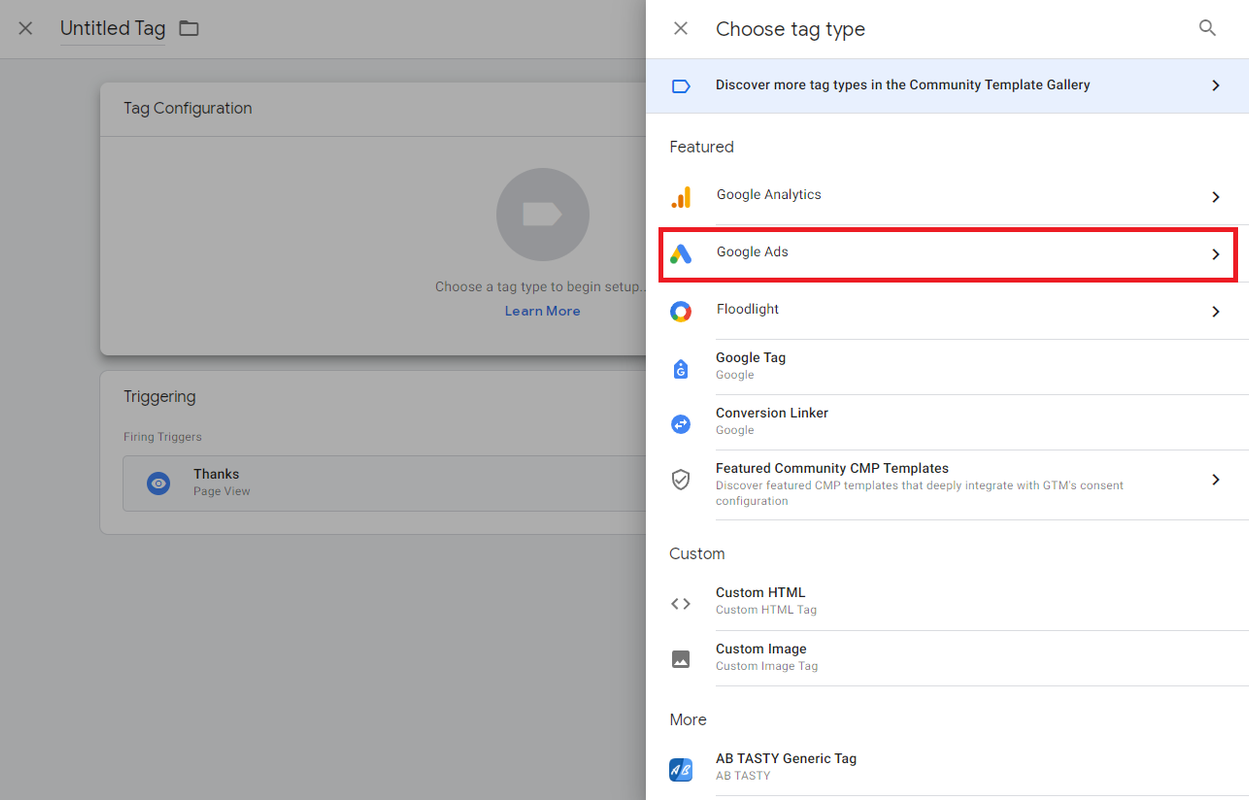
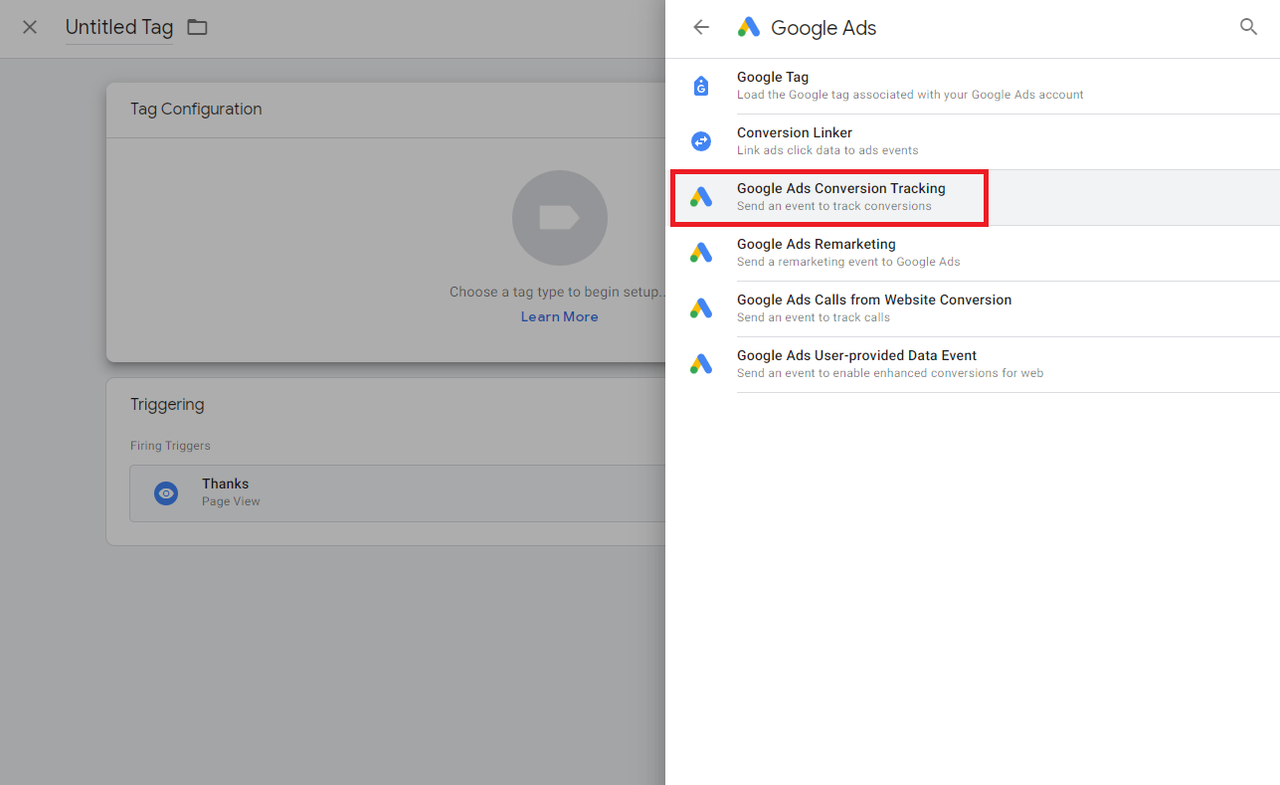
- Select “Google Ads”
• Select “Google Ads Conversion Tracking.”
• Enter the “Conversion ID” and “Conversion Label” from your Google Ads conversion goal setup.
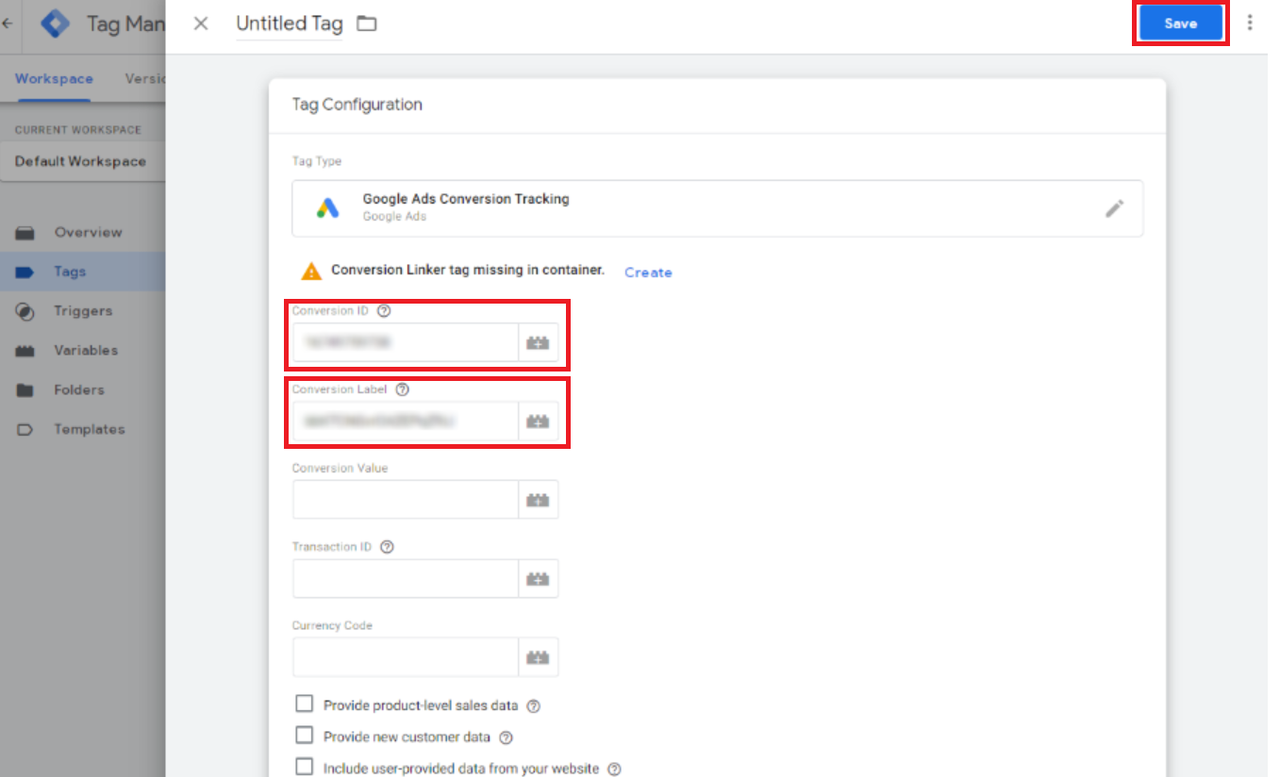
- Click “Save”
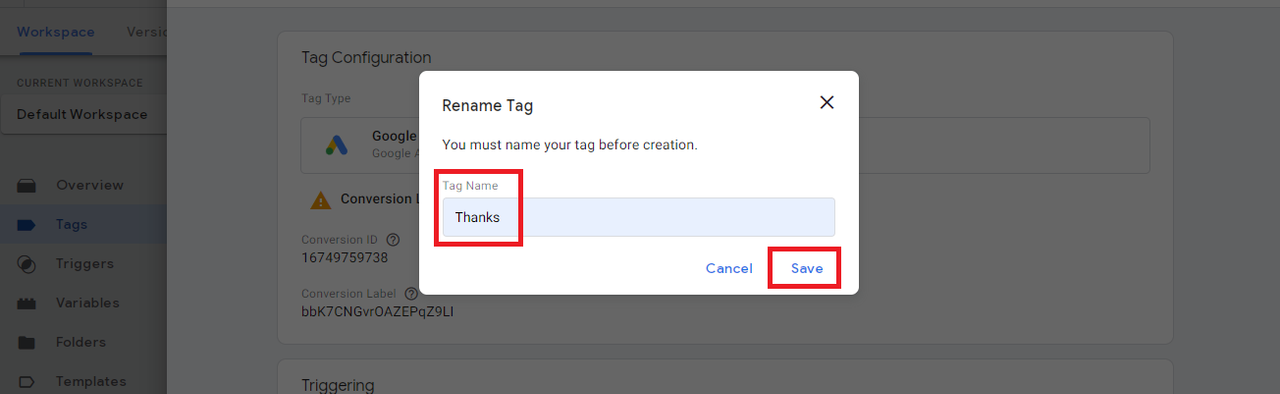
- Set the tag name to “Thanks”
- Click “Save” again
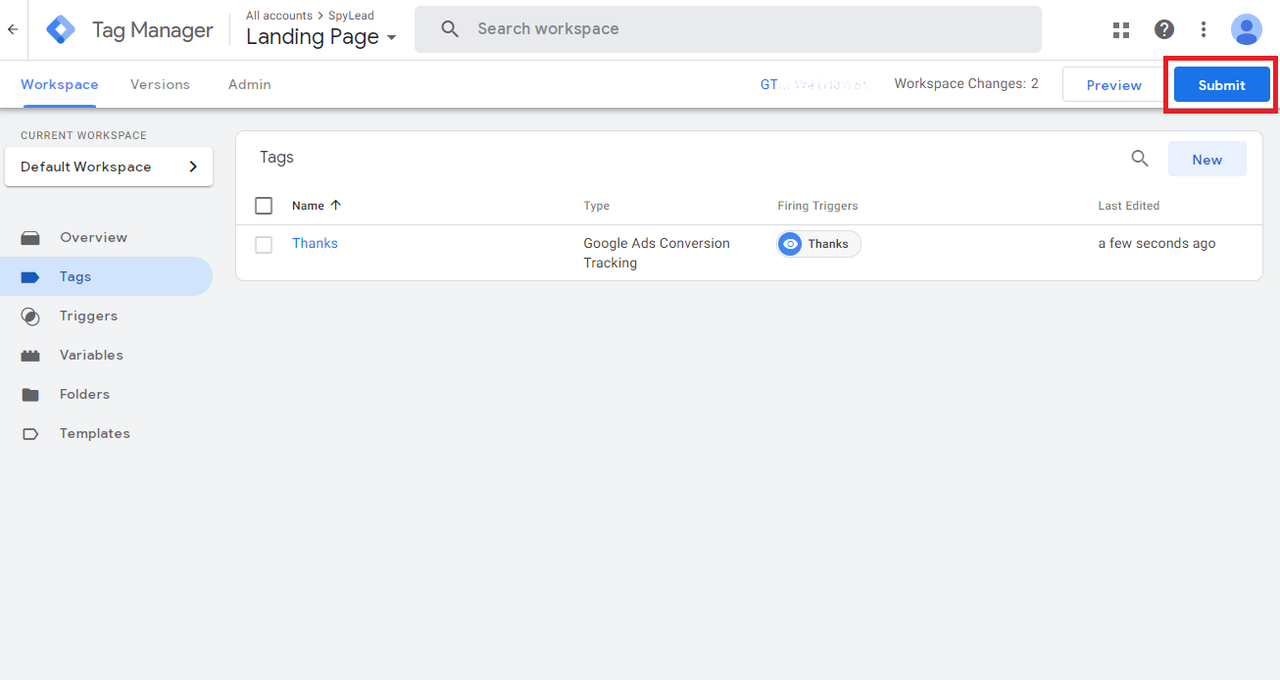
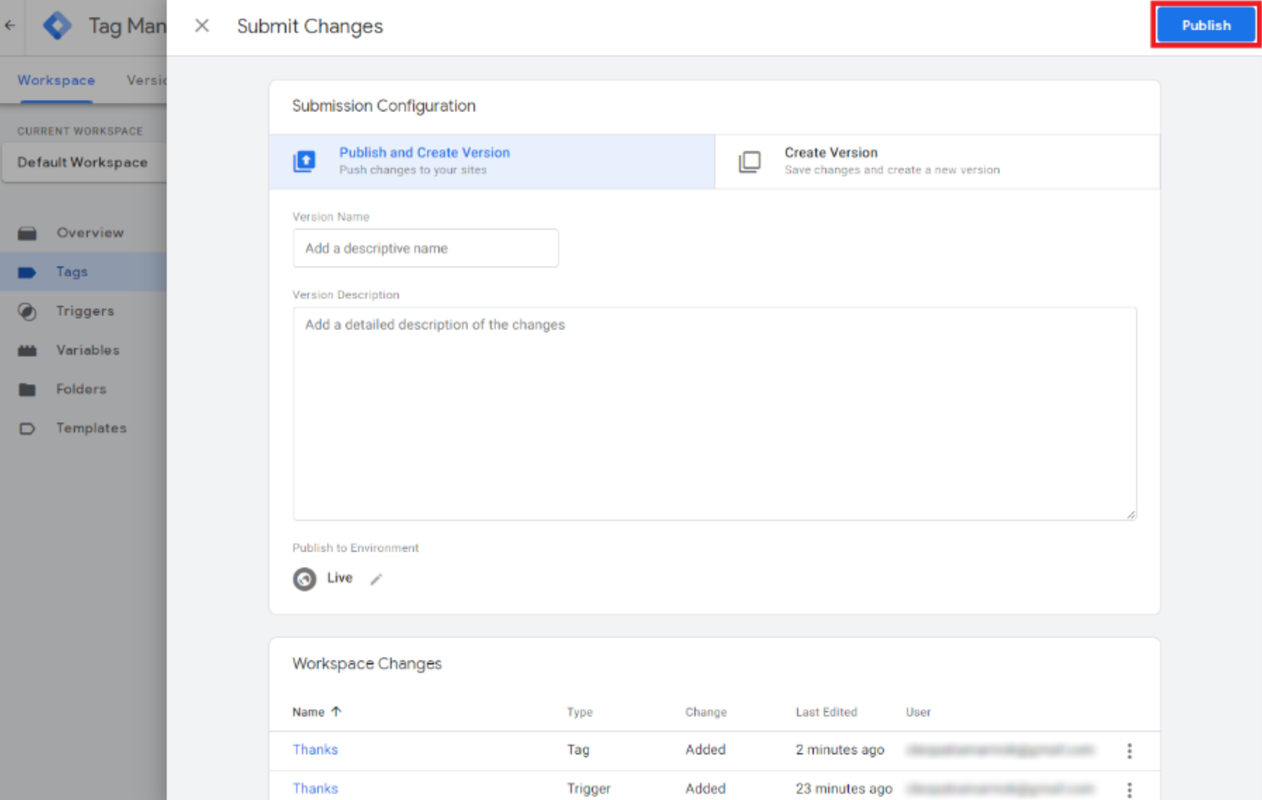
The configured tag appeared in the list. In order for it to be added to the site, it must be published.
- Click “Submit”
- Click “Publish”
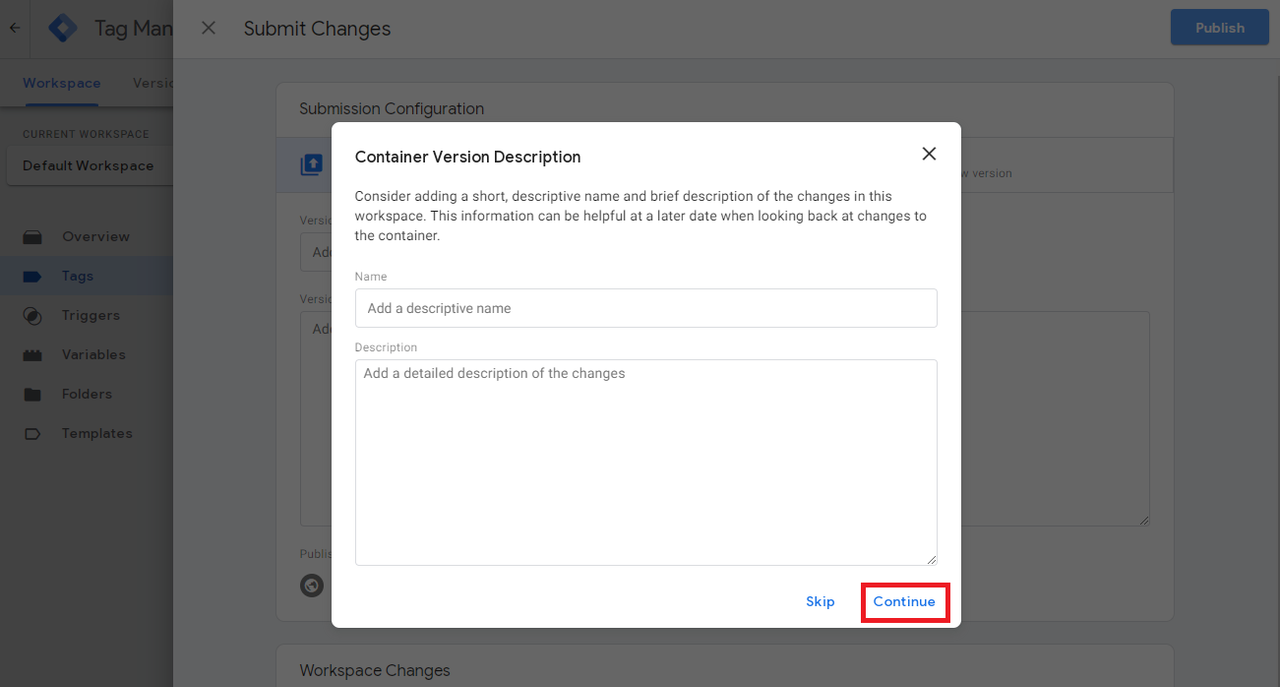
- Click “Continue”
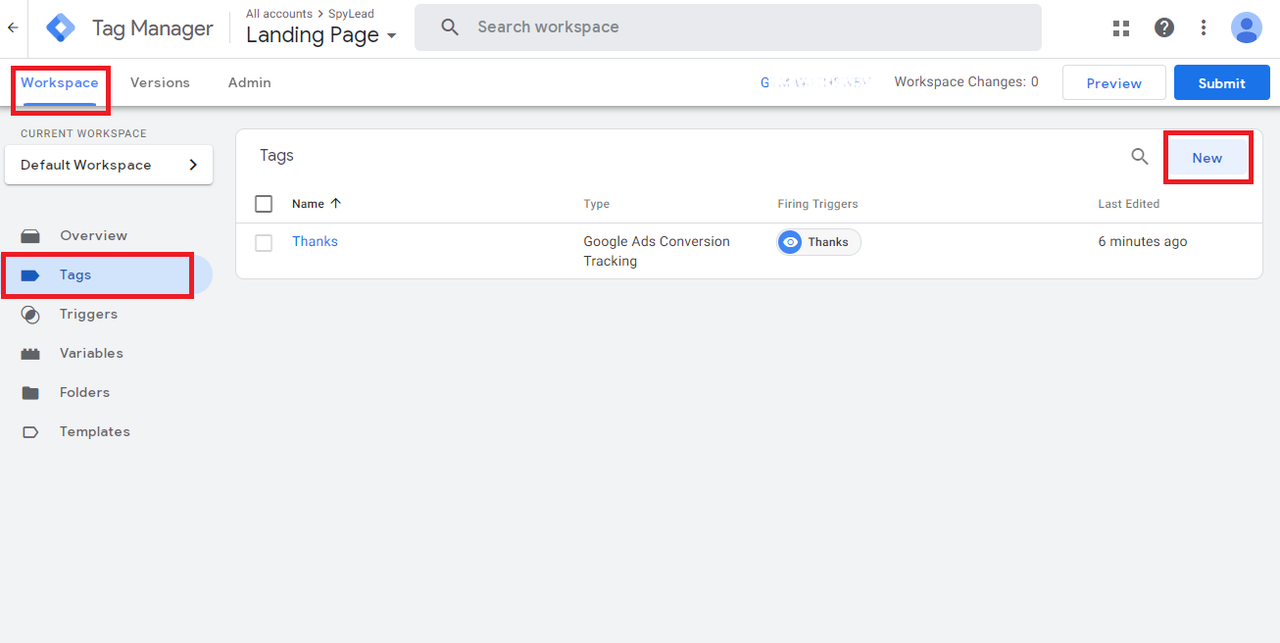
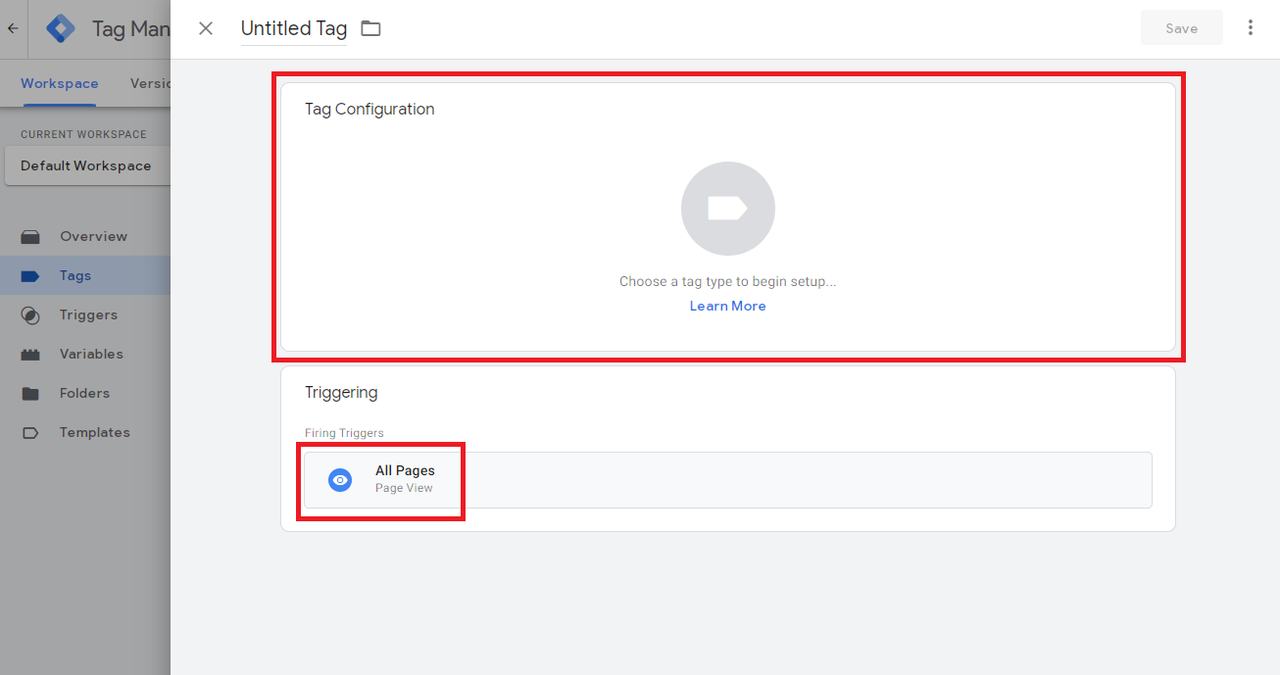
Now you definitely need to add 2 more tags: Conversion Linker and Google Tag. For this:
- Go back to “Workspace”
- Select “Tags”
- Click “New”
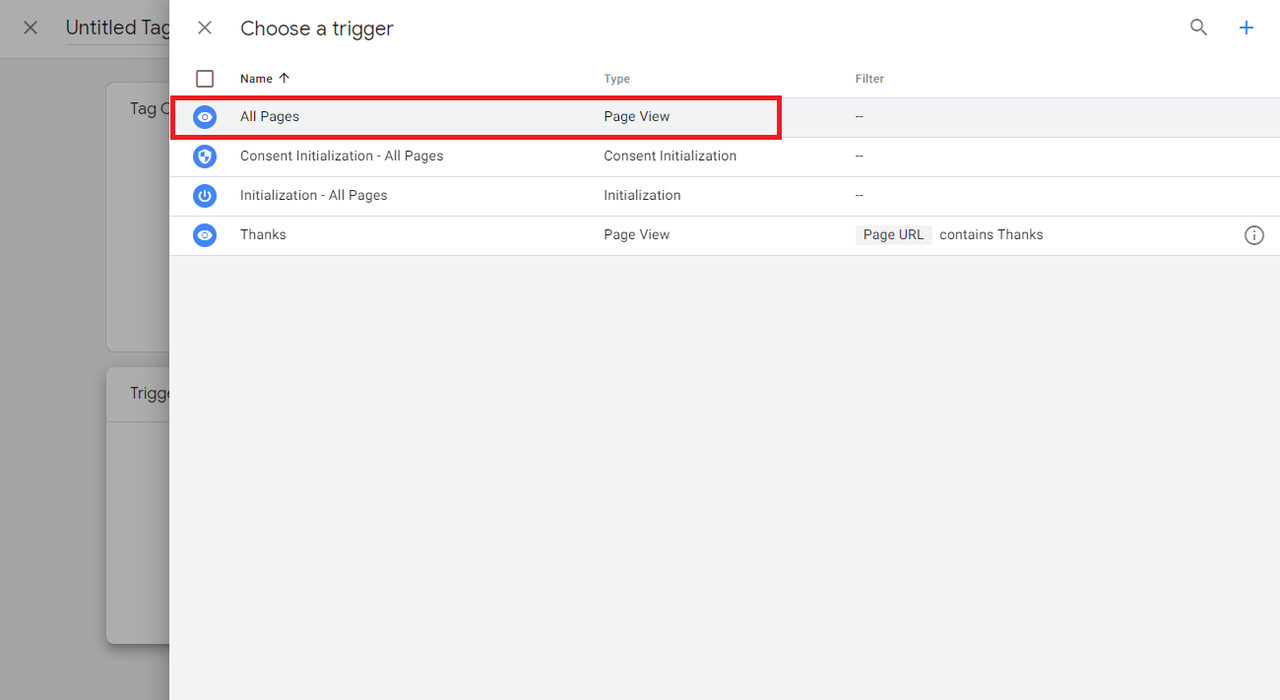
- Select the “All pages” trigger from the list
- Click on the “Tag Configuration” block
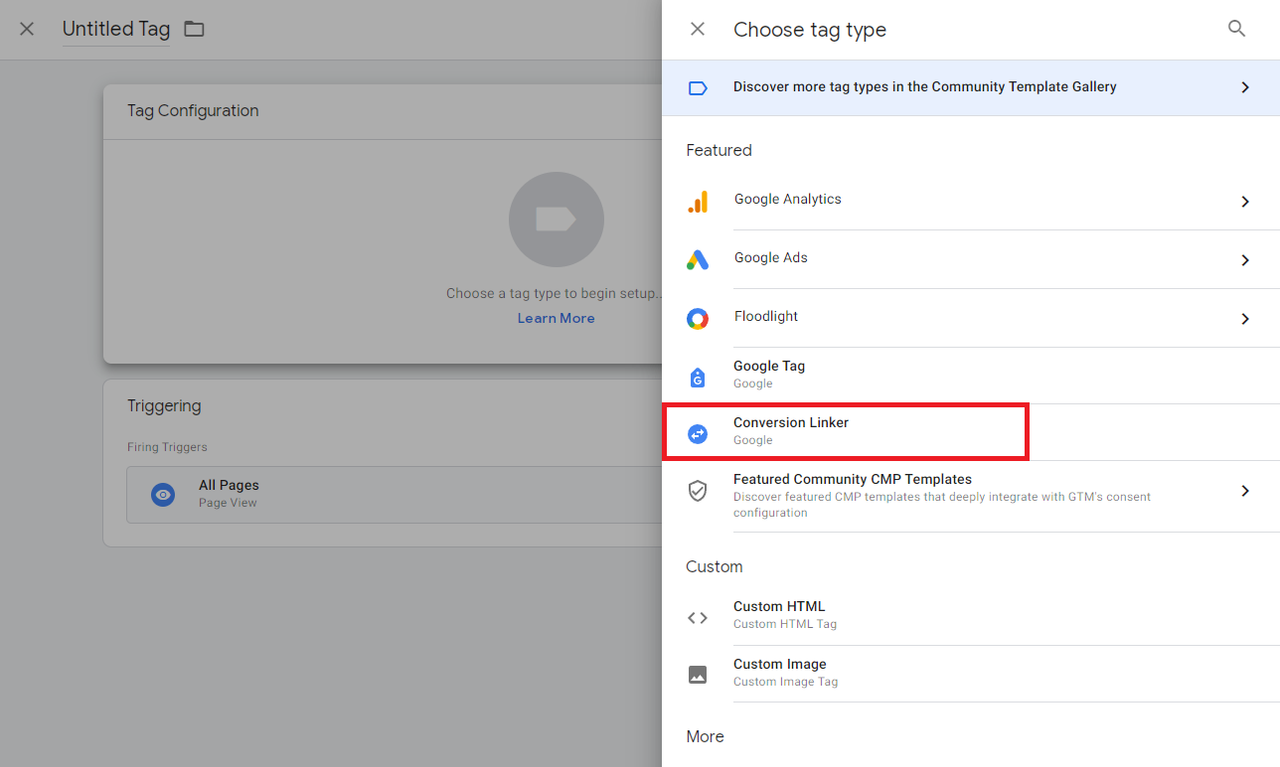
- Select “Conversion Linker”
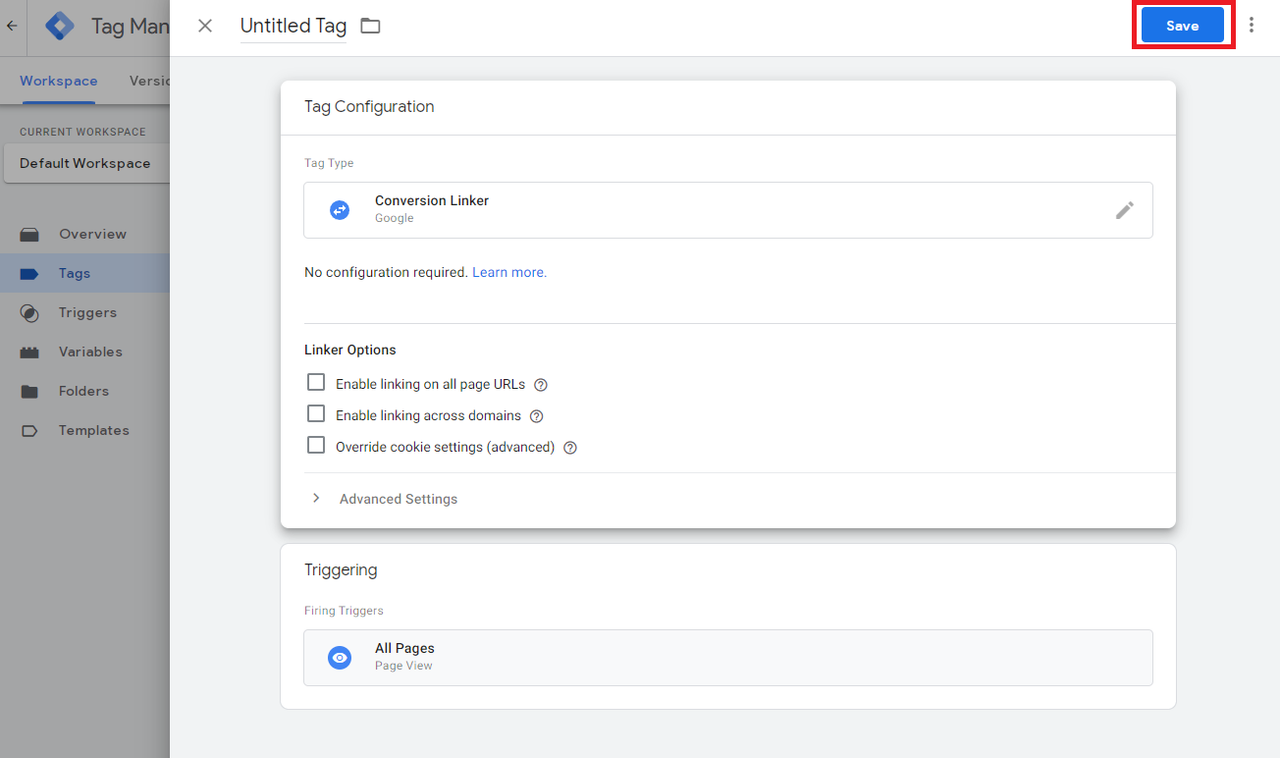
- Click “Save”
- You can leave the name by default
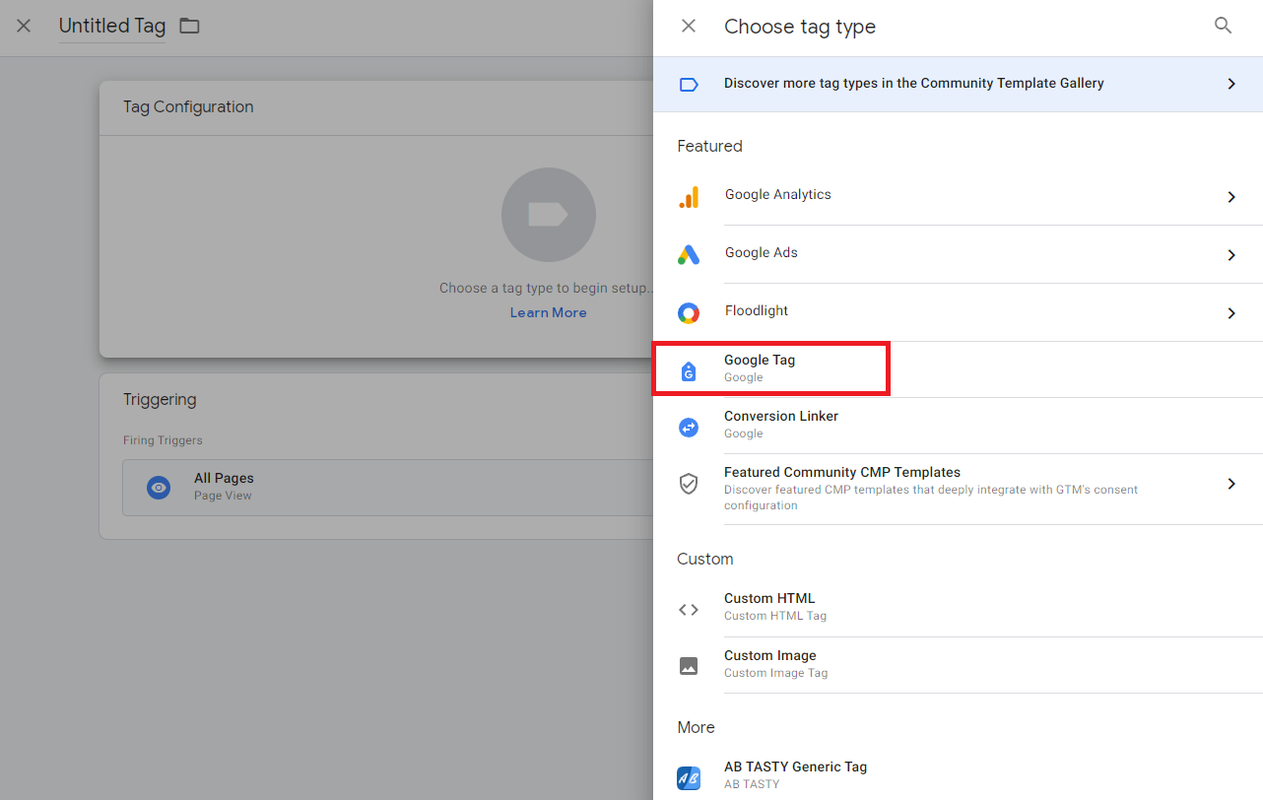
The “Google Tag” is added in a similar way
- Click “New”
- The trigger is also “All Pages”
- “Tag configuration“ select "Google Tag”
- In the “Tag ID” field, you need to register the tag id of your account and save it:
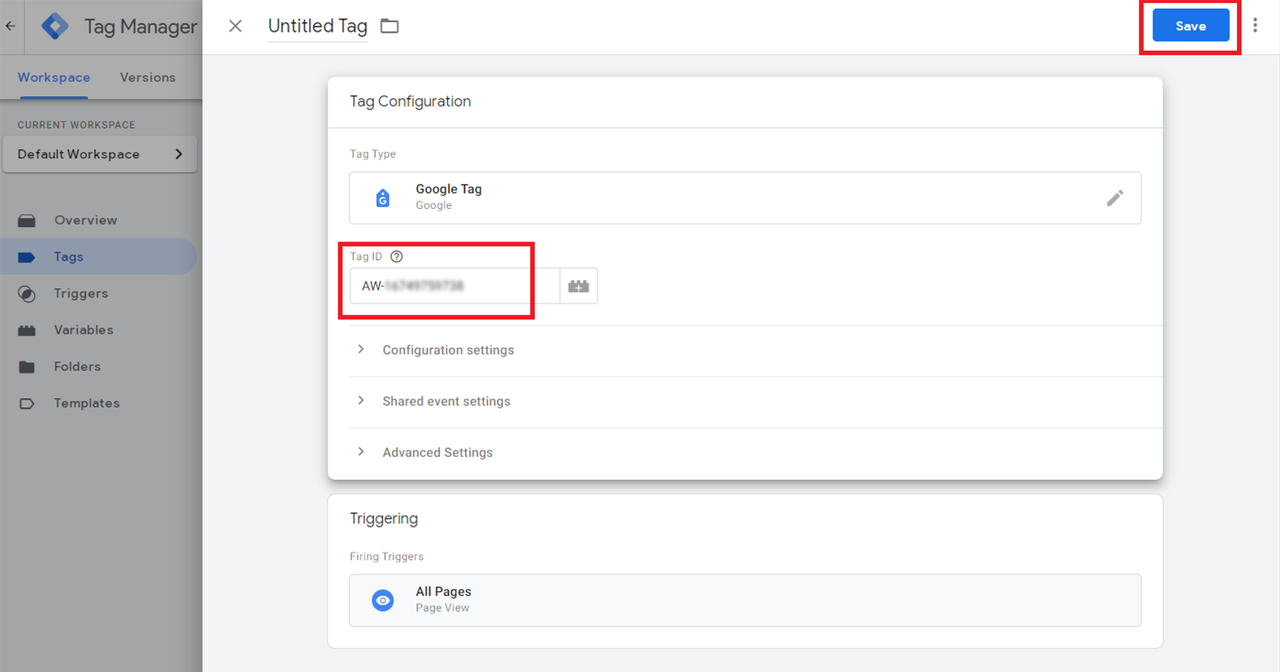
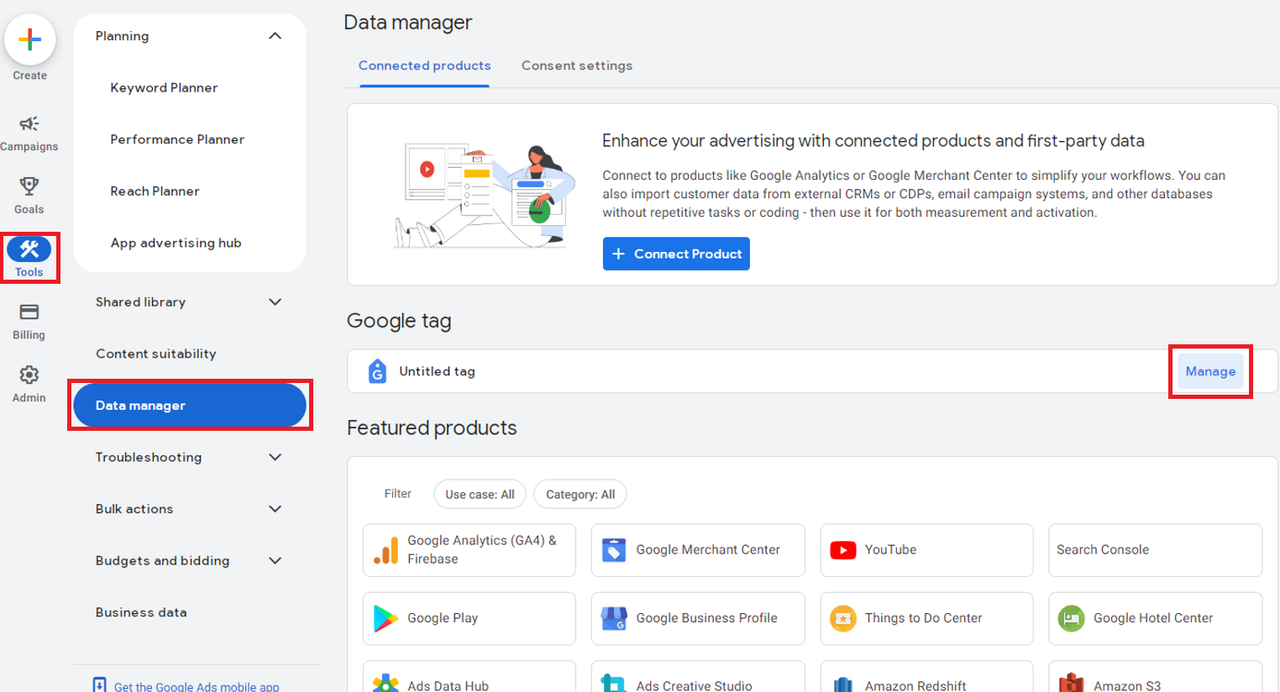
You can find the Tag ID in Google Ads on the Tools->Data manager page by clicking “Manage” next to the corresponding item:
As a result, we have 3 customized tags. You need to publish them again by clicking “Submit” and “Publish".
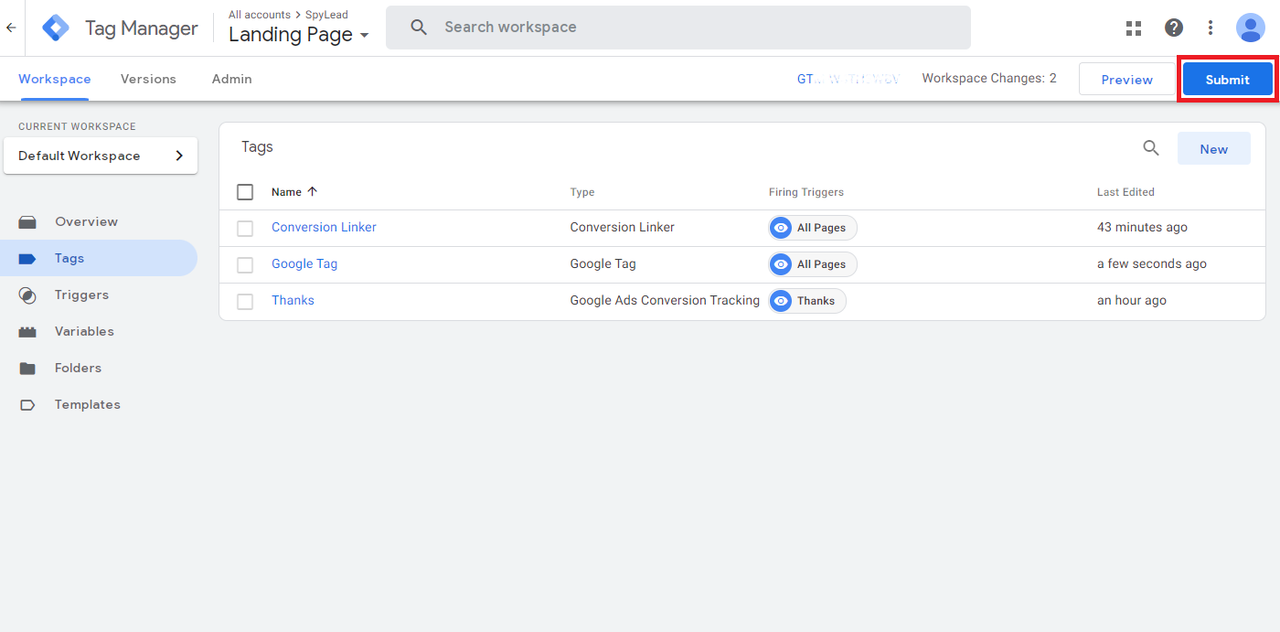
Checking the correct tag settings
There is also a “Preview” button with which you can open the site and check the functionality of the tags.- Click on “Preview”
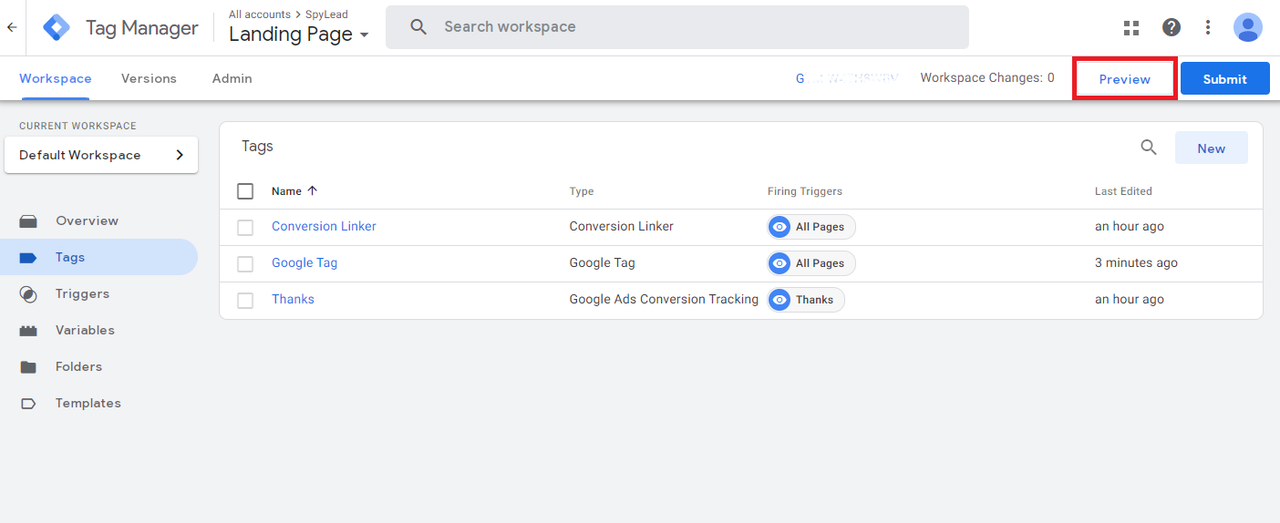
- Enter the website address and click “Connect”
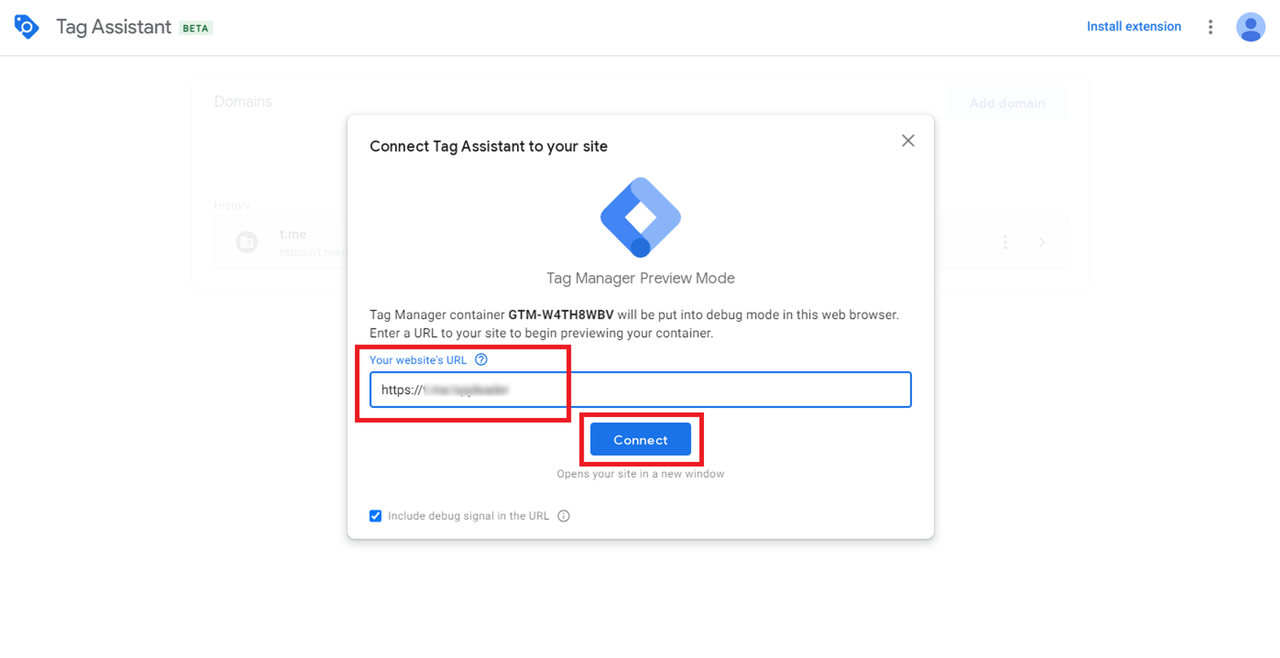
After that, a website opens in a new window where we can perform a targeted action and get to the “Thank You" page.
We return to the test window and if everything was configured correctly, we will see our tags in the “Tags Fired” block. Tags that did not fire will be in “Tags Not Fired".

Optimizing for Conversions in Google Ads
Now, when creating a campaign in Google Ads, you can select the conversion goal set for the “Thanks” page. The system will then use this data to optimize bidding strategies and improve ad performance.This setup ensures precise conversion tracking and helps to increase the efficiency of your Google Ads campaigns.
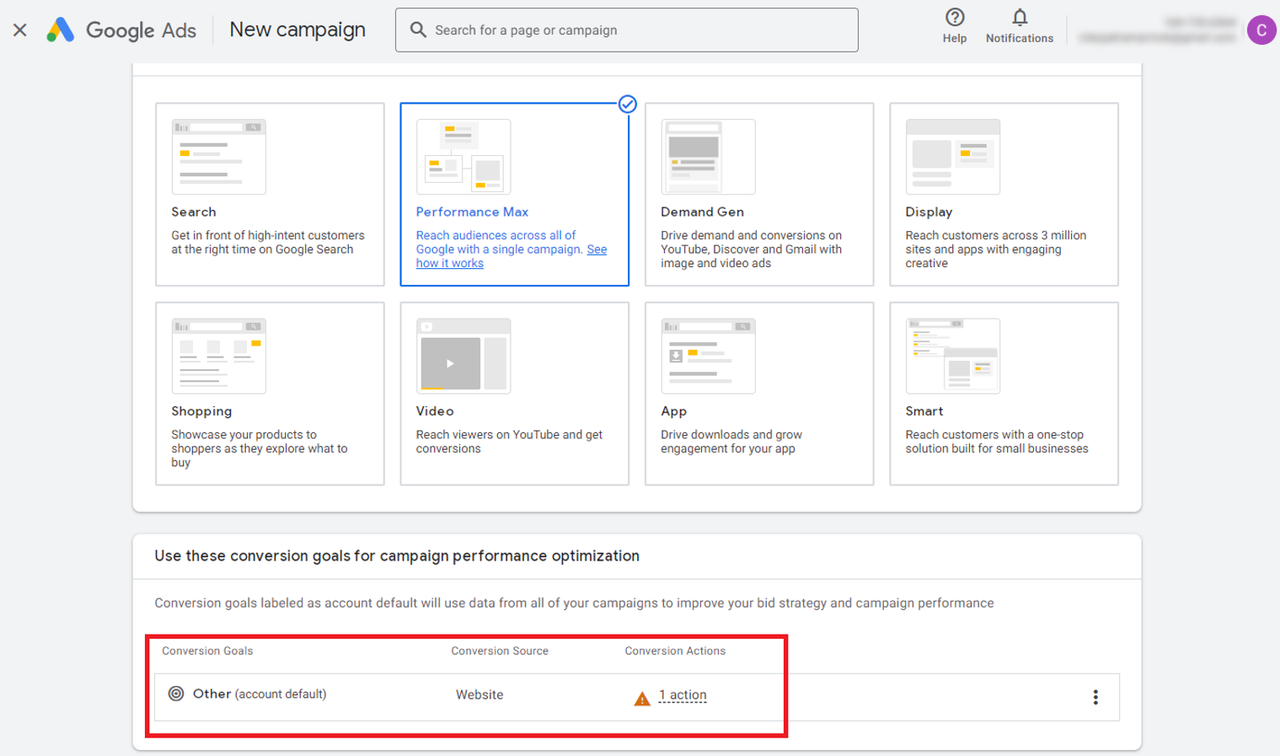
This setup ensures precise conversion tracking and helps to increase the efficiency of your Google Ads campaigns.