
- Nov 29, 2022
- 2,461
- 284
Step-by-Step Manual for Email Verification in Business Manager (Not to Be Confused with BM Verification)
Disclaimer: This material is for informational purposes only.
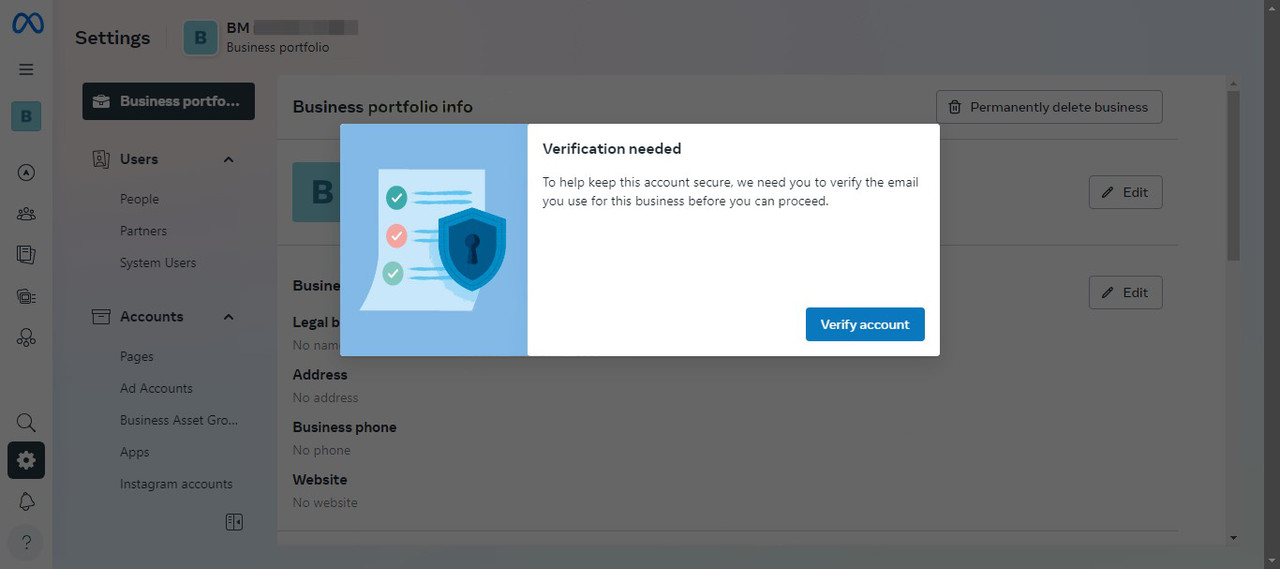
When you receive an email verification notification in Business Manager, it’s essential to have access to the email associated with the account. If you’ve lost access to it (e.g., a temporary email was used), follow this guide to replace the email and verify the new one.
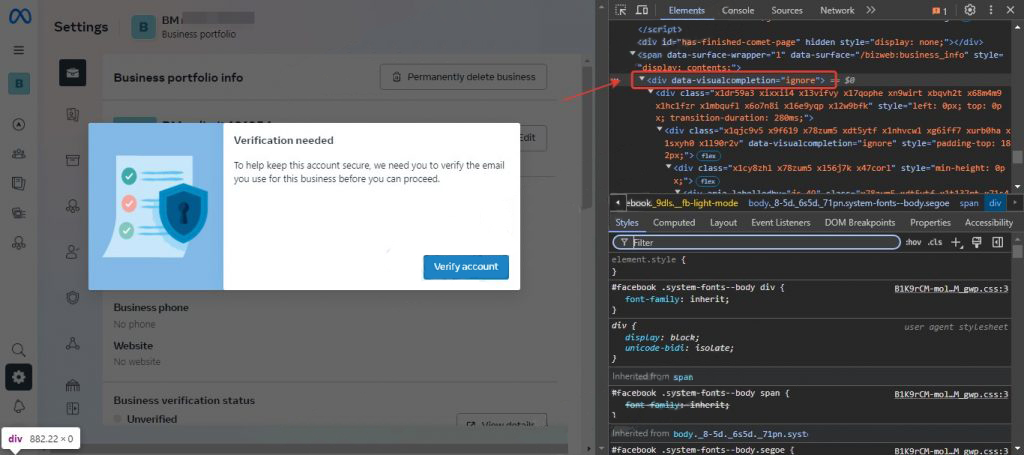
Removing the Verification Window Using Code
The email verification window prevents replacing the email. Here’s how to remove it:- Right-click anywhere on the screen and select “Inspect.”
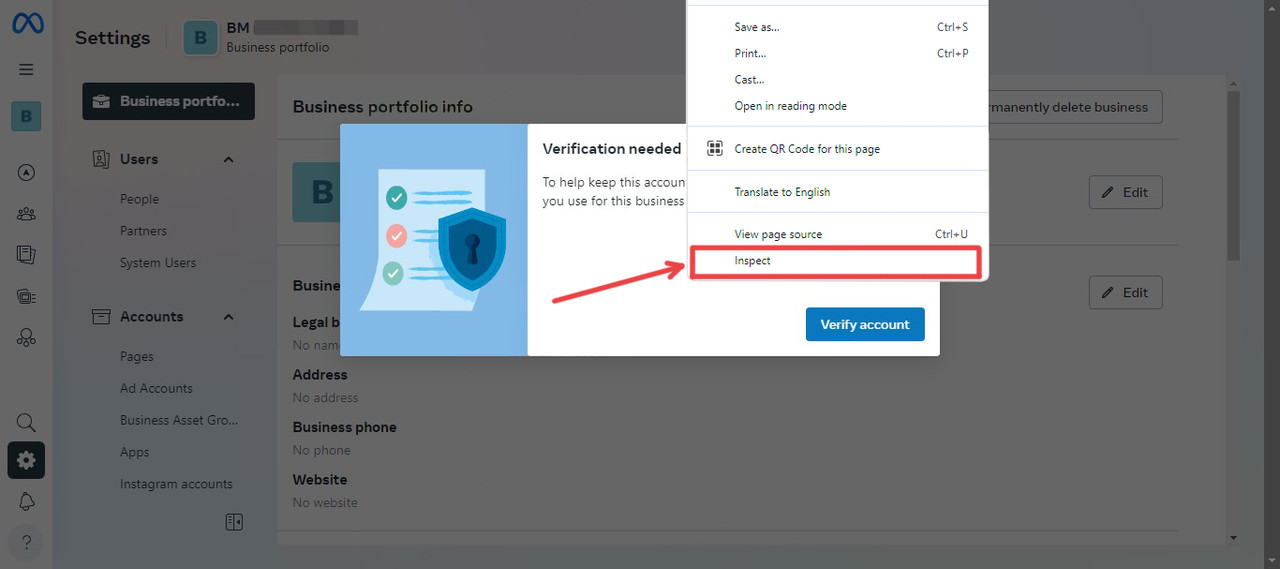
- Find the block <div data-visualcompletion="ignore">
- Right-click the block and select “Delete element” or press the Delete key on your keyboard.
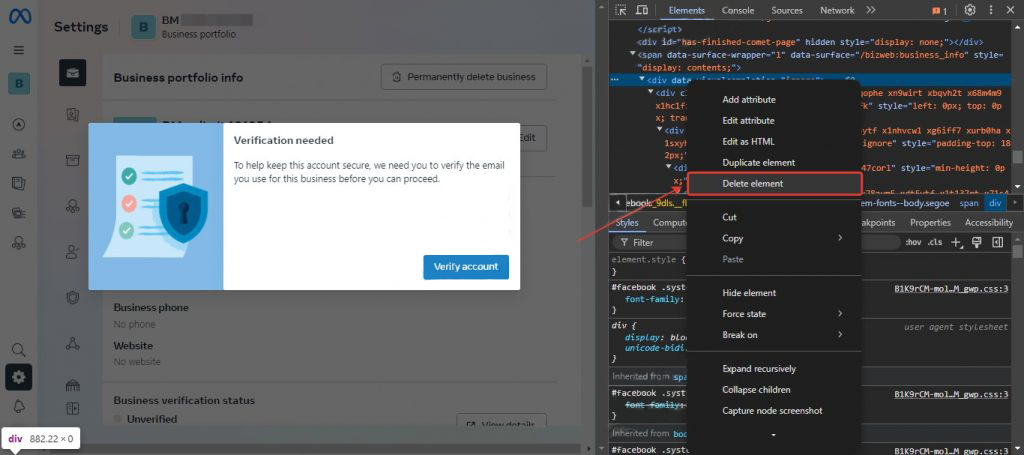
- Close the console after deleting the block.
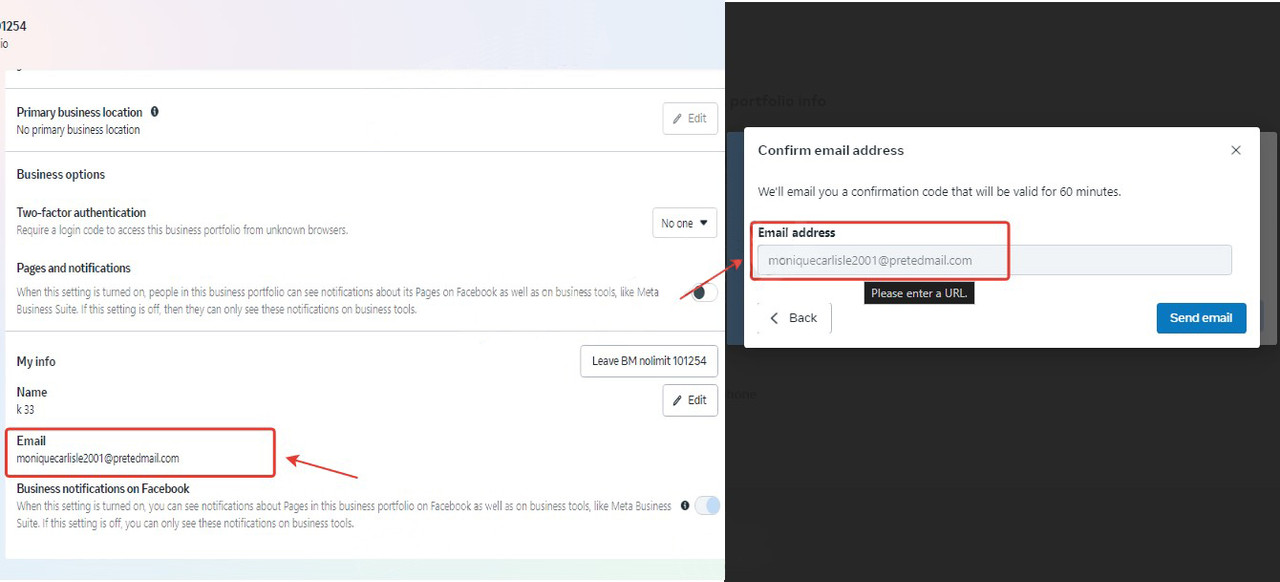
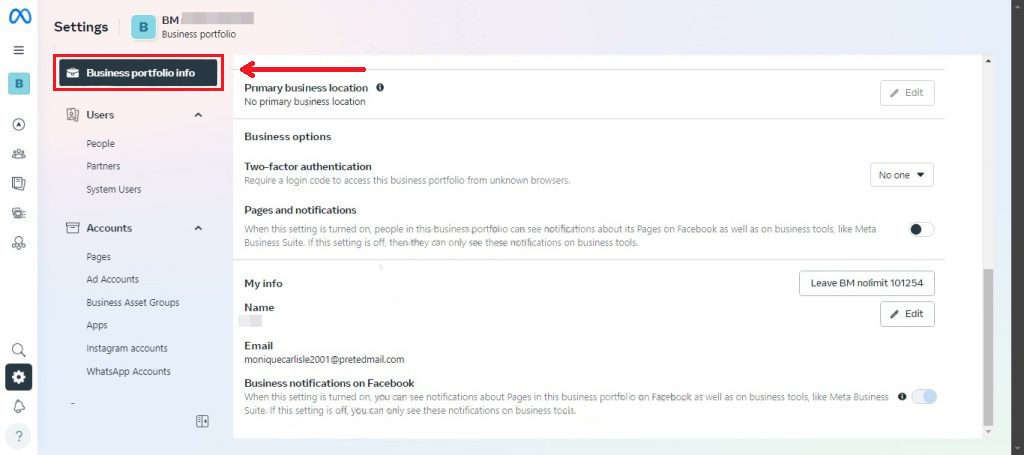
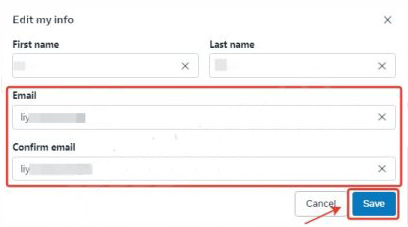
Changing the Email Address in Business Manager
- Navigate to the “Business Portfolio Info” section.
- Click “Edit” next to Email.
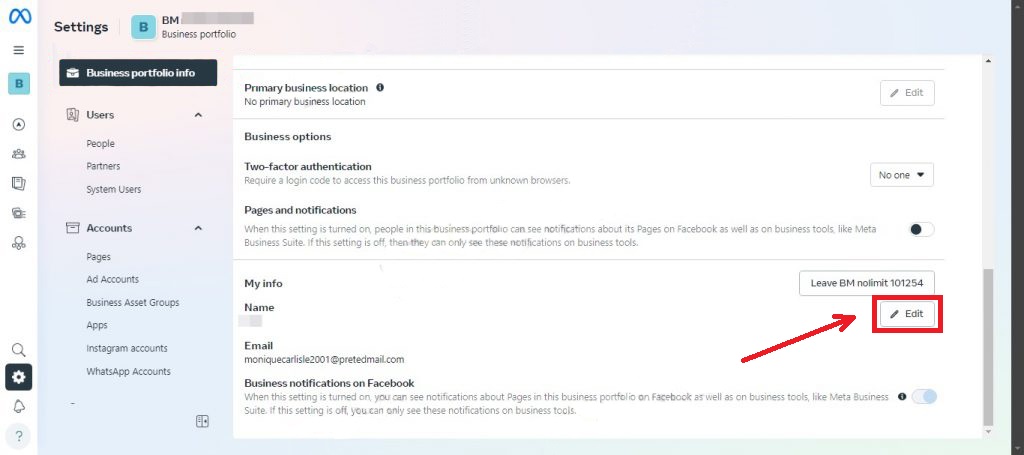
- Replace the email address with a new one and click “Save.
- Refresh the page and click “Verify Account.”

- The verification email will now be sent to the new email address associated with your account.
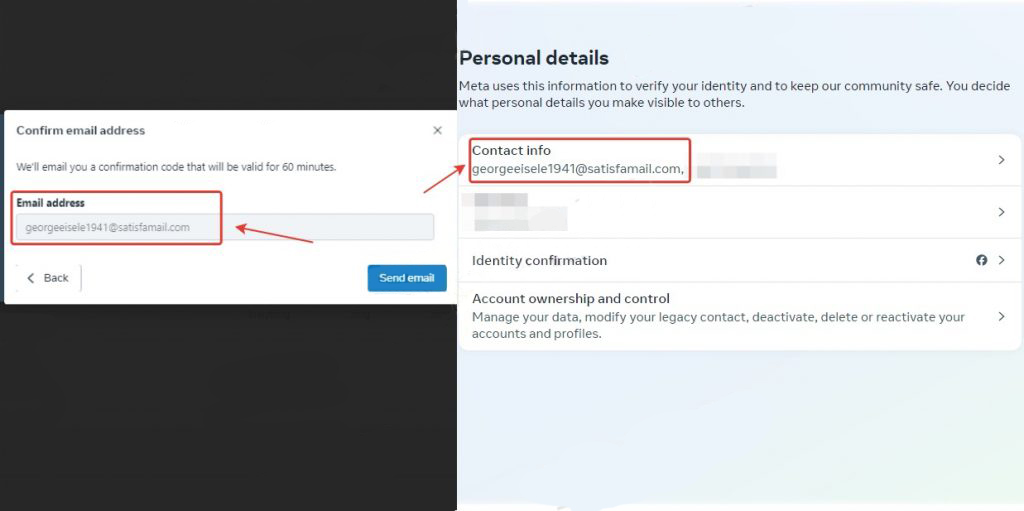
- Verification Process
- Access the email linked to your account.
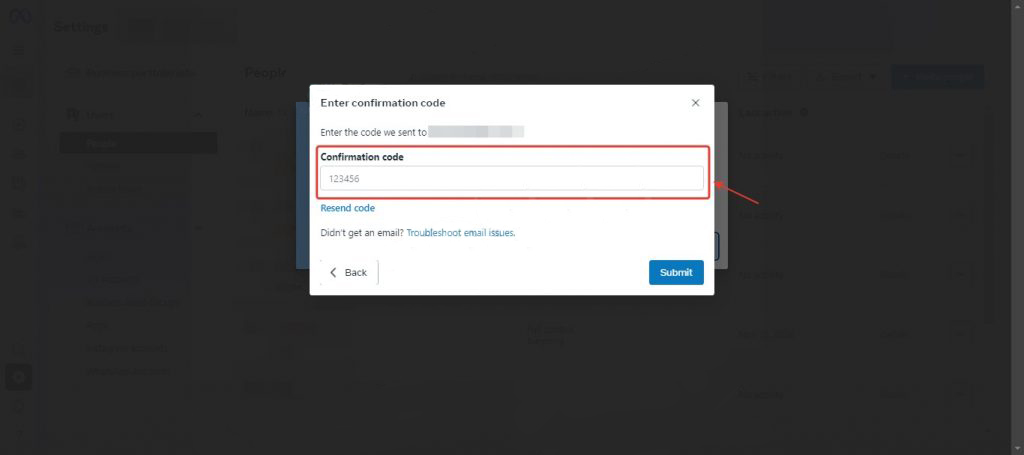
- Find the verification code sent by Facebook.
- Enter the code to verify the email.
Following these steps ensures the smooth transition and uninterrupted access to your Business Manager account by updating and verifying a new email address.