

Degen
Elite Member
- Apr 9, 2016
- 2,604
- 2,899
Due to all the recent Questions lately, here a quick guide to setup your domain properly before you start creating content and get stuck in the middle! ( < 30min to set up)
Changing Name server
The first first part of this guide is using Namesilo as name registrar and Aheadhost as hosting (it shouldn’t matter much, as most are the same anyway)
You’ve bought your site and hosting for your new domain.
First thing that needs to be done is change the nameserver to that of your hosting! (this will be changed LATER in the guide)!!
1. Locate your domain in your registrar account
2. Now click on ‘change nameserver’

3. Your hosting provider should’ve sent you a ‘welcome mail’ containing 2 nameservers for you.
4. Take those nameservers and copy/paste it in the registrar. (submit)
5. You will get a message that it will take 1-48 hours before it is in effect (usually it is within 5 minutes)
You have changed your nameserver to that of your hosting.
Check if it is connected by browsing to your site, if it has worked you will see a page with a folder with ‘cgi-bin’
Now we are going to setup some protecting for the site. We will be using Cloudflare for this.
Setting up Cloudflare
1. Log in to your Cloudflare account.(or create)
2. Click on Add site from the top navigation bar.
3. Enter your website’s root domain and then click Add Site. For example, if your website is www.example.com, type example.com.
4. Cloudflare attempts to automatically identify your DNS records. This process takes approximately 60 seconds to complete.
5. Click Next.
6. Slect “FREE plan’
7. Click Confirm

8. Click Continue.
9. Copy the 2 Cloudflare nameservers displayed and click Continue.
10. To finish domain setup and activate your domain on Cloudflare, change your name server to that of Cloudflare (Changing Name Server, step 4)
( an extra check below if you are unsure if it is setup correct or not)
https://checkforcloudflare.selesti.com/
Now we are done with changing Nameservers forever!!
SSL
Next thing we need to do is getting some encryption (SSL) for the site. (make sure you have Cpanel access, ALL BHW hosting providers give you access to Cpanel)
1. Go to https://www.sslforfree.com/
2. Enter your domain name
3. And follow their steps (it is easy )
4. Locate SSL/TLS in your Cpanel

5. Click on manage SSL sites
6. Copy the certificate that you’ve generated and paste it in the first box
7. Copy the Private key and paste it in the second box
8. Copy the Ca bundle and paste in the third box
9. Click on ‘Install certificate’
You site has now SSL the only problem is that everyone still goes to the unsecured URL.
Redirects and Compression!
1. Locate ‘File manager’

2. Inside File manager go in the folder ‘public_html’
3. Click on settings
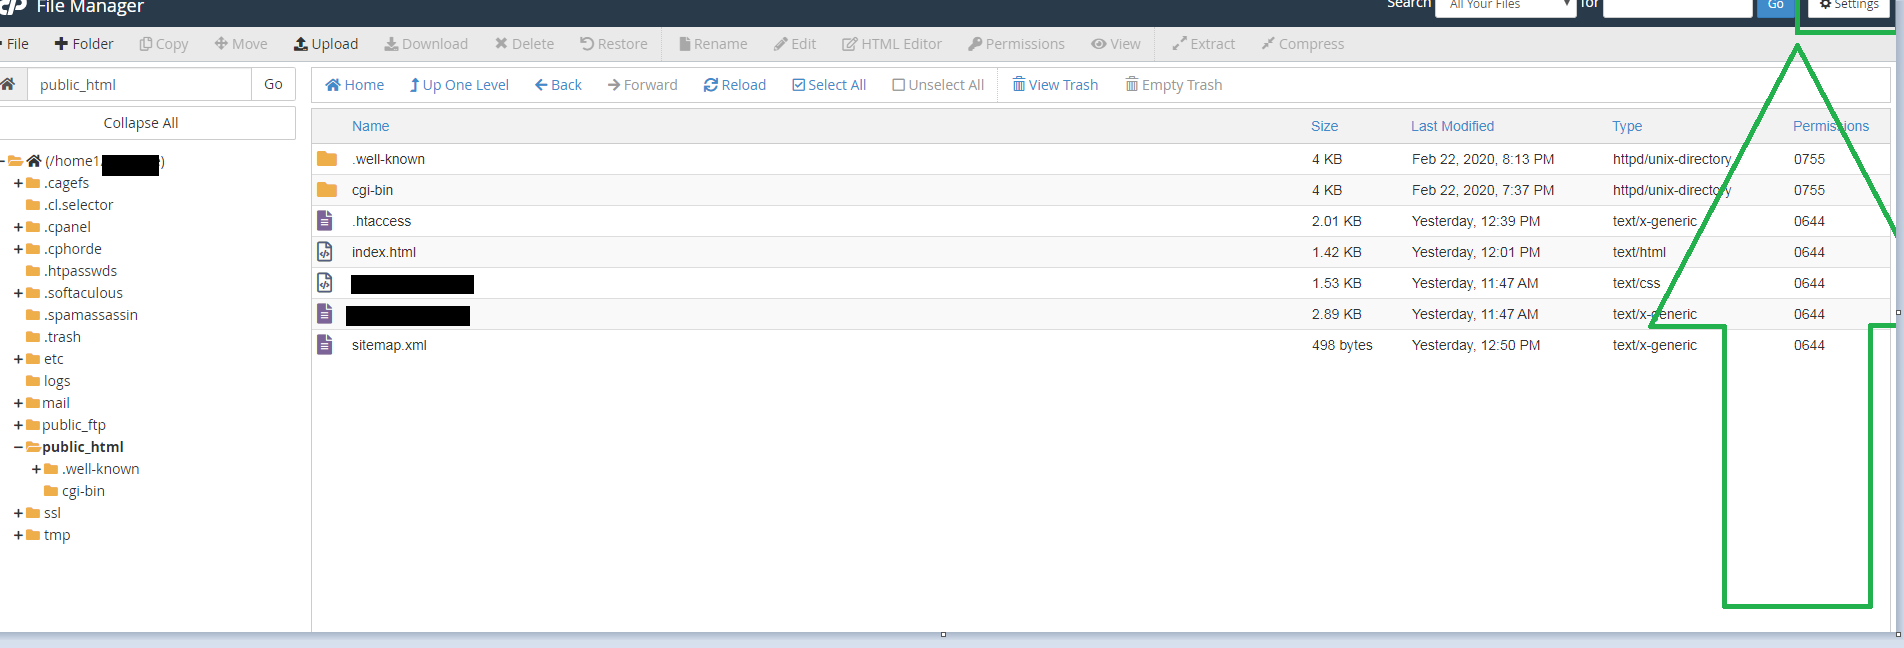
4. Show Hidden Files (dotfiles) and save
5. If you can see a .htaccess file you can skip the next step (proceed from 8 step)
6. Click on ‘file’

7. Name it ‘.htaccess’ and create new file
8. Select the file and click ‘edit’

Add the following codes to do different things
Force https, everyone now gets redirected to the secure site
Force NON – www for your site (I hate www as it is considered a subdomain)
And deflate everything (faster loading speed)

save your changes and you're done.
Wordpress users need a caching plugin (I have been using WP SUPER cache, but there are others which might suit your site better)
I am ready, I am done!
Changing Name server
The first first part of this guide is using Namesilo as name registrar and Aheadhost as hosting (it shouldn’t matter much, as most are the same anyway)
You’ve bought your site and hosting for your new domain.
First thing that needs to be done is change the nameserver to that of your hosting! (this will be changed LATER in the guide)!!
1. Locate your domain in your registrar account
2. Now click on ‘change nameserver’
3. Your hosting provider should’ve sent you a ‘welcome mail’ containing 2 nameservers for you.
4. Take those nameservers and copy/paste it in the registrar. (submit)
5. You will get a message that it will take 1-48 hours before it is in effect (usually it is within 5 minutes)
You have changed your nameserver to that of your hosting.
Check if it is connected by browsing to your site, if it has worked you will see a page with a folder with ‘cgi-bin’
Now we are going to setup some protecting for the site. We will be using Cloudflare for this.
Setting up Cloudflare
1. Log in to your Cloudflare account.(or create)
2. Click on Add site from the top navigation bar.
3. Enter your website’s root domain and then click Add Site. For example, if your website is www.example.com, type example.com.
4. Cloudflare attempts to automatically identify your DNS records. This process takes approximately 60 seconds to complete.
5. Click Next.
6. Slect “FREE plan’
7. Click Confirm
8. Click Continue.
9. Copy the 2 Cloudflare nameservers displayed and click Continue.
10. To finish domain setup and activate your domain on Cloudflare, change your name server to that of Cloudflare (Changing Name Server, step 4)
( an extra check below if you are unsure if it is setup correct or not)
https://checkforcloudflare.selesti.com/
Now we are done with changing Nameservers forever!!
SSL
Next thing we need to do is getting some encryption (SSL) for the site. (make sure you have Cpanel access, ALL BHW hosting providers give you access to Cpanel)
1. Go to https://www.sslforfree.com/
2. Enter your domain name
3. And follow their steps (it is easy )
4. Locate SSL/TLS in your Cpanel
5. Click on manage SSL sites
6. Copy the certificate that you’ve generated and paste it in the first box
7. Copy the Private key and paste it in the second box
8. Copy the Ca bundle and paste in the third box
9. Click on ‘Install certificate’
You site has now SSL the only problem is that everyone still goes to the unsecured URL.
Redirects and Compression!
1. Locate ‘File manager’
2. Inside File manager go in the folder ‘public_html’
3. Click on settings
4. Show Hidden Files (dotfiles) and save
5. If you can see a .htaccess file you can skip the next step (proceed from 8 step)
6. Click on ‘file’
7. Name it ‘.htaccess’ and create new file
8. Select the file and click ‘edit’
Add the following codes to do different things
Force https, everyone now gets redirected to the secure site
Code:
<IfModule mod_rewrite.c>
    RewriteEngine On
    RewriteCond %{HTTPS} off
    RewriteRule (.*) https://%{HTTP_HOST}%{REQUEST_URI} [R,L]
</IfModule>
Force NON – www for your site (I hate www as it is considered a subdomain)
Code:
#Force non-www:
RewriteEngine on
RewriteCond %{HTTP_HOST} ^www.example.com [NC]
RewriteRule ^(.*)$ http://example.com/$1 [L,R=301]
And deflate everything (faster loading speed)
Code:
<IfModule mod_deflate.c>
  # Compress HTML, CSS, JavaScript, Text, XML and fonts
  AddOutputFilterByType DEFLATE application/javascript
  AddOutputFilterByType DEFLATE application/rss+xml
  AddOutputFilterByType DEFLATE application/vnd.ms-fontobject
  AddOutputFilterByType DEFLATE application/x-font
  AddOutputFilterByType DEFLATE application/x-font-opentype
  AddOutputFilterByType DEFLATE application/x-font-otf
  AddOutputFilterByType DEFLATE application/x-font-truetype
  AddOutputFilterByType DEFLATE application/x-font-ttf
  AddOutputFilterByType DEFLATE application/x-javascript
  AddOutputFilterByType DEFLATE application/xhtml+xml
  AddOutputFilterByType DEFLATE application/xml
  AddOutputFilterByType DEFLATE font/opentype
  AddOutputFilterByType DEFLATE font/otf
  AddOutputFilterByType DEFLATE font/ttf
  AddOutputFilterByType DEFLATE image/svg+xml
  AddOutputFilterByType DEFLATE image/x-icon
  AddOutputFilterByType DEFLATE text/css
  AddOutputFilterByType DEFLATE text/html
  AddOutputFilterByType DEFLATE text/javascript
  AddOutputFilterByType DEFLATE text/plain
  AddOutputFilterByType DEFLATE text/xml

  # Remove browser bugs (only needed for really old browsers)
  BrowserMatch ^Mozilla/4 gzip-only-text/html
  BrowserMatch ^Mozilla/4\.0[678] no-gzip
  BrowserMatch \bMSIE !no-gzip !gzip-only-text/html
  Header append Vary User-Agent
</IfModule>
save your changes and you're done.
Wordpress users need a caching plugin (I have been using WP SUPER cache, but there are others which might suit your site better)
I am ready, I am done!