

- Jun 9, 2020
- 6,583
- 3,258
Hi,
I will be pretty straightforward about how you can get free hosting with Netlify for your website.
First of all, you need to install WordPress locally on your computer.
I would recommend bitnami for this
Download and install WordPress. (It will take a couple of minutes to install.)
After that, you need 3 plugins.
They will send you the download link in your email.
After downloading, upload and activate each plugin on your locally hosted website.
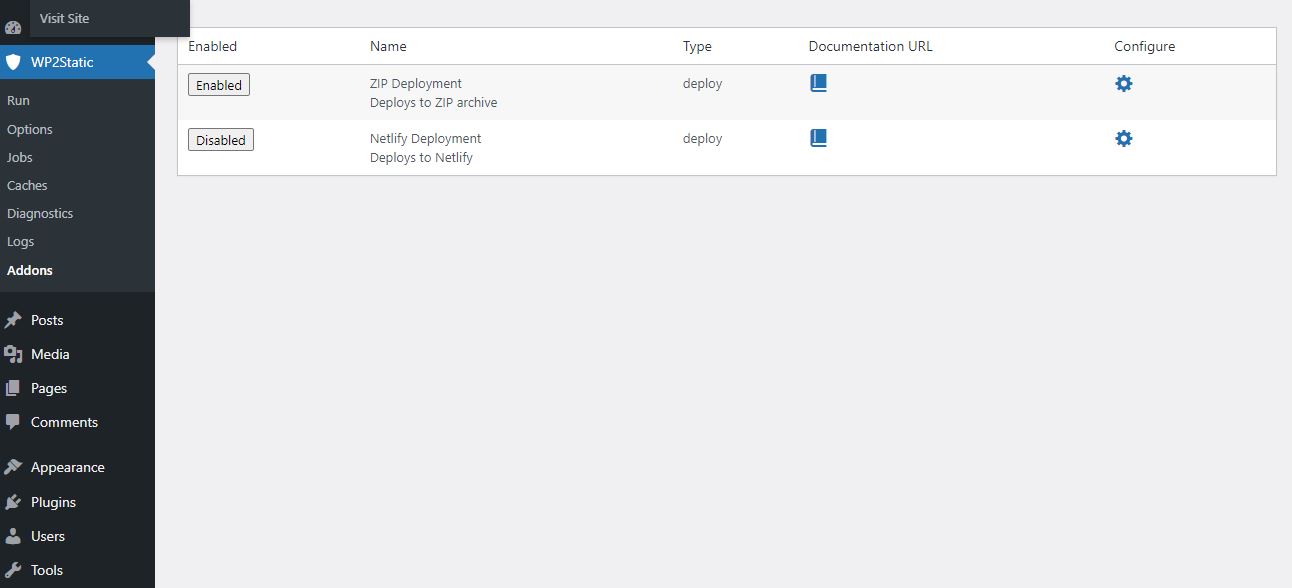
Now go to WP2static > addons, And enabled zip deployment.
Now go to run and generate static site.
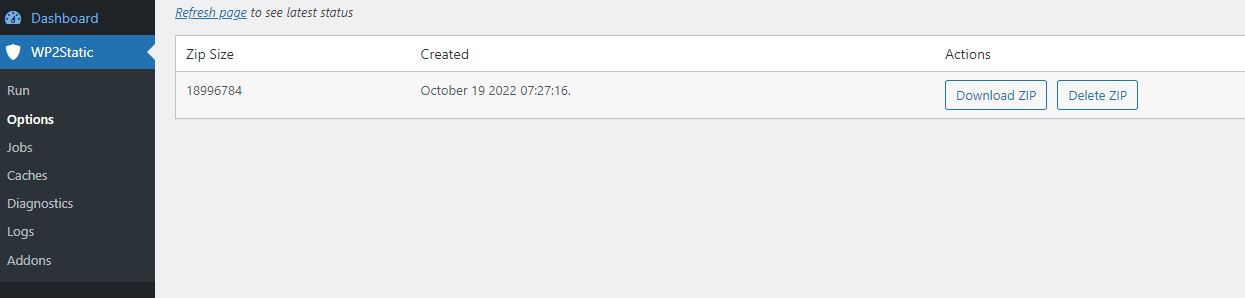
After generating the static site go back to addons. Now click on zip deployment confirguration button.
Download the zip file.
Now head to the https://www.netlify.com/. Create an account there.
Now drag and drop your zip file here
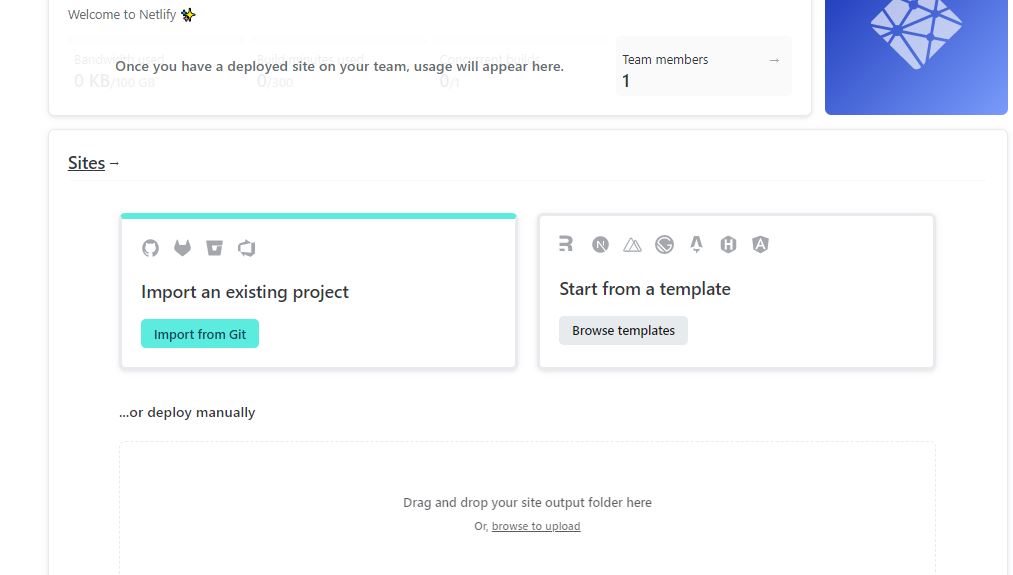
When its done it will show published like this.
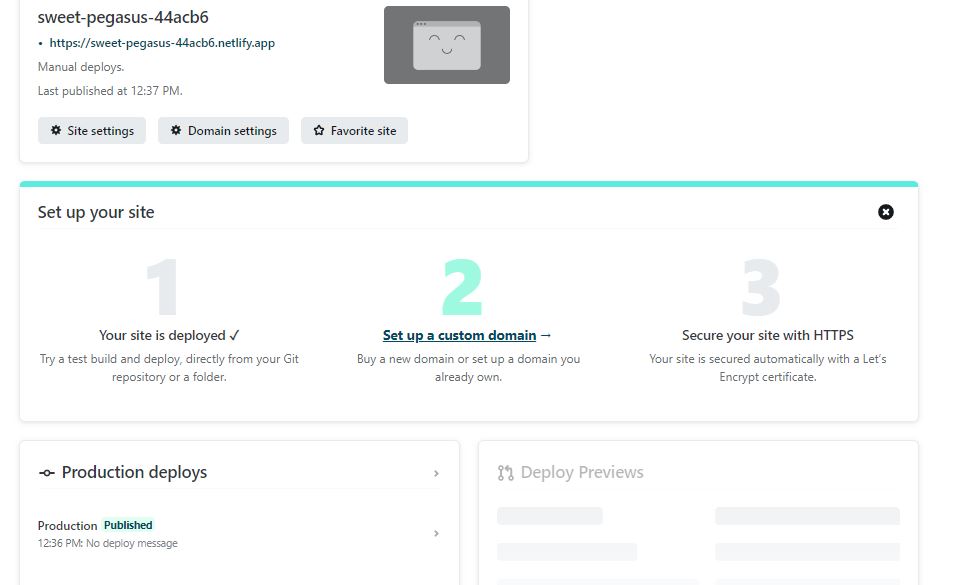
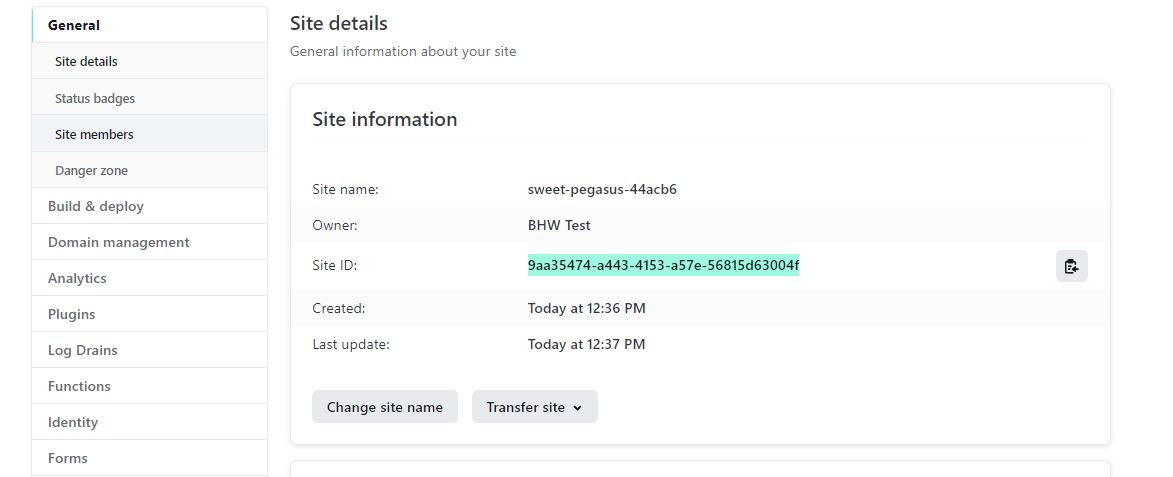
Now go to the site setting.
And copy your Site ID.
Now head back to your localhost domain.
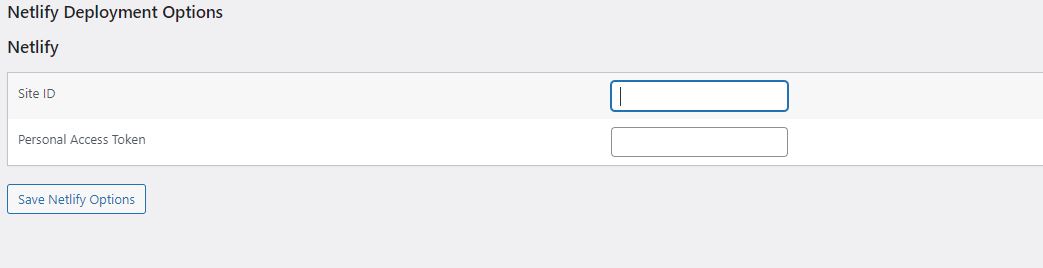
Wp2static < Addons < click on netilfy deployment configuration button.
Paste your site ID here.
Now we need personal access token too.
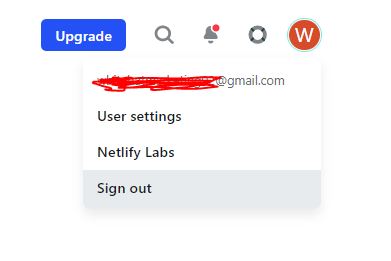
Now go back to netlify , click on user setting.
Click on applications from the left side bar. And click on personal access token.
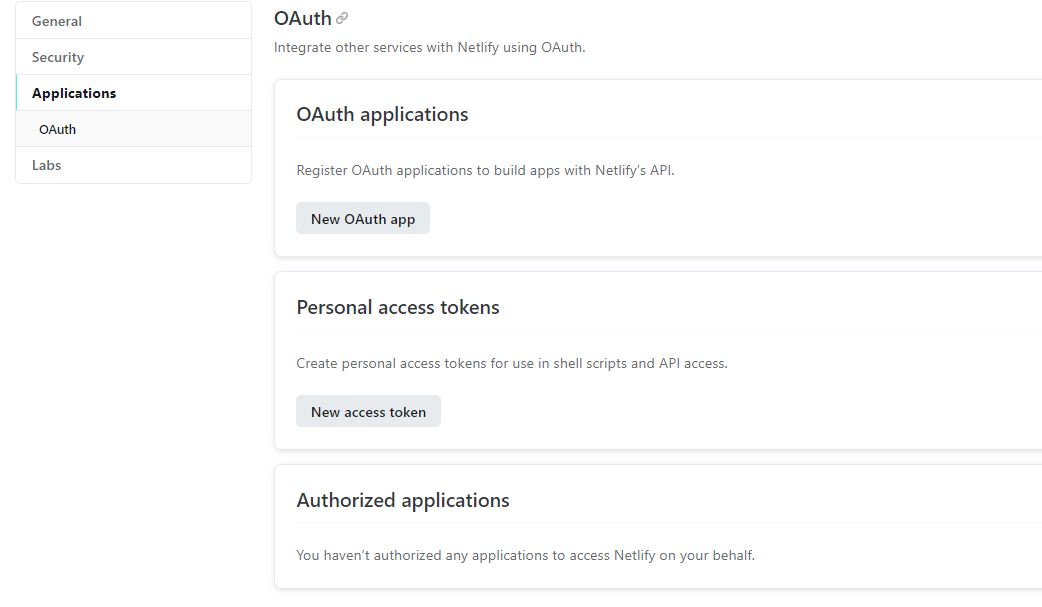
Give whatever name you want. And generate token.
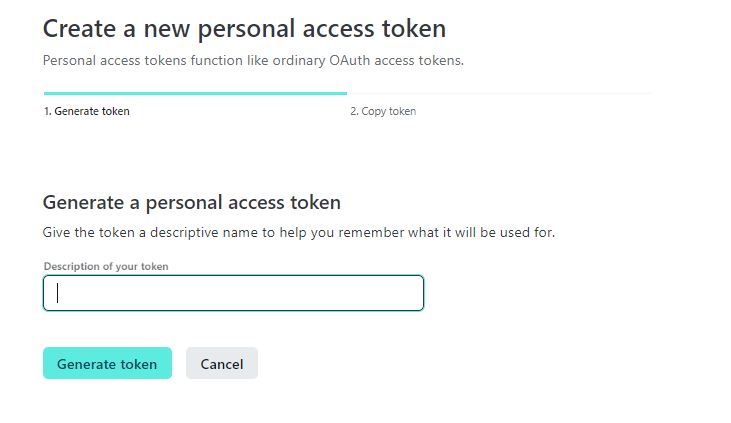
Copy that token and paste it below the Site ID.
Click save options.
Now go to wpstatic options and paste your netlify URL on Deployment URL.
Enabled Netlify Deployment from the addons.
Now go to run and generate static site.
Now deployment work is completed.
Now Set up your custom domain.
Verify your domain by adding Netlify DNS.
Then replace the netlify URL from the options with your domain.
And run again.
It would work.
Now you just have to run generate static site every time you make changes on your local host.
It is recommended not to use Elementor or any heavy plugin because it can create some technical issues.
I will be pretty straightforward about how you can get free hosting with Netlify for your website.
First of all, you need to install WordPress locally on your computer.
I would recommend bitnami for this
https://bitnami.com/stack/wordpressDownload and install WordPress. (It will take a couple of minutes to install.)
After that, you need 3 plugins.
- WP2Static
- WP2Static Add-on: Netlify Deployment
- WP2Static Add-on: Zip Deployment
https://wp2static.com/download/They will send you the download link in your email.
After downloading, upload and activate each plugin on your locally hosted website.
Now go to WP2static > addons, And enabled zip deployment.
Now go to run and generate static site.
After generating the static site go back to addons. Now click on zip deployment confirguration button.
Download the zip file.
Now head to the https://www.netlify.com/. Create an account there.
Now drag and drop your zip file here
When its done it will show published like this.
Now go to the site setting.
And copy your Site ID.
Now head back to your localhost domain.
Wp2static < Addons < click on netilfy deployment configuration button.
Paste your site ID here.
Now we need personal access token too.
Now go back to netlify , click on user setting.
Click on applications from the left side bar. And click on personal access token.
Give whatever name you want. And generate token.
Copy that token and paste it below the Site ID.
Click save options.
Now go to wpstatic options and paste your netlify URL on Deployment URL.
Enabled Netlify Deployment from the addons.
Now go to run and generate static site.
Now deployment work is completed.
Now Set up your custom domain.
Verify your domain by adding Netlify DNS.
Then replace the netlify URL from the options with your domain.
And run again.
It would work.
Now you just have to run generate static site every time you make changes on your local host.
It is recommended not to use Elementor or any heavy plugin because it can create some technical issues.


 They also offer a headless CMS.

