Emmanuel A
Junior Member
- Feb 19, 2018
- 118
- 47
A step-by-step guide to launching high-performance WordPress site on Google Cloud Platform (GCP) using WordPress.
When you start as a blogger or running a small business then shared hosting is fine as it cost less and no hosting skills required to install/setup/maintain the infrastructure platform.
However, when your traffic or user base increase then you need a robust hosting platform to serve millions of customer without slowing down the site.
There are some premium hosting providers for heavy traffic website, but that would easily cost $100+ per month.
Note: Kinsta recently announced starter plan starting at $30 per month which leverage GCP.
However, if you are ok to spend a little bit of time learning and doing by yourself, then you can think about VPS/Cloud servers.
In this article, I will explain how to get WordPress site running on Google Cloud Platform in less than 15 minutes.
This setup would cost around $25 per month and ready to serve 500,000 page views per month. Post setup, I will do a load test to verify the performance.
Prerequisite

In a few seconds, you will have the new instance ready.

Installing WordPress using WordOps
There are multiple ways to install WordPress, but one of the easiest ways is using WordOps
WordOps is a script wrapper which takes care of installing required components like a database, PHP, Nginx, WordPress, etc.
If you install them manually, then it may take longer and room for human errors.
It will take a minute or two and once done; you will be returned to the prompt
Finished processing dependencies for wo==3.9.1
Running post-install steps
Synchronizing wo database, please wait…
For WordOps (wo) auto completion, run the following command
source /etc/bash_completion.d/wo_auto.rc
Yay! WordOps (wo) installed/updated successfully
WordOps (wo) help: https://wordops.org/docs
Now it’s time to create a WordPress site. WordOps gives you an option if you want to install WordPress with caching plugins.
Currently, it supports WP Super, W3 Total, Nginx, Redis. I’ve tried all and Redisalways performed better for me.
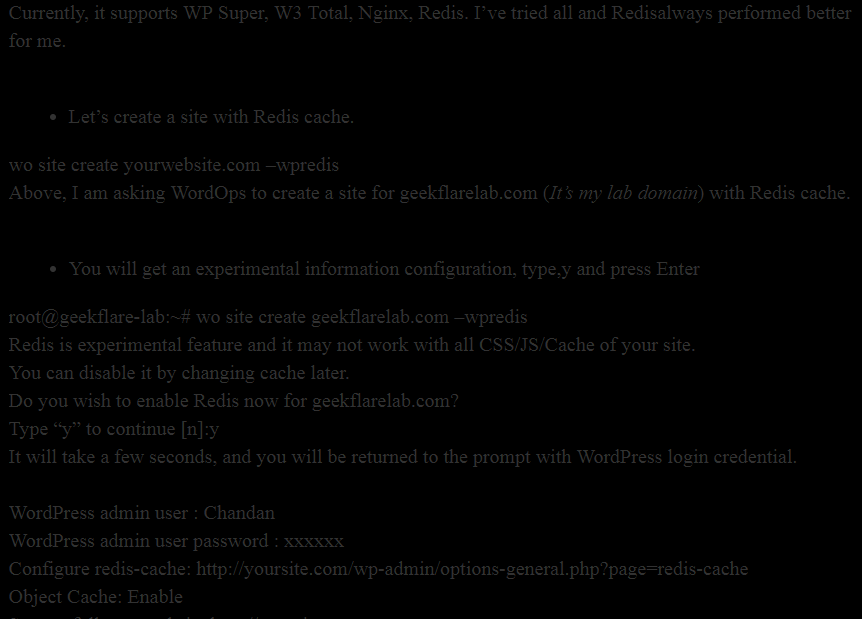
Above, I am asking WordOps to create a site for geekflarelab.com (It’s my lab domain) with Redis cache.
Redis is experimental feature and it may not work with all CSS/JS/Cache of your site.
You can disable it by changing cache later.
Do you wish to enable Redis now for geekflarelab.com?
Type “y” to continue [n]:y
It will take a few seconds, and you will be returned to the prompt with WordPress login credential.
WordPress admin user : Chandan
WordPress admin user password : xxxxxx
Configure redis-cache: http://yoursite.com/wp-admin/options-general.php?page=redis-cache
Object Cache: Enable
Successfully created site http://yoursite.com
root@geekflare-lab:~#
Getting Static IP
By default, Google Cloud assign an ephemeral IP to the instance which you don’t want to configure with the domain as it may change in next instance reboot.
To avoid the risk, we will reserve a static IP.


GCP VM is ready with the static external IP and WordPress, and the last thing to do is map domain to the static IP.
Update Domain A Record
Once domain A record is updated, you can access WordPress site with the domain you used with WordOps command. In my example – http://geekflarelab.com
Performing Load Test
Let’s see how newly setup WordPress site on Google Cloud Platform performs. Before doing a speed test, I will install a theme by Tagdiv as mentioned earlier.
This is not necessary but to ensure I have some post/media files to simulate real-site scenario.

So as you can see geekflarelab.com is ready on GCP.
There are multiple ways to perform benchmarking, and one of the easiest ways is to do from a cloud. I used Loader.io to put a load for 100 to 500 users for a one-minute duration, and the results are:
Average response time = 695 ms

I know this is a basic WordPress setup and require to install additional plugins, add security, SSL certificate, etc. in a production environment. But that would increase the load time by few percentages.
I hope this gives you an idea of how to set up WordPress on Google Cloud Platform to serve over 100 users concurrently per minute.
This requires a little bit of time to set up and skills, but if you would like to save $$ per month, then I believe it’s worth it.
Alternatively, if you don’t have time to set up or manage WordPress and at the same time want to enjoy Google Cloud, then you can try Cloudways managed hosting platform.
When you start as a blogger or running a small business then shared hosting is fine as it cost less and no hosting skills required to install/setup/maintain the infrastructure platform.
However, when your traffic or user base increase then you need a robust hosting platform to serve millions of customer without slowing down the site.
There are some premium hosting providers for heavy traffic website, but that would easily cost $100+ per month.
Note: Kinsta recently announced starter plan starting at $30 per month which leverage GCP.
However, if you are ok to spend a little bit of time learning and doing by yourself, then you can think about VPS/Cloud servers.
In this article, I will explain how to get WordPress site running on Google Cloud Platform in less than 15 minutes.
This setup would cost around $25 per month and ready to serve 500,000 page views per month. Post setup, I will do a load test to verify the performance.
Prerequisite
- I assume you already have a domain, if not you can buy from Namecheap or Google.
- Google cloud account with billing enabled
- Some WordPress theme but I will use Newspaper by Tag die
- Login to Google Cloud and go to Compute Engine >> VM Instances (direct link)
- Click “Create Instance” and enter the required information
- Select the zone (choose the nearest location of your targetted audience)
- Choose the machine type
- Change boot disk to Ubuntu 18.04 LTS and boot disk type to SSD persistent disk with 10 GB size
- Allow HTTP and HTTPS firewall and click Create
In a few seconds, you will have the new instance ready.
Installing WordPress using WordOps
There are multiple ways to install WordPress, but one of the easiest ways is using WordOps
WordOps is a script wrapper which takes care of installing required components like a database, PHP, Nginx, WordPress, etc.
If you install them manually, then it may take longer and room for human errors.
- Login to newly created Google Cloud VM and switch to root user
- Install WordOps with the below command
It will take a minute or two and once done; you will be returned to the prompt
Finished processing dependencies for wo==3.9.1
Running post-install steps
Synchronizing wo database, please wait…
For WordOps (wo) auto completion, run the following command
source /etc/bash_completion.d/wo_auto.rc
Yay! WordOps (wo) installed/updated successfully
WordOps (wo) help: https://wordops.org/docs
Now it’s time to create a WordPress site. WordOps gives you an option if you want to install WordPress with caching plugins.
Currently, it supports WP Super, W3 Total, Nginx, Redis. I’ve tried all and Redisalways performed better for me.
- Let’s create a site with Redis cache.
Above, I am asking WordOps to create a site for geekflarelab.com (It’s my lab domain) with Redis cache.
- You will get an experimental information configuration, type,y and press Enter
Redis is experimental feature and it may not work with all CSS/JS/Cache of your site.
You can disable it by changing cache later.
Do you wish to enable Redis now for geekflarelab.com?
Type “y” to continue [n]:y
It will take a few seconds, and you will be returned to the prompt with WordPress login credential.
WordPress admin user : Chandan
WordPress admin user password : xxxxxx
Configure redis-cache: http://yoursite.com/wp-admin/options-general.php?page=redis-cache
Object Cache: Enable
Successfully created site http://yoursite.com
root@geekflare-lab:~#
- Save the password in secure place.
Getting Static IP
By default, Google Cloud assign an ephemeral IP to the instance which you don’t want to configure with the domain as it may change in next instance reboot.
To avoid the risk, we will reserve a static IP.
- Go to VPC Network >> External IP addresses from the left navigation
- Drop-down Ephemeral type and select static
- Give the name and click RESERVE
- You will notice type is changed to Static
GCP VM is ready with the static external IP and WordPress, and the last thing to do is map domain to the static IP.
Update Domain A Record
- Go to a domain registrar
- Update the A record for your domain to the external IP you just reserved
Once domain A record is updated, you can access WordPress site with the domain you used with WordOps command. In my example – http://geekflarelab.com
Performing Load Test
Let’s see how newly setup WordPress site on Google Cloud Platform performs. Before doing a speed test, I will install a theme by Tagdiv as mentioned earlier.
This is not necessary but to ensure I have some post/media files to simulate real-site scenario.
So as you can see geekflarelab.com is ready on GCP.
There are multiple ways to perform benchmarking, and one of the easiest ways is to do from a cloud. I used Loader.io to put a load for 100 to 500 users for a one-minute duration, and the results are:
Average response time = 695 ms
I know this is a basic WordPress setup and require to install additional plugins, add security, SSL certificate, etc. in a production environment. But that would increase the load time by few percentages.
I hope this gives you an idea of how to set up WordPress on Google Cloud Platform to serve over 100 users concurrently per minute.
This requires a little bit of time to set up and skills, but if you would like to save $$ per month, then I believe it’s worth it.
Alternatively, if you don’t have time to set up or manage WordPress and at the same time want to enjoy Google Cloud, then you can try Cloudways managed hosting platform.