- Jan 17, 2015
- 5,263
- 4,956
There are numerous Catch-All platforms, but all I have to say is that it's true that they are kind of affordable but they have never been reliable for me. Their practices are not great and since they have to share domains with multiple subdomains across multiple users, you end having banned domains and you will not notice that there is a huge drop in your statistics and it's very difficult to identify the cause, until you notice that it's the catchall domain that is not receiving the verification emails or whatever.

So why not setting your system, given how affordable and easy it is, and you will be in full control of everything (you can ditch the domains that are having a bad rate of verification and buy new ones, and you will always be sure that you are not receiving recycled domains for example).
1. Multiple domains: You can choose the cheaper domain if you like, from .pro to .com offers. This is going to be an evergreen guide, so I cannot tell you which will be the cheapest at any time, but for the example, I'm going to be using Spaceship.com with a regular .com domain. A .pro domain costs, for example, $2.24 in Spaceship right now, which is barely peanuts. You can buy like 5 of these domains and still be way cheaper than a classic 3-domain catch-all plan that most catch-all providers offer.
2. A Dedicated Email Server Provider: This is the most expensive part, there are zillions and you could even build yourself in any cheap 5 dollar VPS like Amazon AWS, Lightsail, Hetzner, Digital Ocean or whatever. Given that you are only going to receive emails, the risk of issues is virtually 0, only having to handle spam, which generally won't be a big issue since we will be buying new domains and the size of the hard disk is big enough to handle them if any. Typically, the problems with mail servers come when you deal with sending email because you have to configure a ton of things to avoid people hacking your system and sending from your server, or having your IP banned and being tagged in all anti-spam servers. Although, to simplify this guide, I'm going to use a Dedicated Pre-Made server, there are tons like Serverpronto, Mailcheap,... Even some CatchAll mail providers like CatchallBoxes.com offer pre-made super-expensive and limited email servers (5 domains only), when technically there should be no limitations on domains because this is not a limitation for the server, but for your Hard Disk quota. In this example I'm going to use Mailcheap, the cheapest cost $5 month, $60 year.
Just with these two things, say 10 .pro domains $23 + $60 = $83, you will have a +10 catchall domain solution for barely $7/mo, completely scalable and 100% under your control. And don't be fooled: effortless to configure and maintain. It could be slightly harder if you had to manage your own mail server, but still profitable and worthy given the control you have over it. So let's move into it.

1. First, we are going to buy the domain. I think this is an easy step for most in this forum.
2. After we have the domain, we have to buy the account in Mailcheap and configure the domain inside the control panel. Each Mail server will have their own docs, so follow the one they provide you. In the case of Mailcheap, they ask first to verify the domain with a TXT DNS.
Now it's time to decide which subdomain we are going to use. Technically, we can have infinite subdomains per domain.
For example. If our domain is example.com we can have this subdomain: great.example.com
So, in this case, the subdomain is great.
We can have more subdomains and to add them we only have to repeat the next steps PER subdomain
In this case, we are going to use great for the subdomain


You input the domain and then you copy the Verification code and go to your Domain registrar. In this case, I'm using the Spaceship Advanced DNS config system:

Then we select the TXT DNS
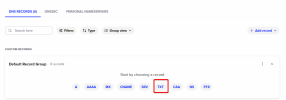
And here we set:
Host: the subdomain: great
Value the content we copied previously: The one like: nms-domain-verification=12315616516516
and then we Add

Note that we will be doing this A TON of times. To avoid having to copy each single time the exact same screenshots, understand the process:
A) First you select the type: TXT, MX, whatever
B) You put the data in Host, Value, Priority, etc. (I will tell exactly what info to put in each field)
C) You press ADD
Another thing you must understand: Every time you hit ADD, the DNS data is added to your account, but it takes time to propagate into the global DNS. This means that it can take from minutes to hours. I don't know exactly the factors that take more or less time to propagate. Nowadays, it always takes less than one hour, but in the past you had to wait like 24 hours. It feels very random, though.
3. Once you have done the last step, and you refresh the previous Mailcheap page, you will see that your domain goes to the bottom and you will see a ton of buttons that we will need to configure now

4. First with start with basic ones. We press in the "i":

And we will see two elements, an MX and a TXT DNS to add

And we go back to our DNS panel (in Spaceship)
A) We click on Add Record, MX type this time, and we set this:
Host: magic
Value: mail12.mymailcheap.com
Priority/Preference: 1 (the one near the Value)
Then we are going to add two extra MX the exact same way (these two are the same for everyone)
Host: magic
Value: alt1.mymailcheap.com
Priority: 5
Host: magic
Value: alt2.mymailcheap.com
Priority: 10
B) Then we are going to add the SPF, that is a TXT DNS this time
Host: @
Value: v=spf1 mx a:relay.mymailcheap.com -all
And we are done with the first part. We have configured the DNS part for receiving emails (not for sending, if you want to send email with that domain, then you should be configuring further DNS records, like DKIM and DMARC, but this is not the purpose of this guide)
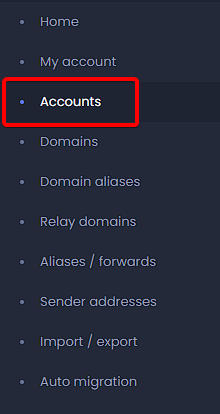
Then, New Account and here we set
Permission Level: MailUser
Username: Here we can create something like [email protected]
Password: Whatever you like
The rest optional
Recovery Email: You can put your own domain in case you want to recovery the password but still, you can access here to change it, so not a great deal, this is in case you are giving out this account to someone else and they can recover it without asking you
Storage Quota: You have a limit for emails. You can set the quota you want here, probably 500 Mb will be enough in most cases, remember that the quota is shared and you have a total of 20 GB in the most simple pack of MailCheap, given we are doing the configuration in this specific server.
2. Now it's time to create the catch-all, go to Aliases/Forwards
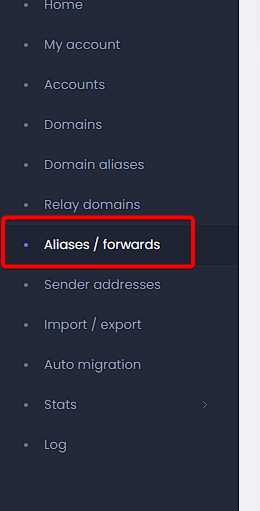
Then New Alias
Alias Address: @great.example.com
Recipients: [email protected]
And you are done right now. You have your catch-all, completely set up. Now it's time to use our Catch-All in one example software, in this case I'm going to test it with GSA
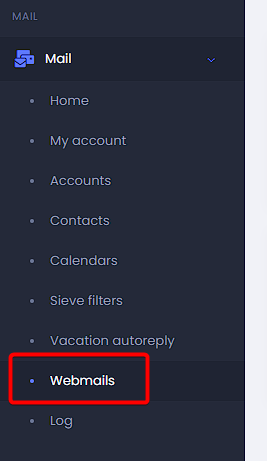
And then select "Open Roundcube webmail".
2. Now it's time to send an email to whatever address you can invent with the @great.example.com from any of your legit emails
For example. Send an email to: [email protected]
It doesn't mind the recipient, given that we have configured a catchall, so any should work
Now we go into the Roundcube email that we have previously opened, and check if we received the email. If we do, then everything is perfectly configured and it's time to use credentials in GSA
3. How to form credentials for GSA
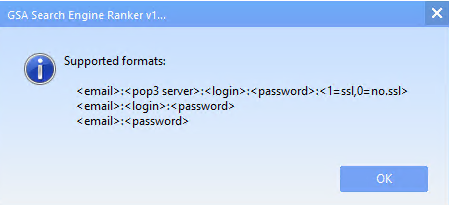
In this case, we observe how we should configure it:
We have to retrieve all the parts.
Email: For the email, we are going to use the spinner from GSA with our subdomain like this:
%spinfile-names.dat%%spinfile-lnames.dat%%random-1-100%@great.example.com
Pop3 Server is the one we got above, in this example: mail12.mymailcheap.com:995
Login: [email protected]
Password: The one we set previously, for the example: p4ssw0rd
SSL: Yes
So the string will be:

Congrats, you are finally done. It may look at first like a lot of work, but done one, done all. You will be able to make this easy as a pie, like selling hotcakes.
So why not setting your system, given how affordable and easy it is, and you will be in full control of everything (you can ditch the domains that are having a bad rate of verification and buy new ones, and you will always be sure that you are not receiving recycled domains for example).
What do you need?
1. Multiple domains: You can choose the cheaper domain if you like, from .pro to .com offers. This is going to be an evergreen guide, so I cannot tell you which will be the cheapest at any time, but for the example, I'm going to be using Spaceship.com with a regular .com domain. A .pro domain costs, for example, $2.24 in Spaceship right now, which is barely peanuts. You can buy like 5 of these domains and still be way cheaper than a classic 3-domain catch-all plan that most catch-all providers offer.
2. A Dedicated Email Server Provider: This is the most expensive part, there are zillions and you could even build yourself in any cheap 5 dollar VPS like Amazon AWS, Lightsail, Hetzner, Digital Ocean or whatever. Given that you are only going to receive emails, the risk of issues is virtually 0, only having to handle spam, which generally won't be a big issue since we will be buying new domains and the size of the hard disk is big enough to handle them if any. Typically, the problems with mail servers come when you deal with sending email because you have to configure a ton of things to avoid people hacking your system and sending from your server, or having your IP banned and being tagged in all anti-spam servers. Although, to simplify this guide, I'm going to use a Dedicated Pre-Made server, there are tons like Serverpronto, Mailcheap,... Even some CatchAll mail providers like CatchallBoxes.com offer pre-made super-expensive and limited email servers (5 domains only), when technically there should be no limitations on domains because this is not a limitation for the server, but for your Hard Disk quota. In this example I'm going to use Mailcheap, the cheapest cost $5 month, $60 year.
Just with these two things, say 10 .pro domains $23 + $60 = $83, you will have a +10 catchall domain solution for barely $7/mo, completely scalable and 100% under your control. And don't be fooled: effortless to configure and maintain. It could be slightly harder if you had to manage your own mail server, but still profitable and worthy given the control you have over it. So let's move into it.
How to set up the whole system?
First, we need to configure the DNS from our Mail Server into our Domain registrar
1. First, we are going to buy the domain. I think this is an easy step for most in this forum.
2. After we have the domain, we have to buy the account in Mailcheap and configure the domain inside the control panel. Each Mail server will have their own docs, so follow the one they provide you. In the case of Mailcheap, they ask first to verify the domain with a TXT DNS.
Now it's time to decide which subdomain we are going to use. Technically, we can have infinite subdomains per domain.
For example. If our domain is example.com we can have this subdomain: great.example.com
So, in this case, the subdomain is great.
We can have more subdomains and to add them we only have to repeat the next steps PER subdomain
In this case, we are going to use great for the subdomain
You input the domain and then you copy the Verification code and go to your Domain registrar. In this case, I'm using the Spaceship Advanced DNS config system:
Then we select the TXT DNS
And here we set:
Host: the subdomain: great
Value the content we copied previously: The one like: nms-domain-verification=12315616516516
and then we Add
Note that we will be doing this A TON of times. To avoid having to copy each single time the exact same screenshots, understand the process:
A) First you select the type: TXT, MX, whatever
B) You put the data in Host, Value, Priority, etc. (I will tell exactly what info to put in each field)
C) You press ADD
Another thing you must understand: Every time you hit ADD, the DNS data is added to your account, but it takes time to propagate into the global DNS. This means that it can take from minutes to hours. I don't know exactly the factors that take more or less time to propagate. Nowadays, it always takes less than one hour, but in the past you had to wait like 24 hours. It feels very random, though.
3. Once you have done the last step, and you refresh the previous Mailcheap page, you will see that your domain goes to the bottom and you will see a ton of buttons that we will need to configure now
4. First with start with basic ones. We press in the "i":
And we will see two elements, an MX and a TXT DNS to add
And we go back to our DNS panel (in Spaceship)
A) We click on Add Record, MX type this time, and we set this:
Host: magic
Value: mail12.mymailcheap.com
Priority/Preference: 1 (the one near the Value)
Then we are going to add two extra MX the exact same way (these two are the same for everyone)
Host: magic
Value: alt1.mymailcheap.com
Priority: 5
Host: magic
Value: alt2.mymailcheap.com
Priority: 10
B) Then we are going to add the SPF, that is a TXT DNS this time
Host: @
Value: v=spf1 mx a:relay.mymailcheap.com -all
And we are done with the first part. We have configured the DNS part for receiving emails (not for sending, if you want to send email with that domain, then you should be configuring further DNS records, like DKIM and DMARC, but this is not the purpose of this guide)
Time to configure our Catch-All Domain
1. First, we need to create an email account in our new subdomain. The data from this account is what we are going to use to configure as IMAP or POP server anywhere we want to pick the verification domains from, like GSA, RankerX, SEO Autopilot/SEO Neo or whatever software we would like to use our Catch-All system
Then, New Account and here we set
Permission Level: MailUser
Username: Here we can create something like [email protected]
Password: Whatever you like
The rest optional
Recovery Email: You can put your own domain in case you want to recovery the password but still, you can access here to change it, so not a great deal, this is in case you are giving out this account to someone else and they can recover it without asking you
Storage Quota: You have a limit for emails. You can set the quota you want here, probably 500 Mb will be enough in most cases, remember that the quota is shared and you have a total of 20 GB in the most simple pack of MailCheap, given we are doing the configuration in this specific server.
2. Now it's time to create the catch-all, go to Aliases/Forwards
Then New Alias
Alias Address: @great.example.com
Recipients: [email protected]
And you are done right now. You have your catch-all, completely set up. Now it's time to use our Catch-All in one example software, in this case I'm going to test it with GSA
One example of use: Configuring our Catch-all in GSA
1. First, if I were you, I would test the catchall. You can access a webmail if you go back to the login of the Mailcheap service page and put your new credentials you set up in the Account part. Then you go to Webmails:
And then select "Open Roundcube webmail".
2. Now it's time to send an email to whatever address you can invent with the @great.example.com from any of your legit emails
For example. Send an email to: [email protected]
It doesn't mind the recipient, given that we have configured a catchall, so any should work
Now we go into the Roundcube email that we have previously opened, and check if we received the email. If we do, then everything is perfectly configured and it's time to use credentials in GSA
3. How to form credentials for GSA
In this case, we observe how we should configure it:
We have to retrieve all the parts.
Email: For the email, we are going to use the spinner from GSA with our subdomain like this:
%spinfile-names.dat%%spinfile-lnames.dat%%random-1-100%@great.example.com
Pop3 Server is the one we got above, in this example: mail12.mymailcheap.com:995
Login: [email protected]
Password: The one we set previously, for the example: p4ssw0rd
SSL: Yes
So the string will be:
Code:
%spinfile-names.dat%%spinfile-lnames.dat%%random-1-100%@great.example.com:mail12.mymailcheap.com:995:[email protected]:p4ssw0rd:1Congrats, you are finally done. It may look at first like a lot of work, but done one, done all. You will be able to make this easy as a pie, like selling hotcakes.
Last edited: