What's the difference?Anydesk isn't a RDP lol

You are using an out of date browser. It may not display this or other websites correctly.
You should upgrade or use an alternative browser.
You should upgrade or use an alternative browser.
Free Way to Create RDPs (100% Working) [Free Method] (Remote Desktop Connection)
- Thread starter Dot Mirror LTD
- Start date
-
- Tags
- free rdp ngrok rdp vps server
sherineto
Newbie
- Oct 11, 2022
- 14
- 6
Anydesk is a remote control Software that you can access or control your pc through a idWhat's the difference?
Anydesk is a remote control Software that you can access or control your pc through a id
Aren't they just two different ways to achieve the same goal? What else does RDP give you? (I'm asking because I don't know)
D
Deleted member 1232083
Guest
Thank you dot engine i will try for educational purposes
liladhen
Regular Member
- Apr 1, 2022
- 218
- 67
I found this method that uses github and google remote desktop, it seems to support 6 hours but I'm not sure.
This can be useful for anyone who wants to upload files to some host, it has 800 mb of download and 1.5 gb of upload.
https://github.com/DynastyAIO/DynastyRDP

This can be useful for anyone who wants to upload files to some host, it has 800 mb of download and 1.5 gb of upload.
https://github.com/DynastyAIO/DynastyRDP
EdwardNygma
Registered Member
- Jul 28, 2019
- 56
- 28
Thanks. Bookmarked ")
charles666
Junior Member
- Nov 1, 2013
- 194
- 78
Thanks bro i bookmarked it too
- May 18, 2012
- 7,617
- 7,477
It will get banned anyway.Lol what a hella write up! I'm too noob scared to try this, I don't want to accidentally trip my real GitHub account and get banned.

Zablo
Regular Member
- Apr 5, 2015
- 288
- 88
i dont know about that folder uploads but i have made this same with only yaml file, the rdp worked but runs only for like 1 hour but the system was so laggy and gave such a late response. the reason for what i was trying to use rdp got void cause i wanted to check like 3 light weighted softwares but it take such a long time that i was hardly able to use a single s/w and then i got frustrated and deleted this repo!
but if ya work is only browser related like searching something or accessing then go for it! apart from that it is useless!
but if ya work is only browser related like searching something or accessing then go for it! apart from that it is useless!

Ranking Boss
Newbie
- Feb 22, 2022
- 24
- 8
This rdp method i implement a year ago and rdp just work maximum 2 hours or 3 hours then off permanently now again repeat all process lol
jonathan101
Banned for blackmailing clients
- Feb 13, 2016
- 2,393
- 703
Thanks for sharing.
gigapothem
Newbie
- Jul 28, 2020
- 7
- 2
I'm curious, what would this be doing that I couldn't do with a vagrant box, an nginx pod with kind or terraform with OCI/AWS/GCP? I may not be fully understanding the potential utilization here.
Mastineo MARKETING
Junior Member
- Jul 23, 2023
- 124
- 40
Great sharing .
Thank you for sharing the detailed method dude .
Thank you for sharing the detailed method dude .
borracho
Registered Member
- Apr 10, 2022
- 92
- 26
what's that for?Welcome, everyone! dotEngine is here and I'm excited to share my own knowledge/method with you. By looking at the title of this post, many of you have already guessed what I am going to discuss or what I’m going to share with you.
In the modern world of technology, Remote Desktop Protocols (RDPs) have become increasingly popular, allowing users to access PCs remotely without any issue. This comes with a cost, as setting up RDPs can often be an expensive and time-consuming endeavor. To rid ourselves of this burden, we will take a look at a revolutionary, free way to create RDPs that is 100% working. This free method of creating RDPs is guaranteed to save you time, money, and effort, and ultimately revolutionize the way you create RDPs.
In this post, I’ll show you a step-by-step guide on how to create an RDP, tell you what challenges I faced during the entire process when creating mine, and help you overcome/fix those issues. I have talked a lot. However, Let's move on to the tutorial part without any further delay.
Tutorial Part
Method-1 (Creating RDP With Github Resource)
What you may need before starting?
I’ll suggest you not use your main GitHub account for the process.
- A GitHub account.
- And a Ngrok account.
Steps:
- First of all, Create a GitHub account (use VPN when signing up). I’ve used HMA VPN (not refer link).

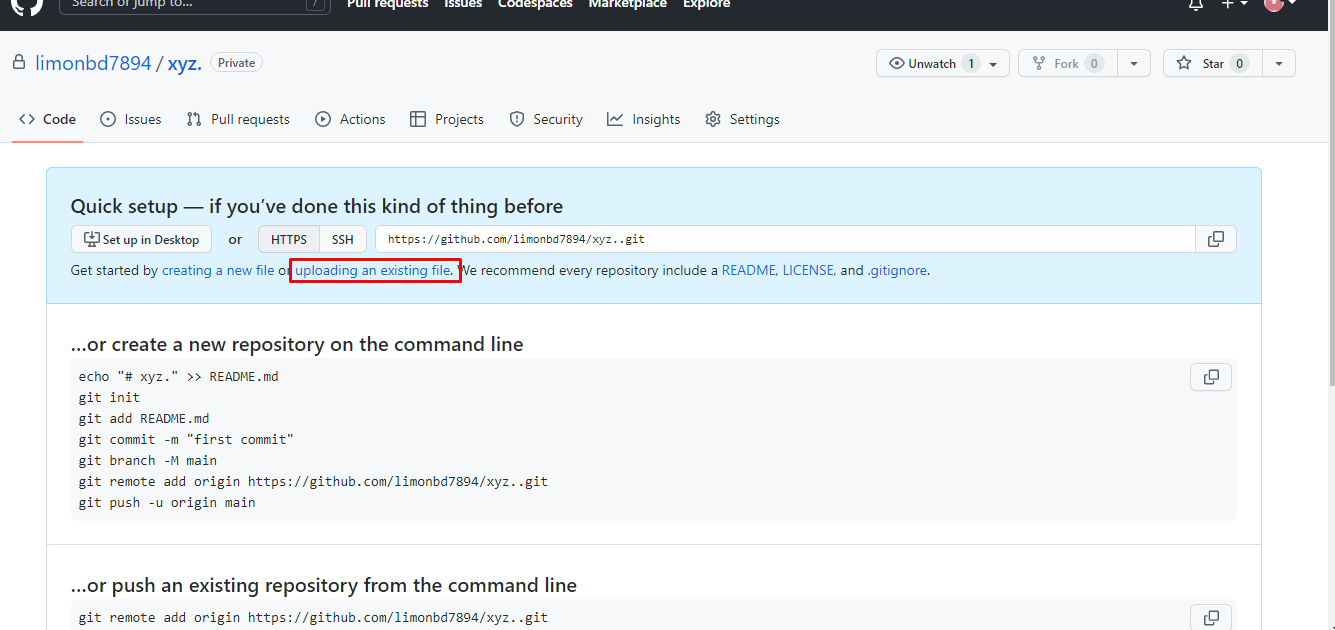
- Once you've signed up for a GitHub account, go to the Dashboard and create a new repository with any name.

The All File Download From here: Mega.nz - Virustotal
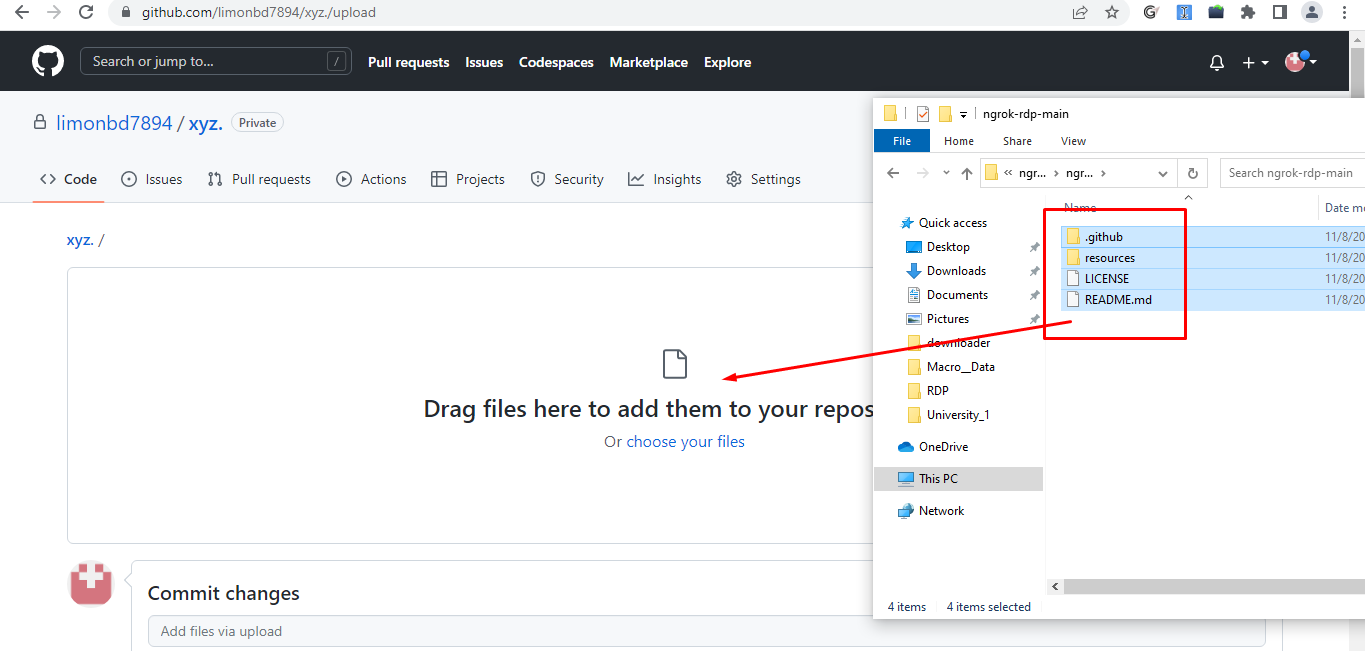
- After that, you must upload all the files and folders in the GIT.
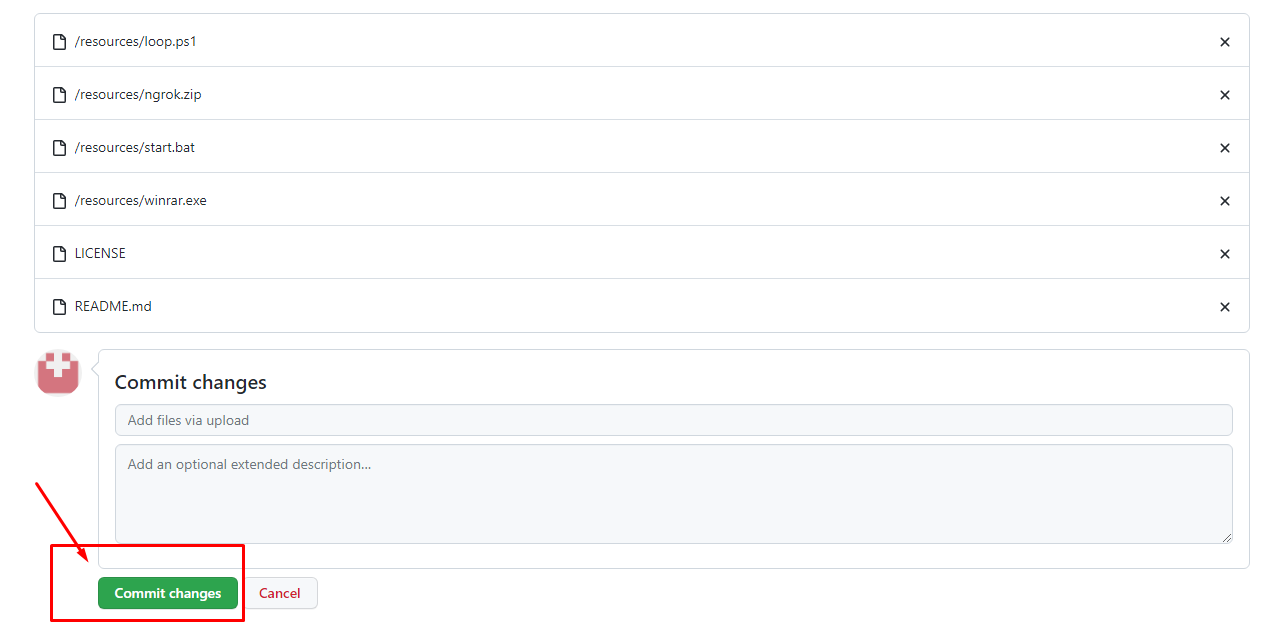
- Now Go: Uploading an existing file >>> Drag and drop files & folder >>> Click Commit Changes.
- Then sign up for a NGROK account to get an authentication token that will be used by the workflow process.

- After signing up, log in to the NGROK account and go to your dashboard. Then Go: >> “Your Authtoken” and copy the code.
- Now go back to your GitHub account. Then Go: >> Settings >> secrets >> Action. Then in the name field type the name “NGROK_AUTH_TOKEN” and in the 2nd field paste the Ngrok token key that you have copied from the Ngrok website.


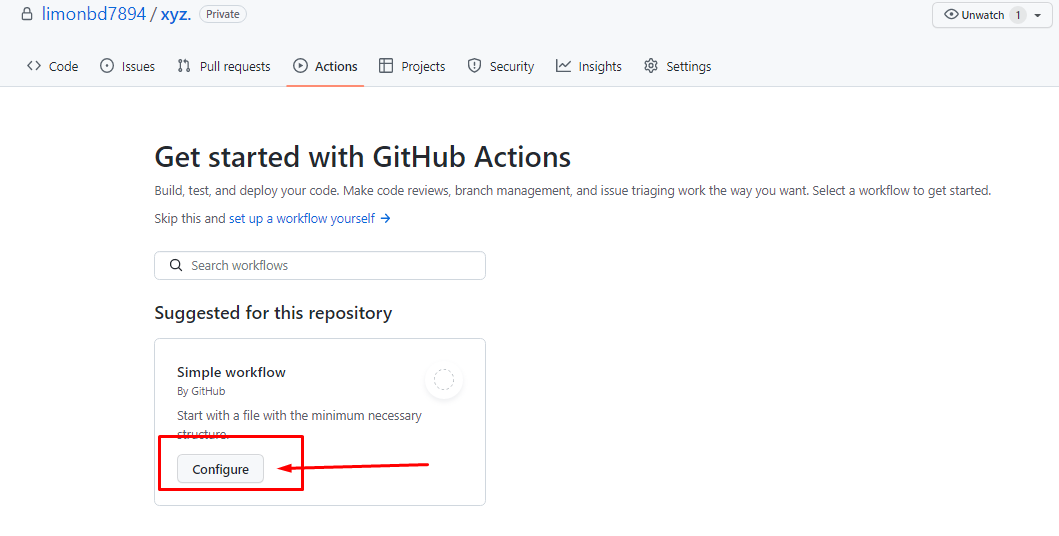
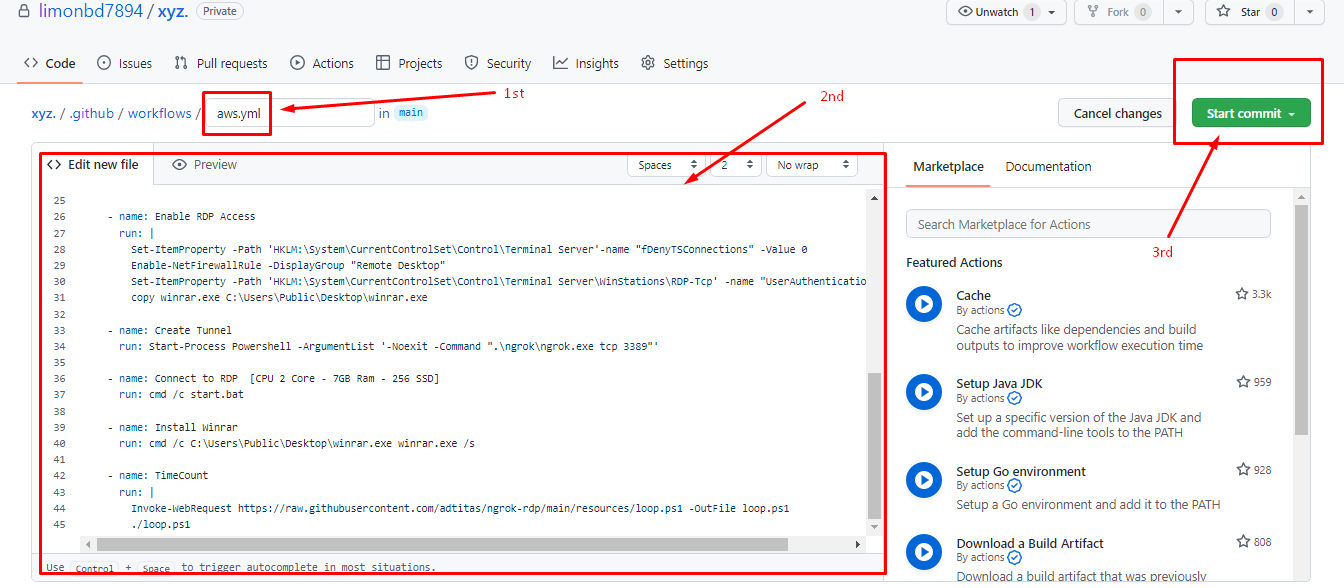
- Now Go: Add secret >> Actions >> Configure and then workflows dashboard will appear. From this part rename the “blank.yml” to “aws.yml”.
- In the 2nd field replace all the code with my given code. Link [Mega.nz, Virustotal]
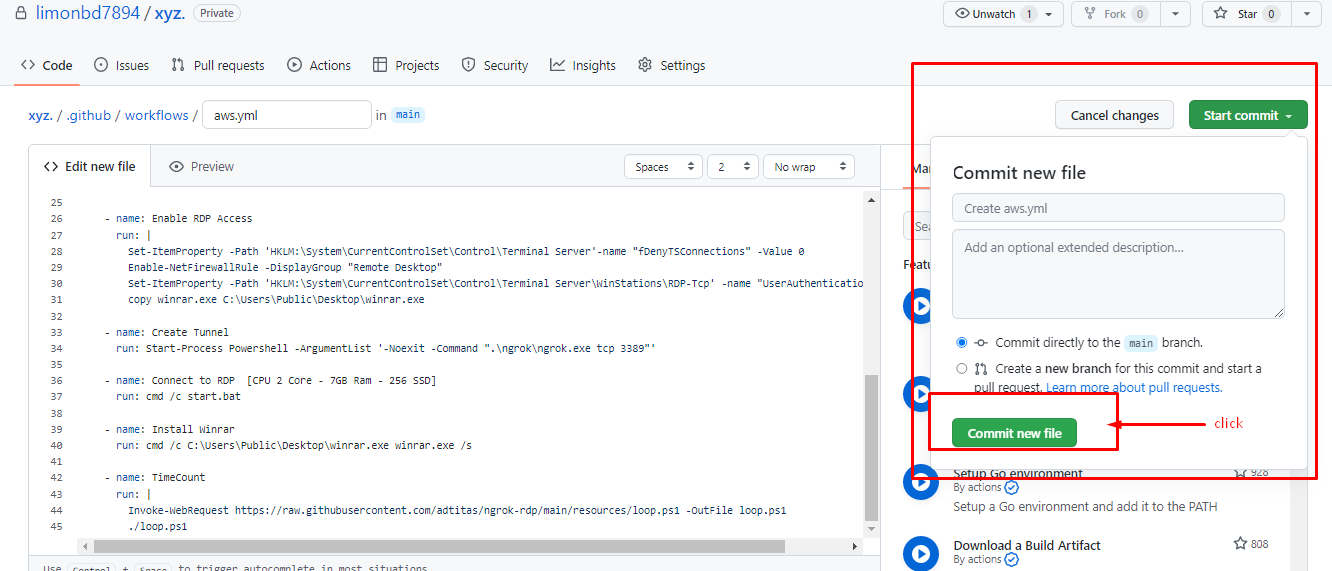
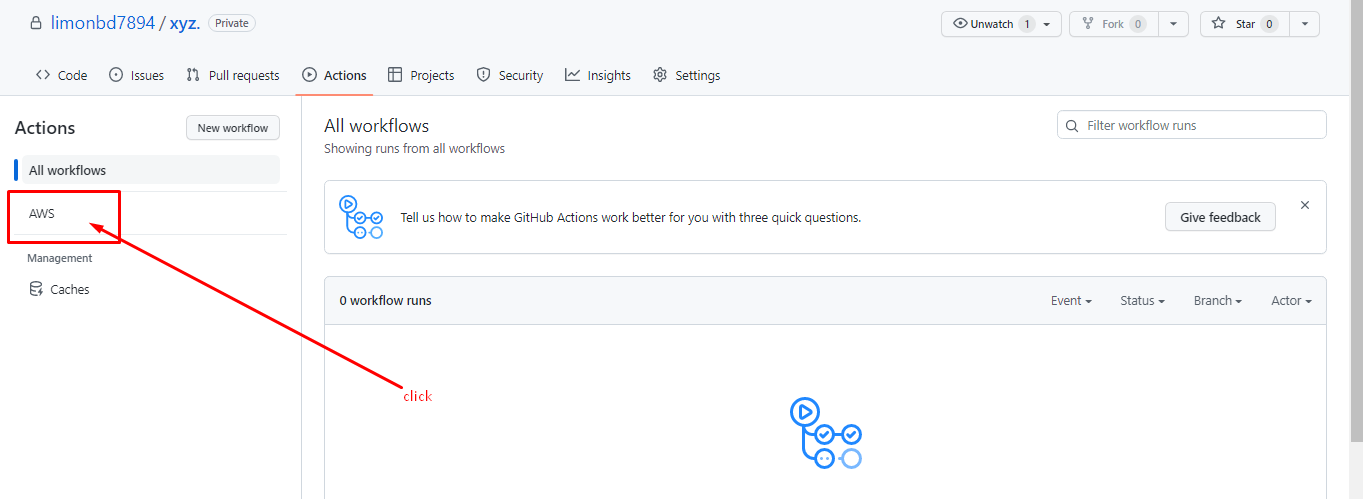
- Then Go: Start commit >>Commit new file >> Actions >> AWS >> Run workflow >>Run workflow >> AWS >> AWS >>build.
- After doing that the process will be started to create RDP.


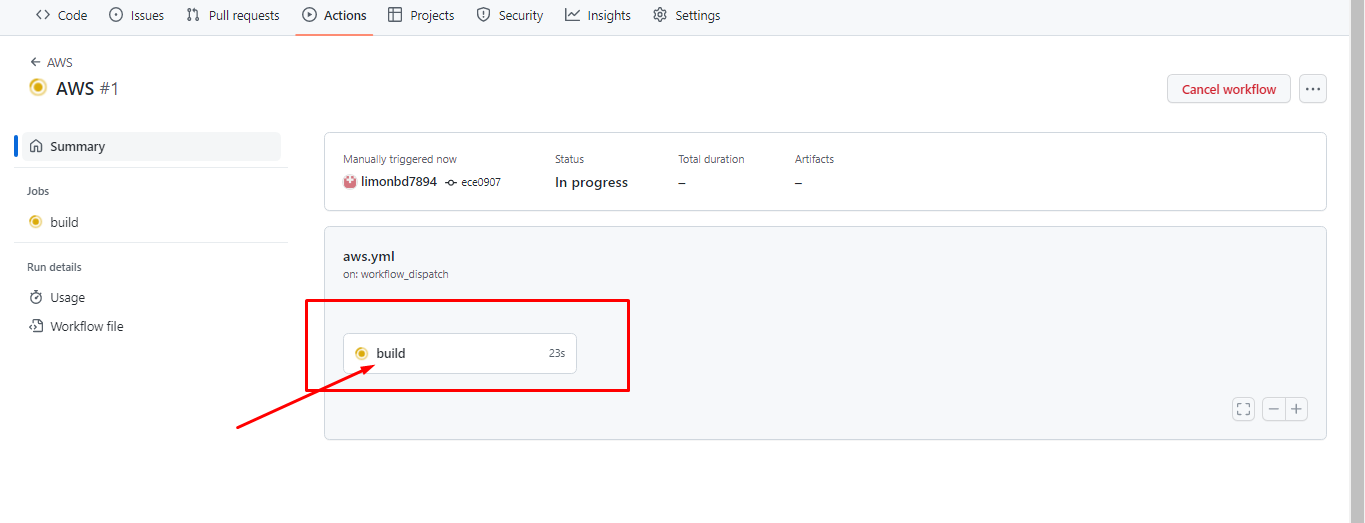
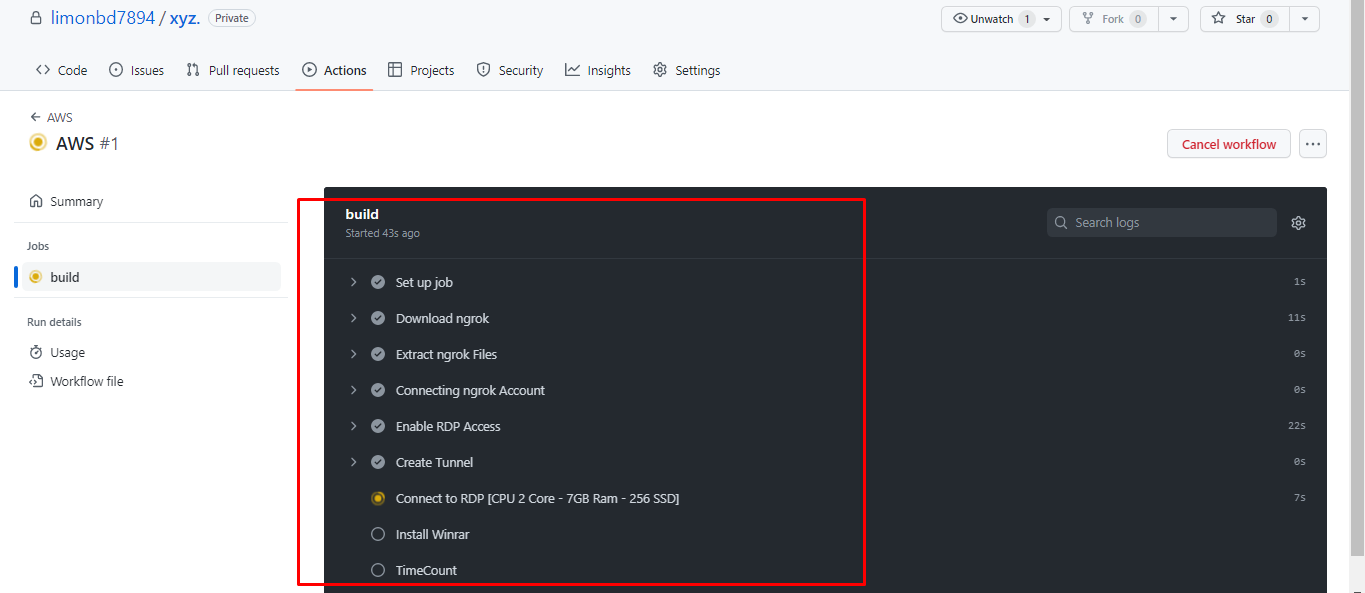
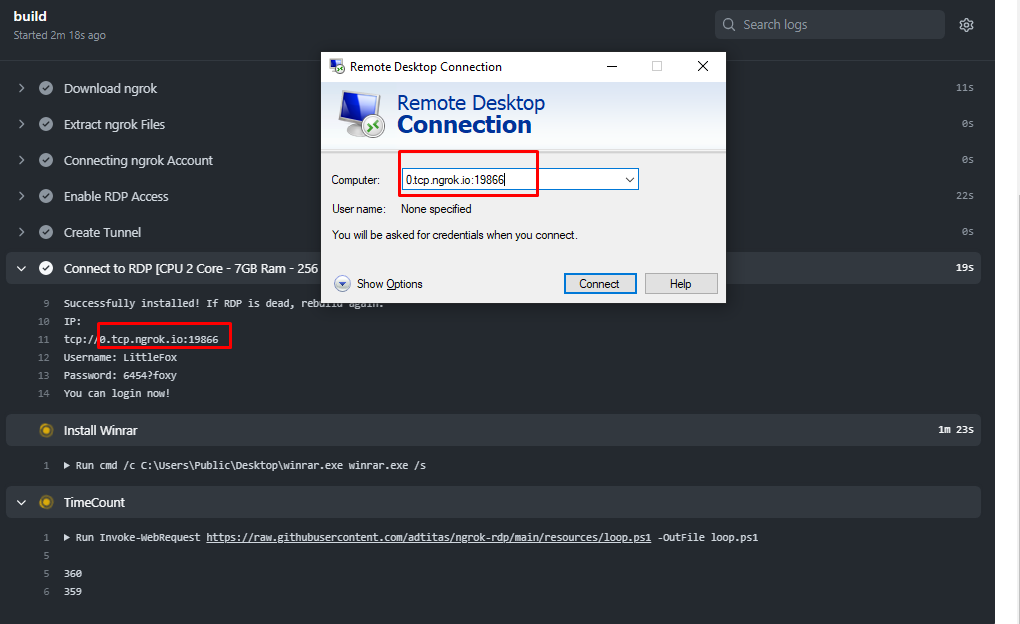
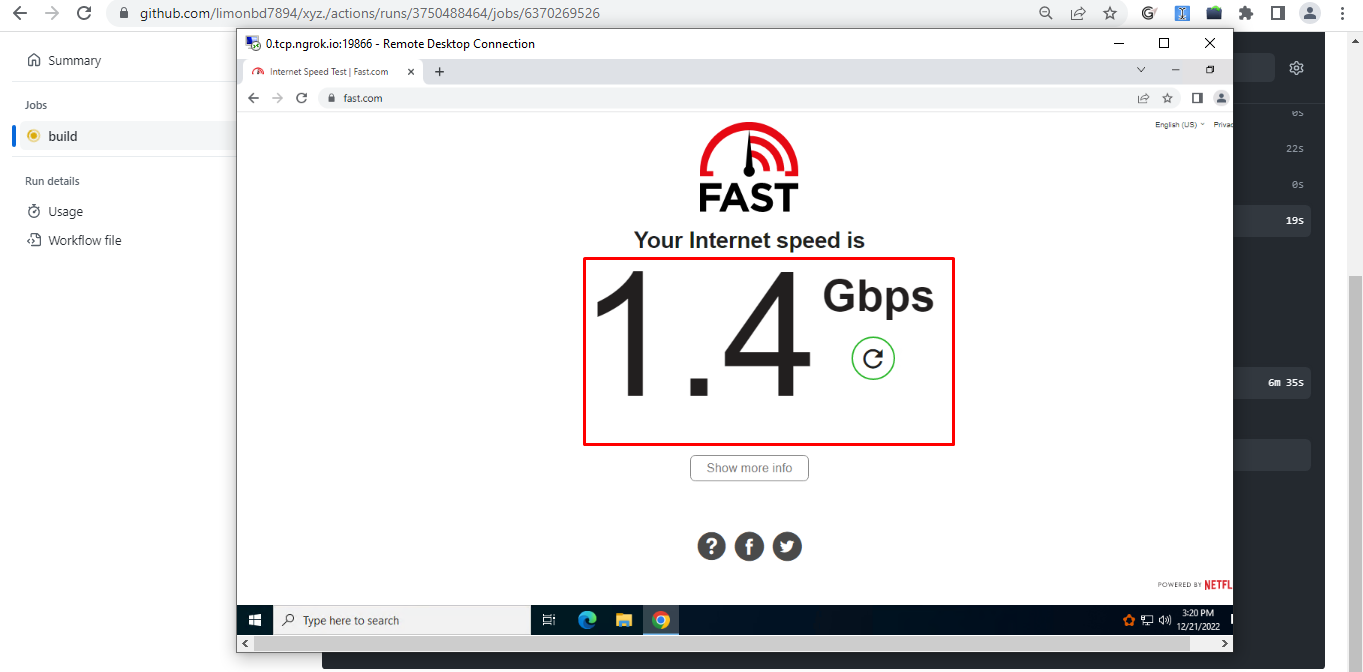
- After waiting for a few seconds your RDP’s IP, Username and password will be generated in the workflow field.
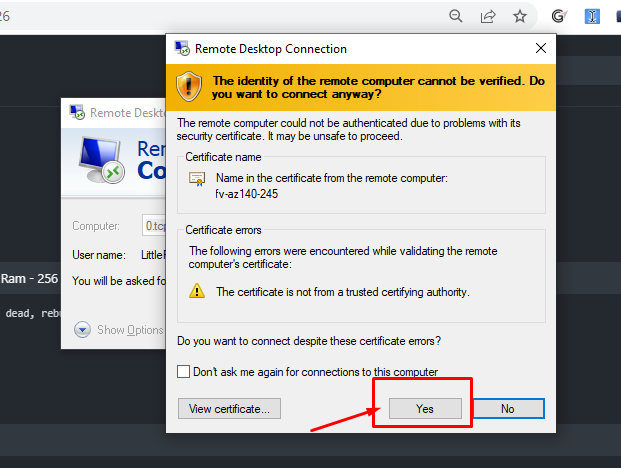
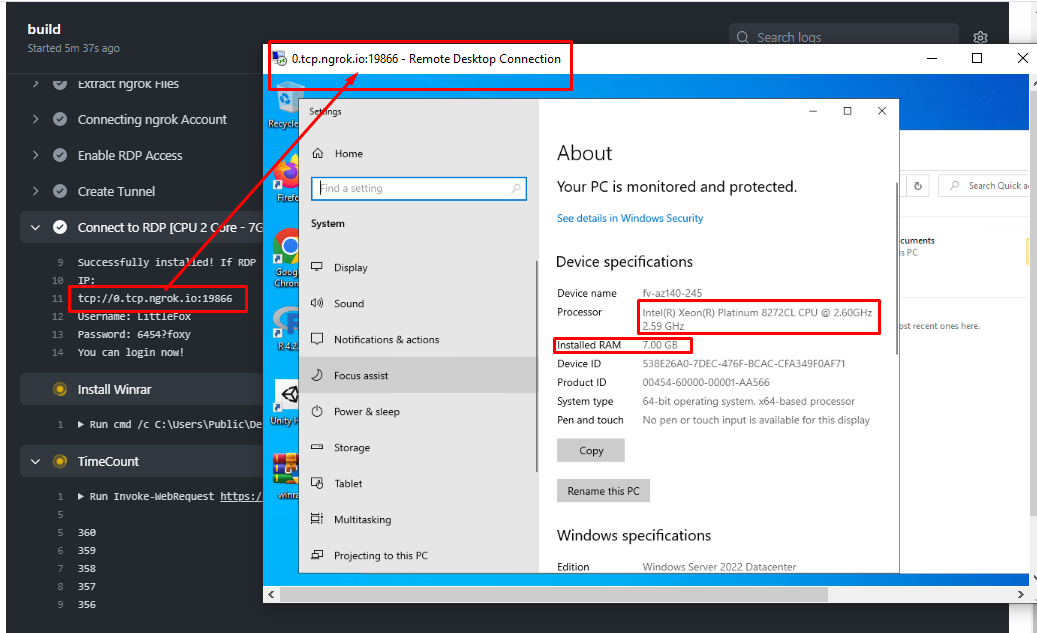
- It’s done! Now it’s time to use it. For that open your windows Remote Desktop Connection software. Then copy the IP without “tcp://”, username, and password from the workflow field and sign into your RDP. Congrats you did it! That’s it, the entire process.


At a glance the full process (summary):
- Sign in to the GitHub account with VPN.
- Create New Repository
- Upload all the files and folders.
- Set NgrokToken (Go to Settings > Secrets > Action > New Repository Secret)
- In the name section, enter this text: “NGROK_AUTH_TOKEN” and In the value section, enter the ngrok token
- Go: Configure “simple Workflow”, Commit & Run the workflow.
How long does this RDP stay active?
This RDP stays active for up to 2 hour (previously 4-5 hours). Currently, I'm working on it to extend time.
Problems that I have faced during the entire process & the solutions:
Github account flagged.
Solution: Use VPN to sign up & log in.
Cannot create unlimited mail for github account if Github account is flagged.
Solution: Use this temp mail/microsoft account to create unlimited github account. [Temp mail - not affiliated]
Workflow runtime error.
Solution: Check NgrokToken & Name(NGROK_AUTH_TOKEN) that you set.
Warn:
Don't use the RDP for mining or illegal use.
Wrap-up
I'm leaving here today. I'll be back again with more helpful content soon! If you have any questions about this tutorial, feel free to ask in the comments section below. I will do my utmost to answer them asap. Thank you, everyone, for being with me.