paraztos
Senior Member
- Jan 4, 2021
- 828
- 1,075
Okay, are you ready to create some AI images without any subscription? Here we go!
REQUIREMENTS
Open a new workbook in Google Colab. Google Colab is a very nice FREE tool from Google that lets you run python and play around with AI. Of course, free account performance is limited and you will be thrown out if you use the system too heavily.
Go to
Now click on Runtime --> change runtime type --> select 'GPU' --> SAVE.
Click on 'Connect' on the top right. Once it says you are connected you can get ready to work.
Time to paste the code into this. Luckily, once you paste the code blocks and save the notebook, it will open back up as-is. So you only need to do this once. Though you WILL need to run these blocks each time you open the notebook up.
What you see in front of yourself is an empty code block. We'll start with this one. Copy:
Now once you've copied your code in, you can run it. Click the 'Play' button on the code block and it will run. If everything goes right you should see something like this:

NOTE: You always get a 'Green Checkmark' next to the play button when it runs successfully. SOME STEPS TAKE TIME. Never run the next step until you get the green checkmark.
We'll need new a code block. To add one just click '+Code' at the top.

Paste the following in the code block and run it. Will take around 20-40 sec.
Add your next code block. Once again, paste what I have here and run it.
Add another code block, paste and run.
If you've followed me correctly to this point then you should now have a little window asking for a Huggingface token. That's great! This is where your FREE huggingface account comes into play.
First you need to accept the licence terms for Stable Diffusion. Log into Huggingface head over to this page https://huggingface.co/runwayml/stable-diffusion-v1-5 and you'll have an 'Accept' terms somewhere at the start of the text.
Next: get your token.
Now you are set up to run Stable Diffusion. But wait how to do it? There are still a few more code blocks to add.
New code block:
Don't forget to run it! This is the longest step, can take a minute!
Almost there! Add one more code block:
And finally add the code block for image generation:
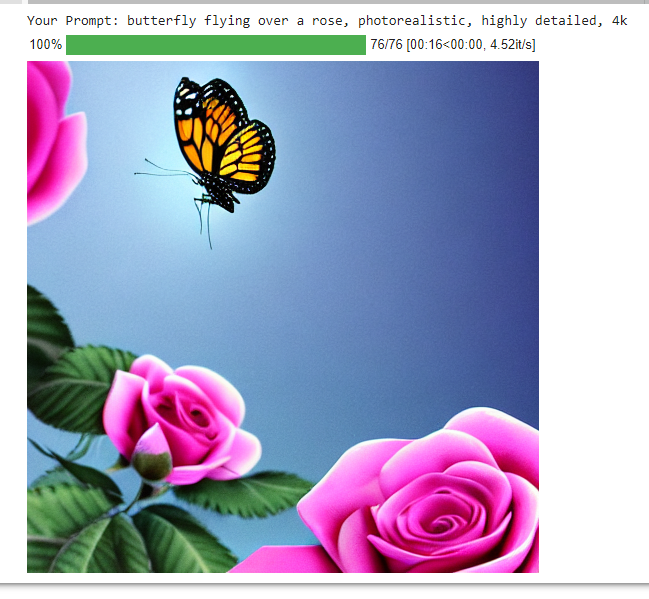
Hit run and try it!
Don't forget if you try to overuse it Google will limit you. Not sure how long the limited access lasts, but for me it happened only one time. Next day I was fine again.
Also: in the code you see 'height' and 'width' values. You can play with these, BUT you can't generate huge images.
512x512 is best. 512x768 and 768x512 works for certain compositions that need more width or height. However, if you try to go 1024x1024 the model will not work well. So I recommend only 512x512, 512x768, and 768x512 then find some free upscaler software.
I know the code I provided has a fault. It's super user friendly, but your prompt disappears as soon as you hit run. So if are comfortable typing your prompt directly into the code you should use this version for the last step:
That's it! Have fun!
REMEMBER: If you close the notebook you need to hit 'RUN' on ALL the code blocks again and wait until each step is completed. This is a Colab limitation.
Credit: This guide is based mostly on
REQUIREMENTS
- Google Account
- Huggingface Account
- You can understand English so you can follow this guide
- Method is not good for mass creation
- Google puts certain limits on your free account, but I've only reached it once. For low-volume usage, it should be no problem
- You need to 're-initialize' the whole thing each time you launch it
- We will use Stable Diffusion, so the limitations of Stable Diffusion
Step 1:
Open a new workbook in Google Colab. Google Colab is a very nice FREE tool from Google that lets you run python and play around with AI. Of course, free account performance is limited and you will be thrown out if you use the system too heavily.
Go to
https://colab.research.google.com/ and from 'File' select 'New Notebook'. It will open in a new tab.Now click on Runtime --> change runtime type --> select 'GPU' --> SAVE.
Click on 'Connect' on the top right. Once it says you are connected you can get ready to work.
Step 2:
Time to paste the code into this. Luckily, once you paste the code blocks and save the notebook, it will open back up as-is. So you only need to do this once. Though you WILL need to run these blocks each time you open the notebook up.
What you see in front of yourself is an empty code block. We'll start with this one. Copy:
Code:
!nvidia-smiNow once you've copied your code in, you can run it. Click the 'Play' button on the code block and it will run. If everything goes right you should see something like this:
NOTE: You always get a 'Green Checkmark' next to the play button when it runs successfully. SOME STEPS TAKE TIME. Never run the next step until you get the green checkmark.
We'll need new a code block. To add one just click '+Code' at the top.
Paste the following in the code block and run it. Will take around 20-40 sec.
Code:
!pip install diffusers==0.4.0
!pip install transformers scipy ftfy
!pip install "ipywidgets>=7,<8"
Add your next code block. Once again, paste what I have here and run it.
Code:
from google.colab import output
output.enable_custom_widget_manager()
Add another code block, paste and run.
Code:
from huggingface_hub import notebook_login

notebook_login()
If you've followed me correctly to this point then you should now have a little window asking for a Huggingface token. That's great! This is where your FREE huggingface account comes into play.
First you need to accept the licence terms for Stable Diffusion. Log into Huggingface head over to this page https://huggingface.co/runwayml/stable-diffusion-v1-5 and you'll have an 'Accept' terms somewhere at the start of the text.
Next: get your token.
https://huggingface.co/docs/hub/security-tokens follow this guide to get a token. Paste this token into your colab window where it asks for it.Now you are set up to run Stable Diffusion. But wait how to do it? There are still a few more code blocks to add.
New code block:
Code:
import torch
from diffusers import StableDiffusionPipeline

pipe = StableDiffusionPipeline.from_pretrained("runwayml/stable-diffusion-v1-5", revision="fp16", torch_dtype=torch.float16)Almost there! Add one more code block:
Code:
pipe = pipe.to("cuda")And finally add the code block for image generation:
Code:
prompt = input('Your Prompt: ')
images = pipe(prompt, height=512, width=512, num_inference_steps=75, guidance_scale = 8).images[0]  # image here is in [PIL format](https://pillow.readthedocs.io/en/stable/)

images
Hit run and try it!
Step 3: Enjoy!
Don't forget if you try to overuse it Google will limit you. Not sure how long the limited access lasts, but for me it happened only one time. Next day I was fine again.
Also: in the code you see 'height' and 'width' values. You can play with these, BUT you can't generate huge images.
512x512 is best. 512x768 and 768x512 works for certain compositions that need more width or height. However, if you try to go 1024x1024 the model will not work well. So I recommend only 512x512, 512x768, and 768x512 then find some free upscaler software.
I know the code I provided has a fault. It's super user friendly, but your prompt disappears as soon as you hit run. So if are comfortable typing your prompt directly into the code you should use this version for the last step:
Code:
prompt = ["A huge angry robot in the middle of New York, illustration, pen, highly detailed, brutalist, colorful, realistic"]
images = pipe(prompt, height=512, width=512, num_inference_steps=75, guidance_scale = 8).images[0]  # image here is in [PIL format](https://pillow.readthedocs.io/en/stable/)

# or if you're in a google colab you can directly display it with
images
That's it! Have fun!
REMEMBER: If you close the notebook you need to hit 'RUN' on ALL the code blocks again and wait until each step is completed. This is a Colab limitation.
Credit: This guide is based mostly on
https://colab.research.google.com/github/huggingface/notebooks/blob/main/diffusers/stable_diffusion.ipynb although that one is for 1.4 version of Stable Diffuse and we are using the latest 1.5.
Last edited: