

Christian Lowe
Newbie
- Jul 15, 2017
- 47
- 158
What's up guys? So if you plan on doing any sort of automation, you probably need proxies right? While residential proxies are by far the best and safest bet, they also are not the cheapest. Thankfully, Google has a cloud service and you can get up to $300 credits for free each year! If you are tired of paying for proxies much like I am, check out the below tutorial on how to create your own proxy server. Now, there are some additional steps you should do in order to secure your server such as adding user authentication to it and although I don't have screenshots for that, I have included how to do it below.
1. Go to console.cloud.google.com.
a. Select “Yes” to agree to the terms and click “Accept”

2. Click “SIGN UP FOR FREE TRIAL” in the upper right hand corner

3. Select your country, select the first “No” and select “yes”
a. Click “Agree and Continue”

4. Fill out your info on the next page

5. Add Your Payment Info and Click “Start My Free Trial” (note you won’t be charged when the free trial ends. It will ask you for your card info again)

6. A page like this will load. Click “Got It”

7. Click on the hamburger menu in the top left corner then >”Compute Engine”>”VM Instances”

8. Click “Create”

9. Change the Machine Type to the lowest one

10. Change Boot Disk to Ubuntu 18.04 LTS


11. Check the two boxes for allowing HTTP and HTTPS traffic and click Create

12. When you are done click on the SSH box. A new window will pop up and you will be working on the command line from within your virtual server from this point on

13. Switch to the super user by typing the command sudo -s (this is bad security practice, but for the tutorial simplicity I thought this was easiest)

14. Add a user that will have super user privileges. The name can be whatever you want. I am going to make the user squid by running the command adduser squid

15. It will ask you to set a password. Create a secure password for this user. It will also ask you to fill out information about this user. You do not have to type anything here. Just hit enter until it asks you if the information is correct and type y and hit enter
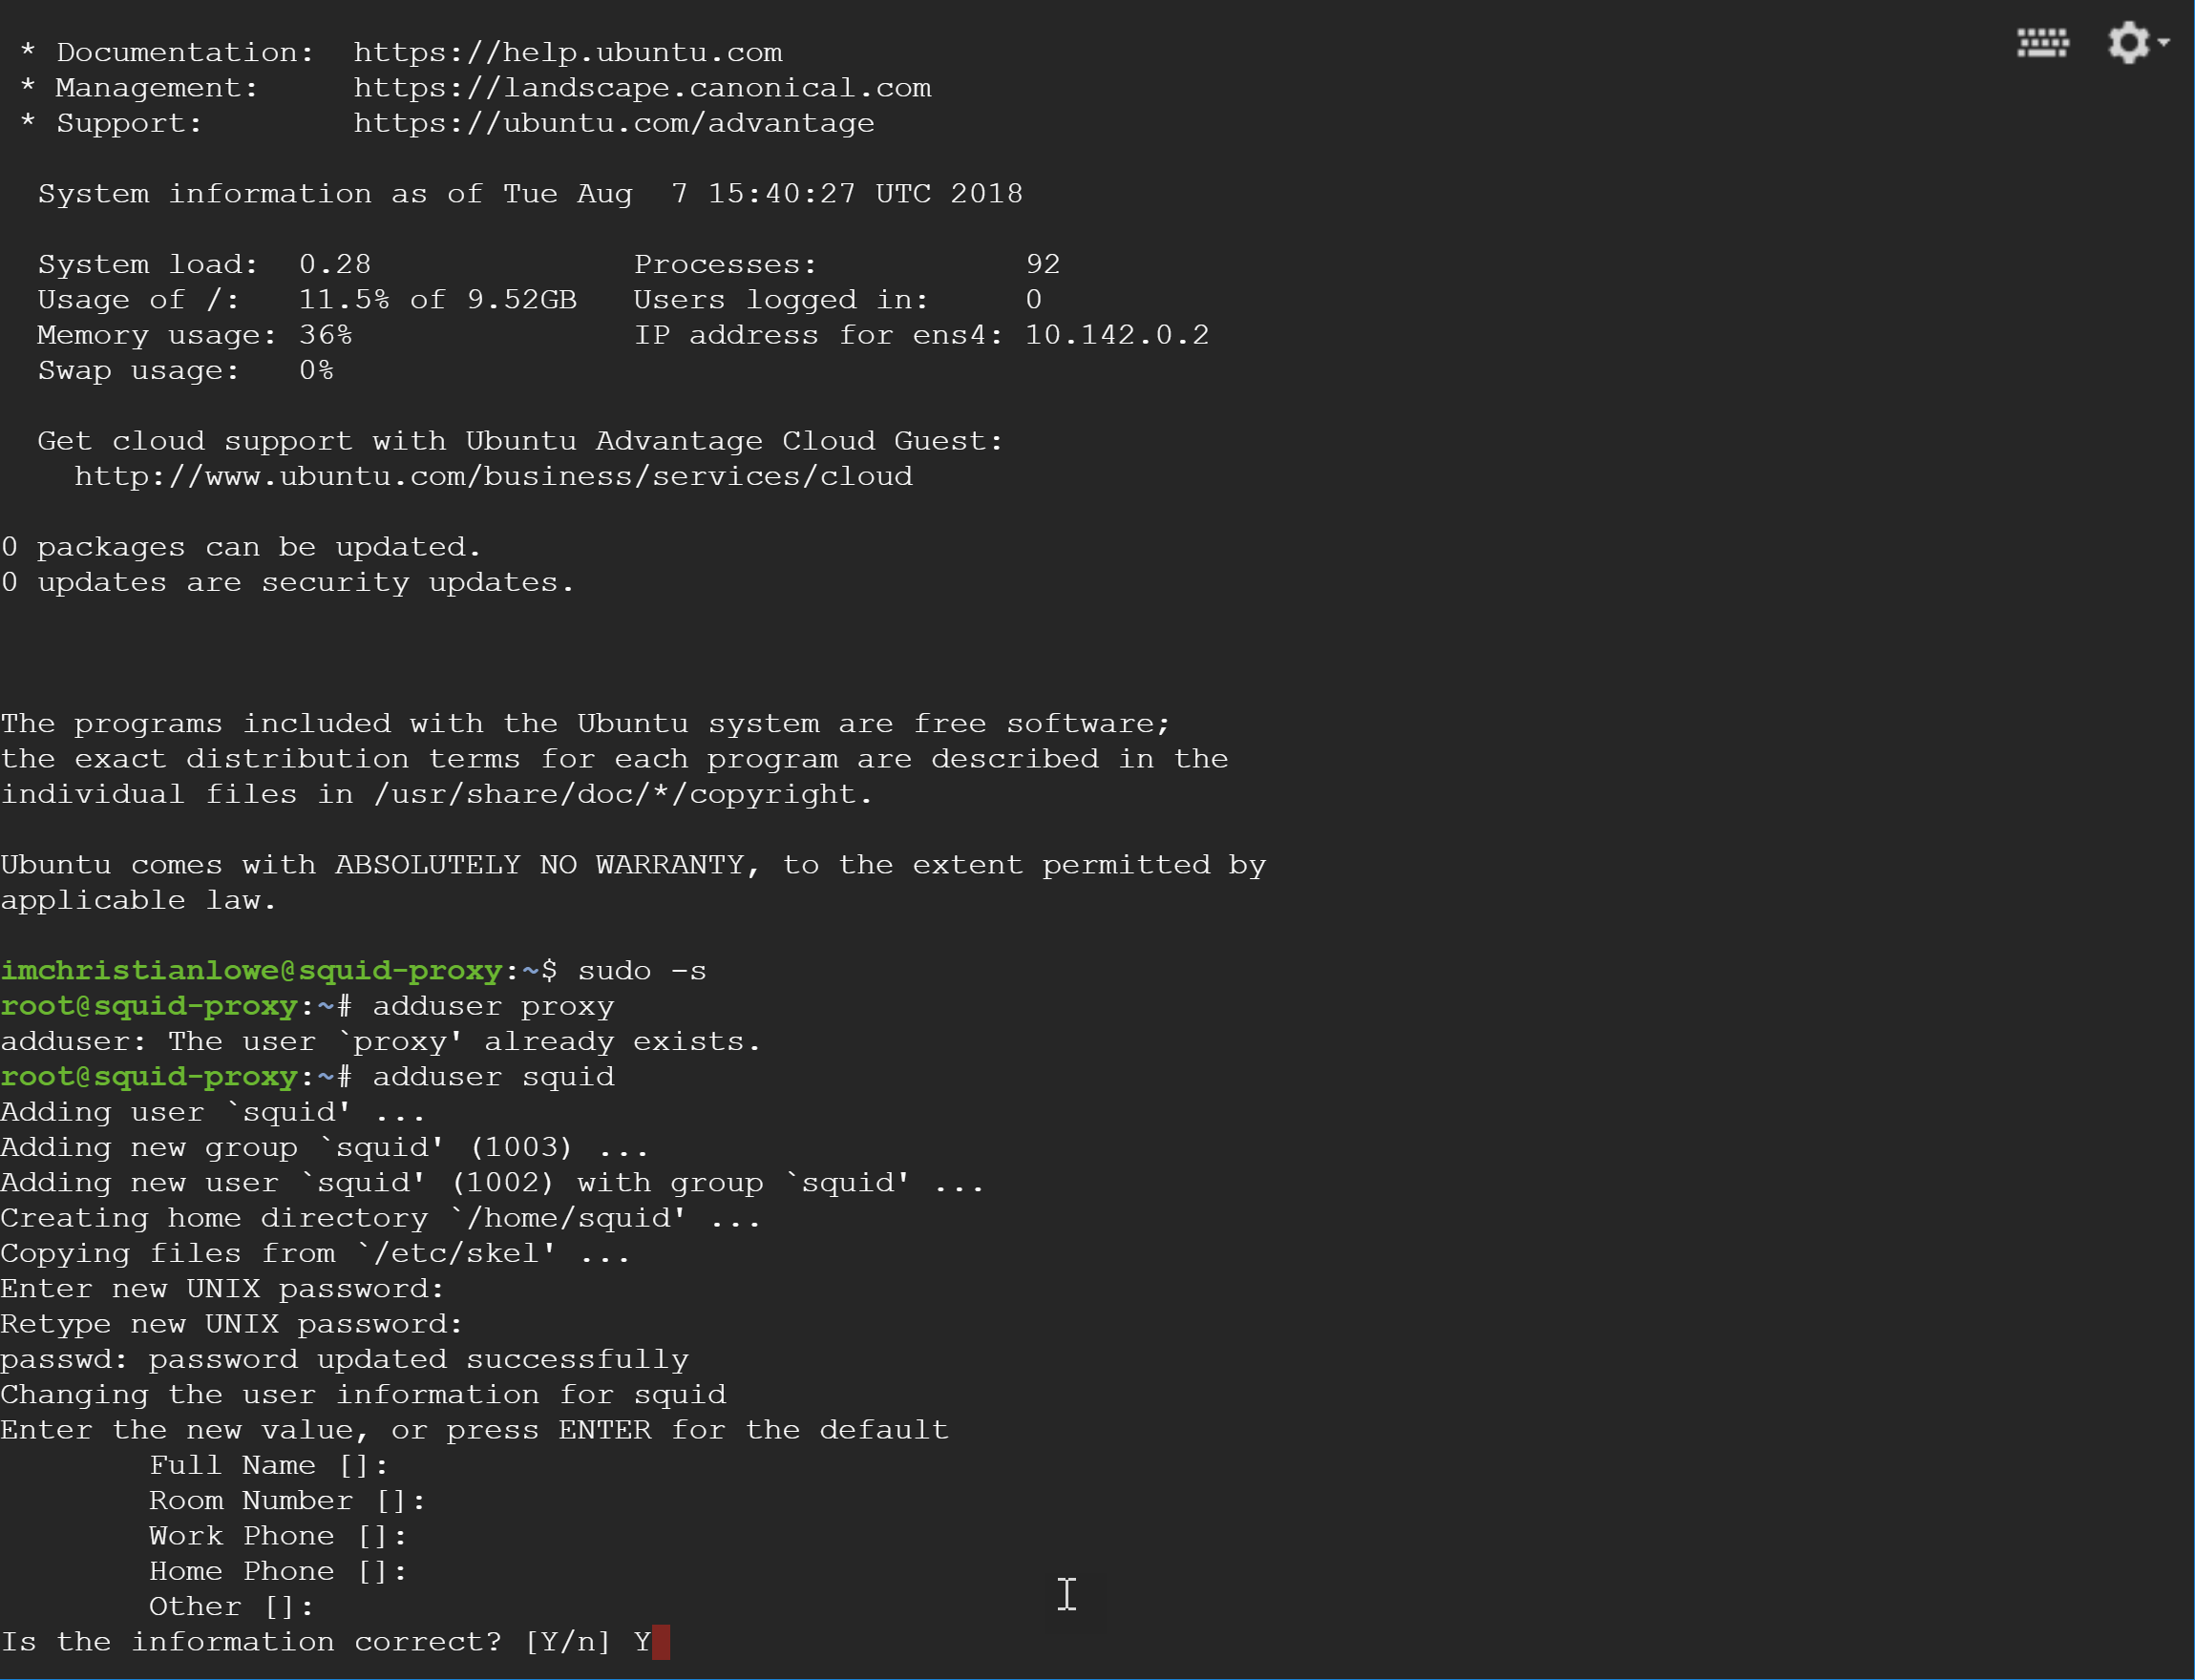
16. Add the user you just created by running the command usermod -aG sudo username. In this case, I would type usermod -aG sudo squid

17. Now update and upgrade your server packages by running apt-get update && apt-get -y upgrade
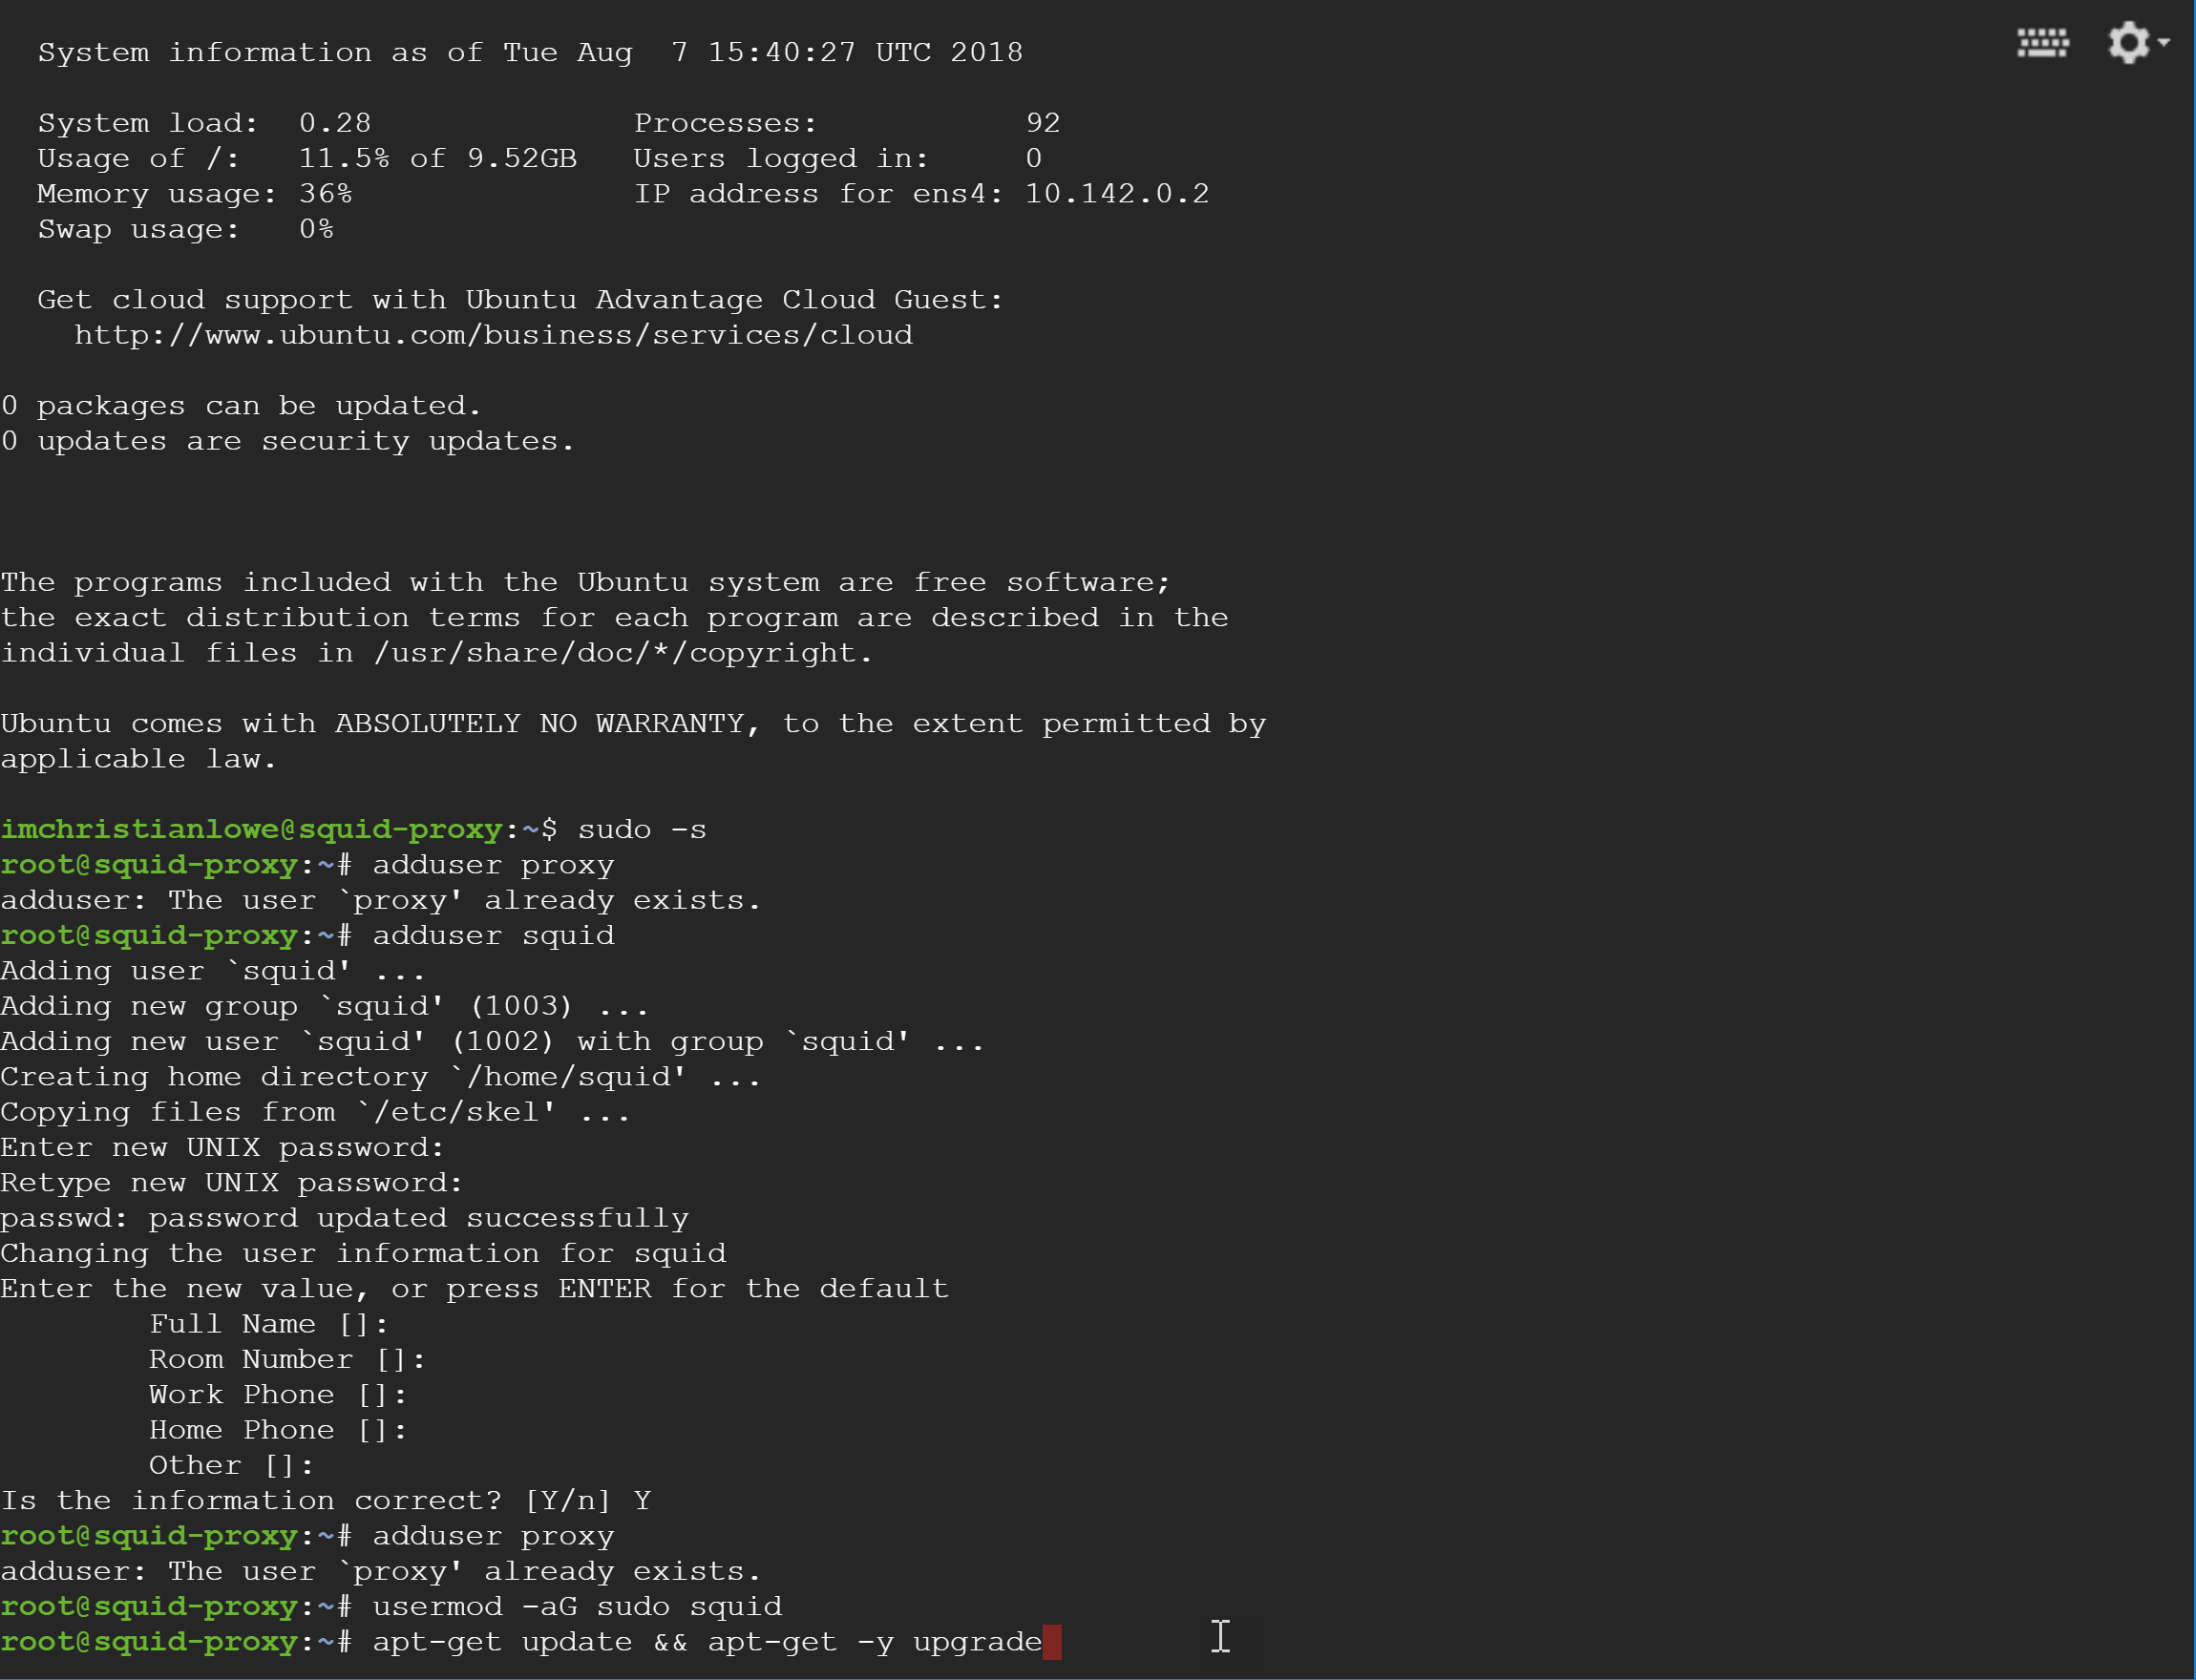
18. When it’s done install the squid proxy server by running apt-get install squid

19. Once it has installed, make a backup of the configuration file just in case you mess up by running the command cp /etc/squid/squid.conf /etc/squid/squid.conf.bak

20. Now we want to edit the configuration file to our settings. Run the command nano /etc/squid/squid.conf to begin editing

21. There are two things we want to do – allow connections on the server and change the port.
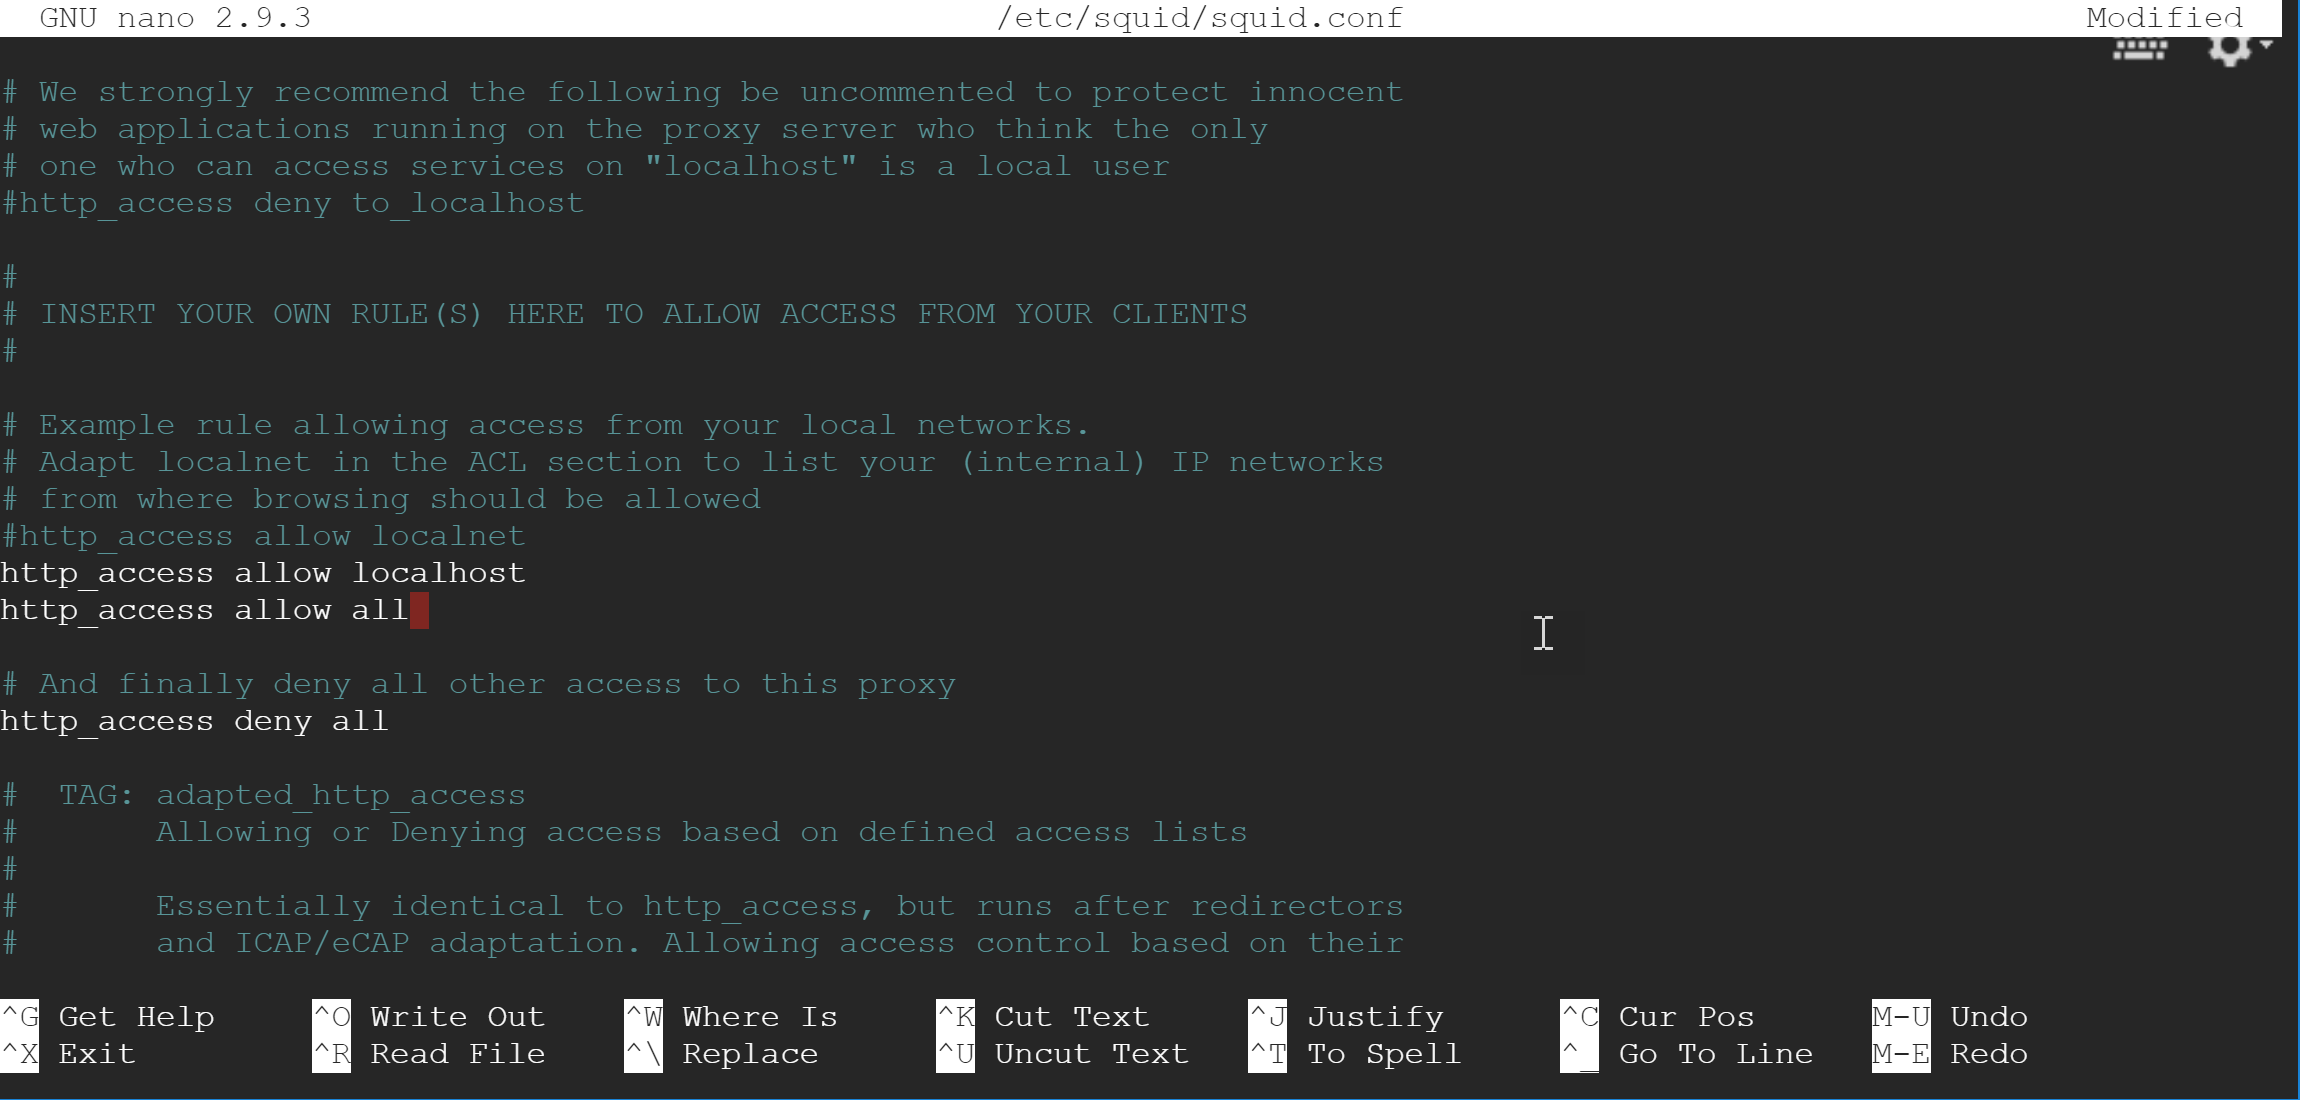
22. To allow computers to connect to our server hit Ctrl+Shift+- and you will get a prompt to enter a line number. Go to line 1194 and add the line http_access allow all
23. Now hit Ctrl+shift+- again to get the line prompt. Go to line 1612 and change the port number from 3128 to 80
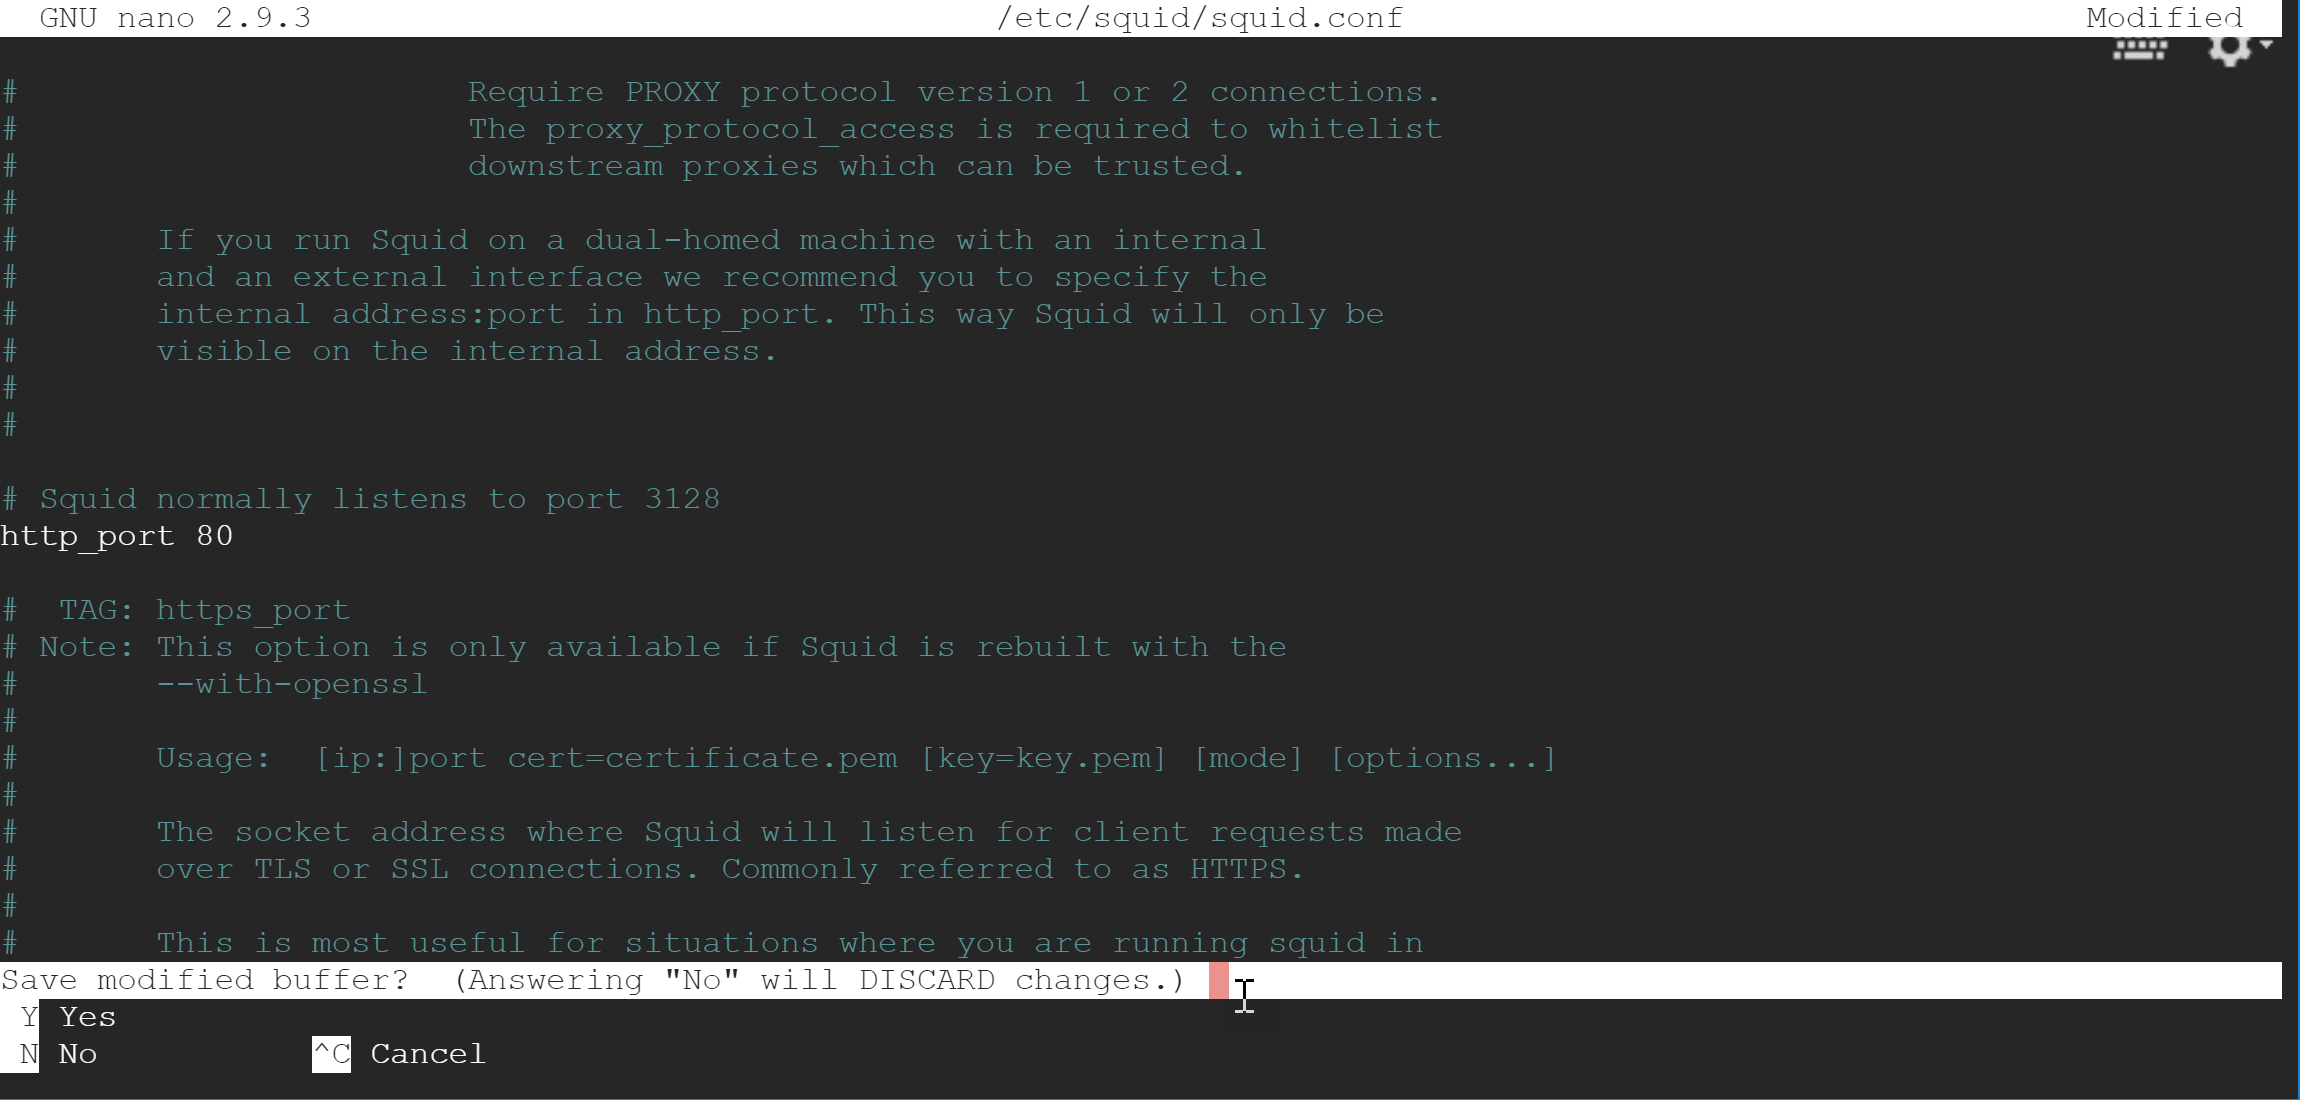
24. Hit Ctrl+x and type Y, hit enter, hit enter. You’ll now be taken back to the command line. If there is a bunch of text and you want to start with a clean command prompt type the command clear
25. Restart the squid proxy server to take effect systemctl restart squid
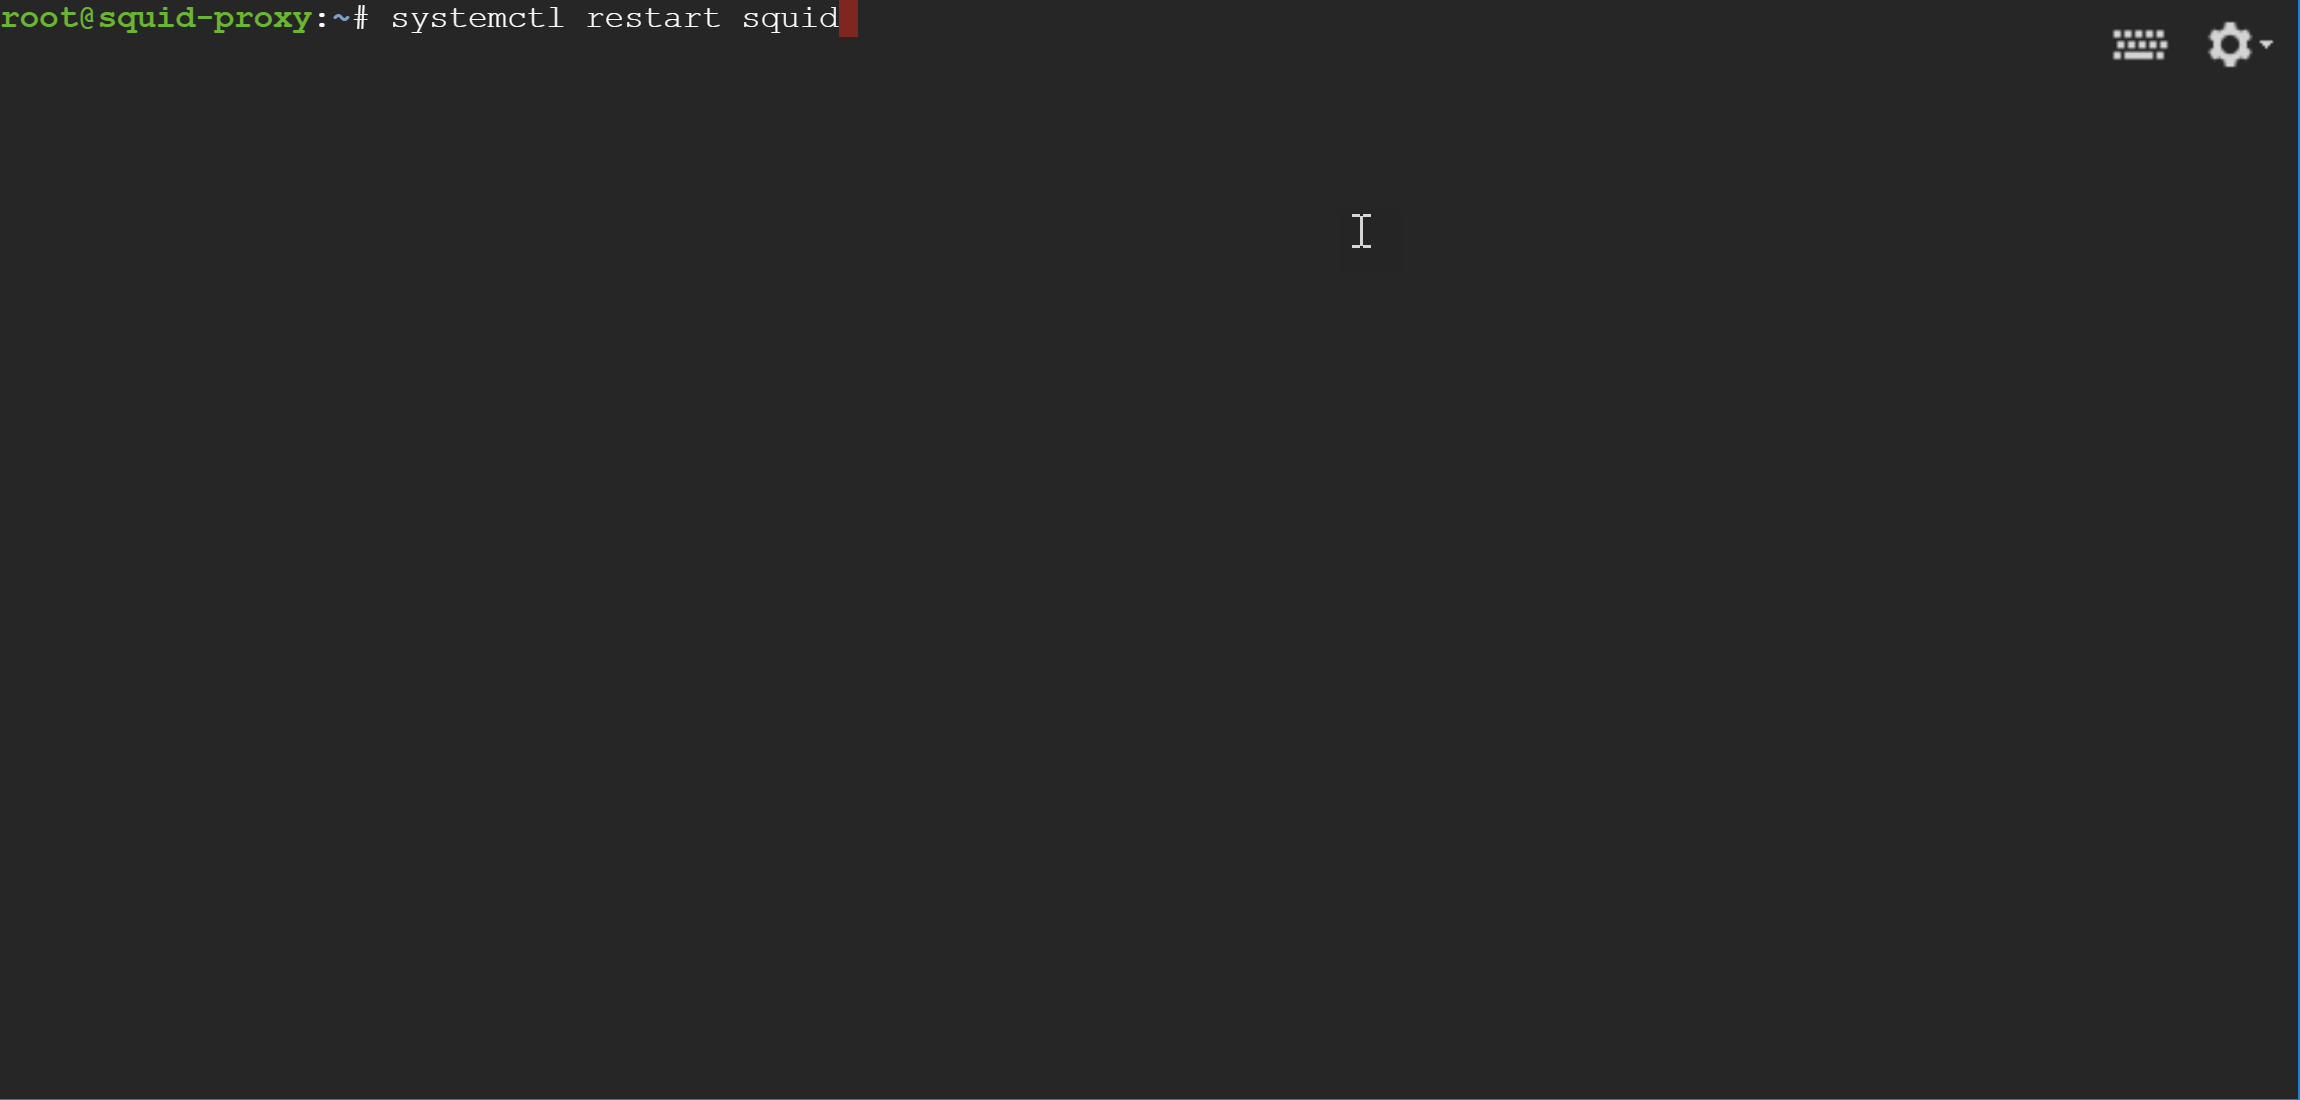
26. Check the status of the server systemctl status squid

27. You should now be able to connect to your proxy server
Securing Your Server with Basic Authentication
1. Go to console.cloud.google.com.
a. Select “Yes” to agree to the terms and click “Accept”
2. Click “SIGN UP FOR FREE TRIAL” in the upper right hand corner
3. Select your country, select the first “No” and select “yes”
a. Click “Agree and Continue”
4. Fill out your info on the next page
5. Add Your Payment Info and Click “Start My Free Trial” (note you won’t be charged when the free trial ends. It will ask you for your card info again)
6. A page like this will load. Click “Got It”
7. Click on the hamburger menu in the top left corner then >”Compute Engine”>”VM Instances”
8. Click “Create”
9. Change the Machine Type to the lowest one
10. Change Boot Disk to Ubuntu 18.04 LTS
11. Check the two boxes for allowing HTTP and HTTPS traffic and click Create
12. When you are done click on the SSH box. A new window will pop up and you will be working on the command line from within your virtual server from this point on
13. Switch to the super user by typing the command sudo -s (this is bad security practice, but for the tutorial simplicity I thought this was easiest)
14. Add a user that will have super user privileges. The name can be whatever you want. I am going to make the user squid by running the command adduser squid
15. It will ask you to set a password. Create a secure password for this user. It will also ask you to fill out information about this user. You do not have to type anything here. Just hit enter until it asks you if the information is correct and type y and hit enter
16. Add the user you just created by running the command usermod -aG sudo username. In this case, I would type usermod -aG sudo squid
17. Now update and upgrade your server packages by running apt-get update && apt-get -y upgrade
18. When it’s done install the squid proxy server by running apt-get install squid
19. Once it has installed, make a backup of the configuration file just in case you mess up by running the command cp /etc/squid/squid.conf /etc/squid/squid.conf.bak
20. Now we want to edit the configuration file to our settings. Run the command nano /etc/squid/squid.conf to begin editing
21. There are two things we want to do – allow connections on the server and change the port.
22. To allow computers to connect to our server hit Ctrl+Shift+- and you will get a prompt to enter a line number. Go to line 1194 and add the line http_access allow all
23. Now hit Ctrl+shift+- again to get the line prompt. Go to line 1612 and change the port number from 3128 to 80
24. Hit Ctrl+x and type Y, hit enter, hit enter. You’ll now be taken back to the command line. If there is a bunch of text and you want to start with a clean command prompt type the command clear
25. Restart the squid proxy server to take effect systemctl restart squid
26. Check the status of the server systemctl status squid
27. You should now be able to connect to your proxy server
Securing Your Server with Basic Authentication
- Open the configuration file with nano /etc/squid/squid.conf and add the following:
-
Code:
auth_param basic program /usr/lib/squid/basic_ncsa_auth /etc/squid/passwd
auth_param basic realm proxy
acl authenticated proxy_auth REQUIRED
http_access allow authenticated
-
- Create the password file by running - touch /etc/squid/passwd
- Add a password for a username of choice. We will be using squid here - htpasswd -c /etc/squid/passwd squid
- You will be asked to input the password
- Now restart the server - systemctl restart squid


